![]()
In this project we’re going to build the game Odd One Out using SwiftUI. This project will give you the chance to practice many of the skills you already learned, which is really important if you ever want to keep this stuff in your head.
Let’s get started now: create a new macOS App in Xcode, using SwiftUI for the user interface. Name it OddOneOut, then make sure all the checkboxes are unchecked.
You’ll need some assets to follow along with this project, which you can download from https://github.com/twostraws/macOS. Copy all the images from project8-files into your asset catalog, and you’re all set.
We’re going to start by creating a game grid filled with buttons. In this game, the player will be presented with a grid of animal pictures, all of which appear at least twice except for one animal, which is by itself – their goal is to click that odd one out as quickly as possible. As they progress through levels we’ll show more and more pictures, until eventually the grid is full.
To make that happen we need to define some properties for ContentView. First, the size of our grid:
static let gridSize = 10Our grid will always be square, so a size of 10 means it will have 10 rows and 10 columns.
Next, an array of our animal images:
@State private var images = ["elephant", "giraffe", "hippo", "monkey", "panda", "parrot", "penguin", "pig", "rabbit", "snake"]That uses @State so that we can shuffle it to create new levels.
Third, an array to hold our grid. This could be implemented as a two-dimensional array, but honestly it’s easier to make it one-dimensional. Here that means filling it with the word “penguin” as many times as we need to fill the entire grid, like this:
@State private var layout = Array(repeating: "penguin", count: gridSize * gridSize)Once we generate our first level, that will be replaced with names of varying animal pictures – it’s just there so we have an initial value for the when the view has just been created.
Fourth, an integer to hold the level the player is currently on:
@State private var currentLevel = 1We’ll be using that to create increasingly difficult levels over time.
And finally, a Boolean to track whether the current game is active or not:
@State private var isGameOver = falseThat’s set to false by default, so the game starts active.
Our first real work is to get a basic grid layout up and running. We have a one-dimensional array for our grid images, so we can find the correct image for any row/column combination by multiplying the row number by the grid size and adding the column number. This is quite repetitive to type, so we can write a simple helper method to get the image name for a particular row and column.
So, add this method to ContentView now:
func image(_ row: Int, _ column: Int) -> String {
    layout[row * Self.gridSize + column]
}
For the body of our view we’re going to use several nested stacks:
ZStack, which lets us place overlapping views. This will be helpful later when we want to add a game over screen.VStack consisting of our game’s title and rows in our grid.HStack containing their columns.There is one small hiccup here, and to be honest I consider it a SwiftUI bug: for whatever reason, SwiftUI will make our window slightly resizable, to the point where the title text and bottom row are slightly clipped. Fortunately, we can stop this happening by telling SwiftUI our title should have a fixed size – it should always take up all the space it needs, rather than trying to resize according to the parent.
In order to draw the user interface for this project, we need to use all three stacks alongside ForEach and Image. So, we can create a basic version of our app’s user interface like this:
ZStack {
    VStack {
        Text("Odd One Out")
            .font(.system(size: 36, weight: .thin))
            .fixedSize()

        ForEach(0..<Self.gridSize, id: \.self) { row in
            HStack {
                ForEach(0..<Self.gridSize, id: \.self) { column in
                    Image(image(row, column))
                }
            }
        }
    }
}
Tip: Previously I showed you that ForEach can loop over fixed ranges such as 0..<10, but here we’re using a dynamic range and so it’s important to provide the id parameter to avoid Xcode issuing warnings.
I slipped in a slight variation of the font() modifier, but hopefully it’s self-describing – it uses a 36-point system font in a thin weight.
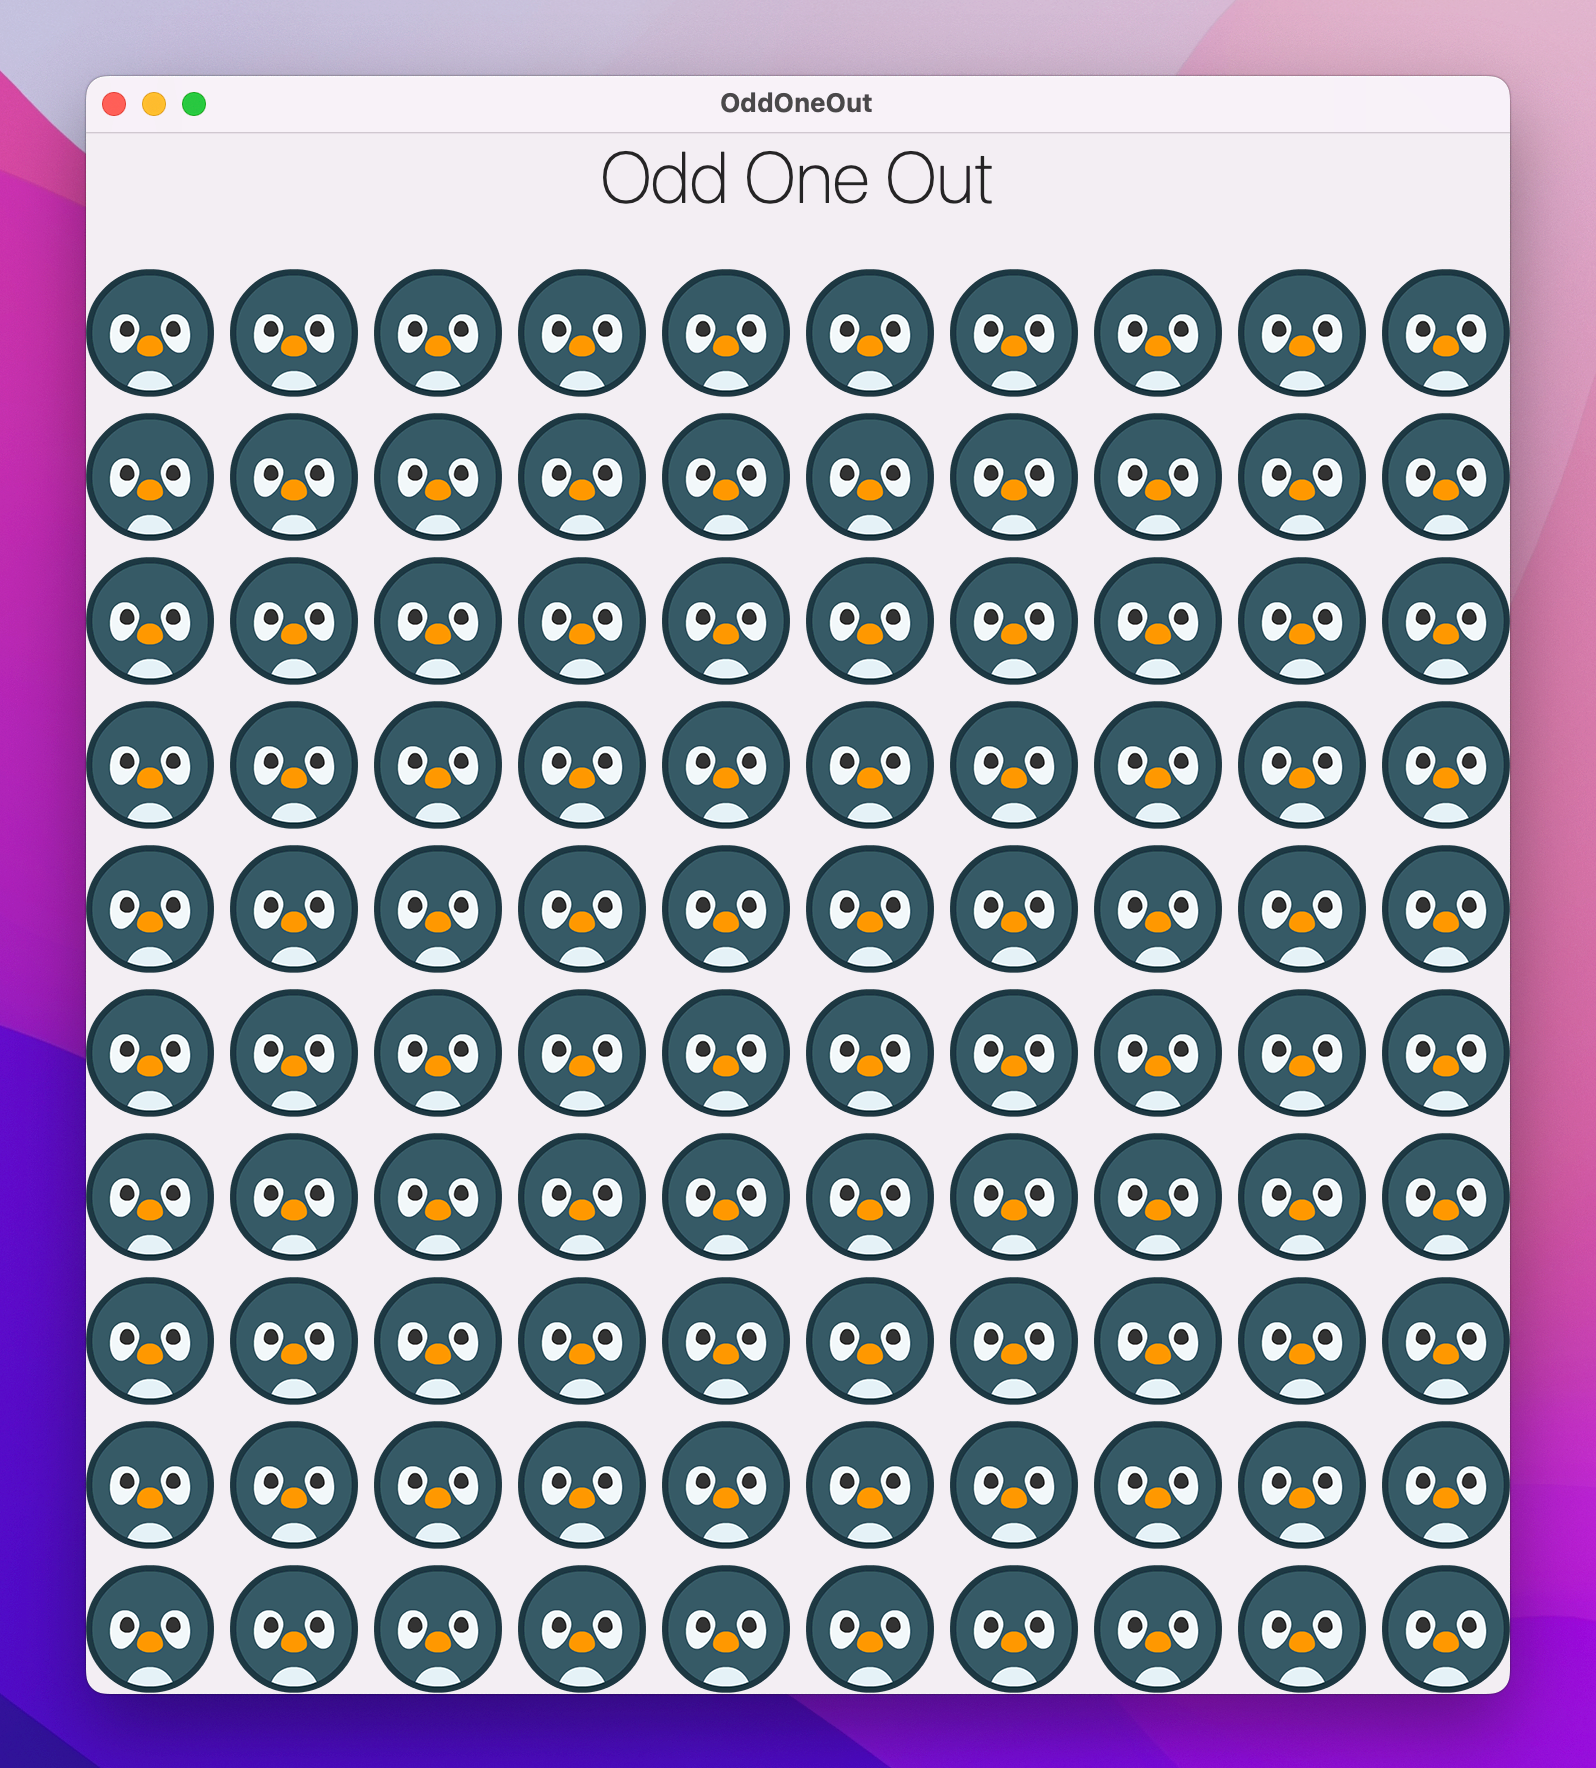
Go ahead and run the app now and you should see 100 penguins staring back at you – not bad!
Of course, we don’t really just want inert images, because we want users to be able to press on them. SwiftUI lets us use images for buttons using slightly more complex syntax than using plain text:
Button {
    print("Penguin was clicked")
} label: {
    Image("penguin")
}
That’s the basic concept, but things are clouded a little because once again macOS automatically gives buttons a distinct 3D styling.
We can fix this by attaching the buttonStyle(.borderless) image to the button like this:
Button {
    print("Penguin was clicked")
} label: {
    Image("penguin")
}
.buttonStyle(.borderless)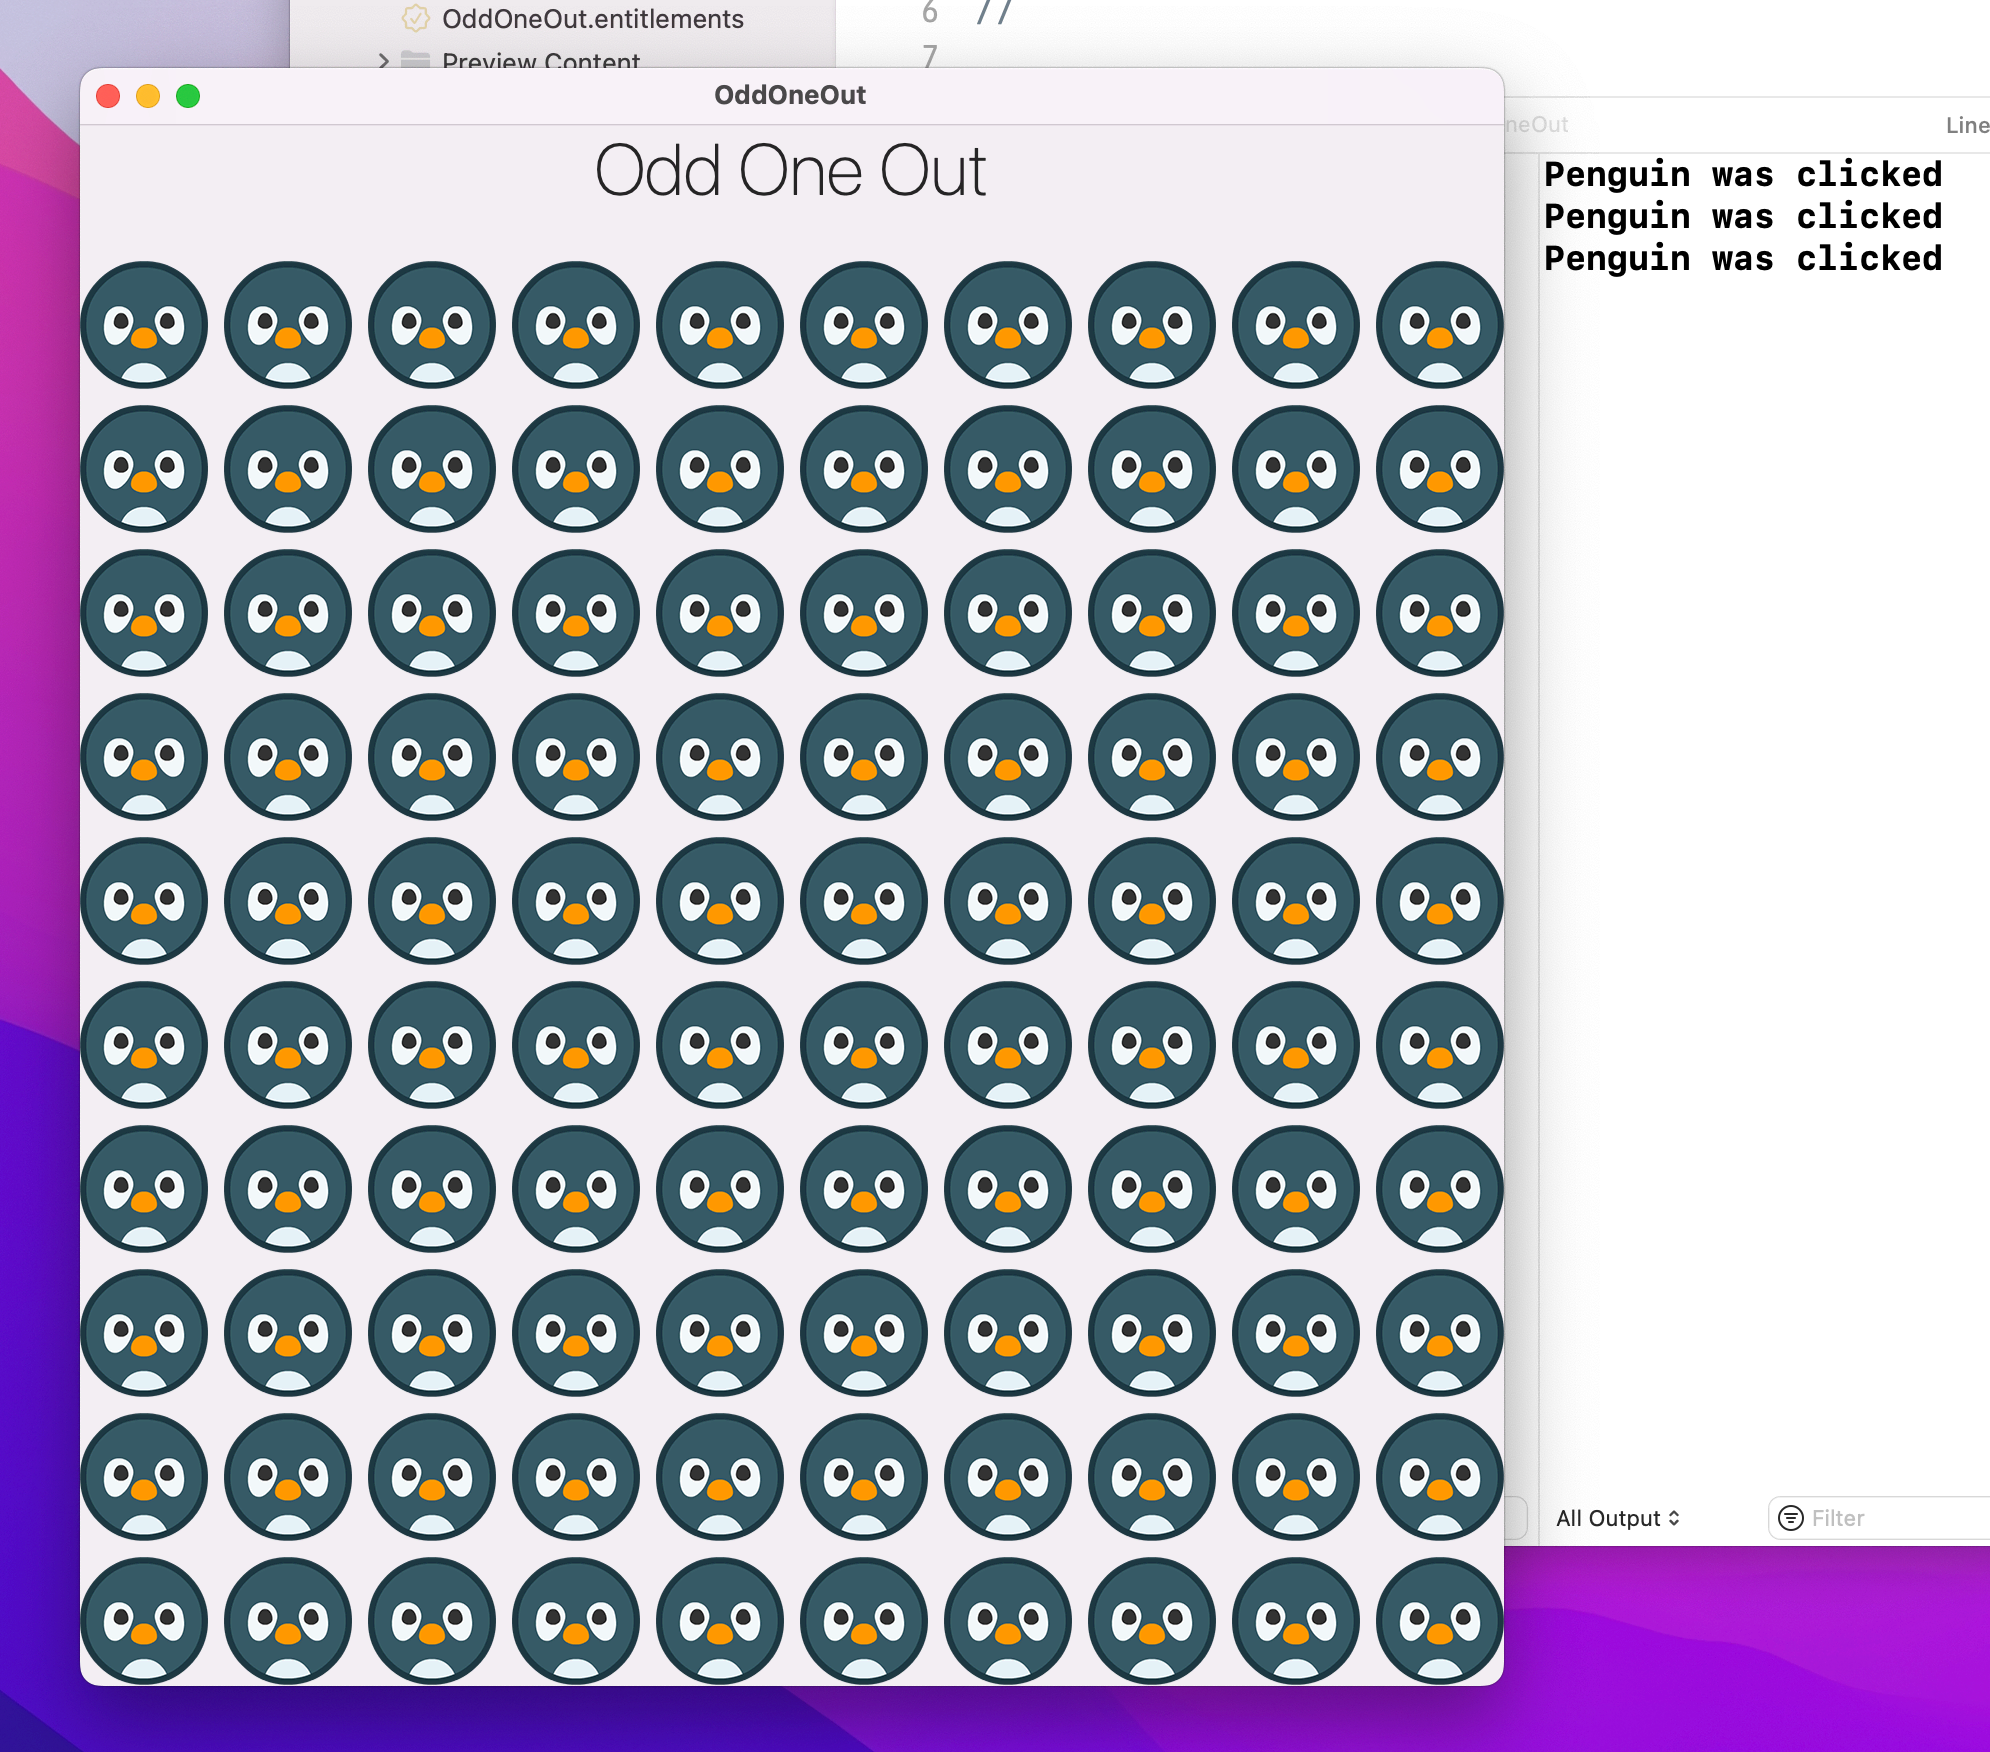
So, that solves the problem for the grid squares that should have a picture. But what about squares that shouldn’t have a picture – what should we show there?
One option is to render a transparent image in place one of the animals – this works with our current code, and I even provided an empty.png image for you to use if you want to try this out. However, the alternative we’re going to use here is to draw a clear rectangle instead of a button that’s the same size as the animal pictures.
I’ve chosen this approach for two reasons: it lets me show you something new in the form of transparent shapes, and because it lets us move the window more easily. We’ll get onto the window thing later on, but first let’s write some new code to replace the existing inner ForEach:
ForEach(0..<Self.gridSize, id: \.self) { column in
    if image(row, column) == "empty" {
        Rectangle()
            .fill(.clear)
            .frame(width: 64, height: 64)
    } else {
        Button {
            print("Penguin was clicked")
        } label: {
            Image(image(row, column))
        }
        .buttonStyle(.borderless)
    }
}
As you can see, that checks whether the current image has the name “empty”, and if it does creates a 64x64 rectangle with a clear fill color – that’s the same size as the animal images, so it just makes sure the same amount of space is taken up regardless of the image contents.
To try that out, change your layout property to this:
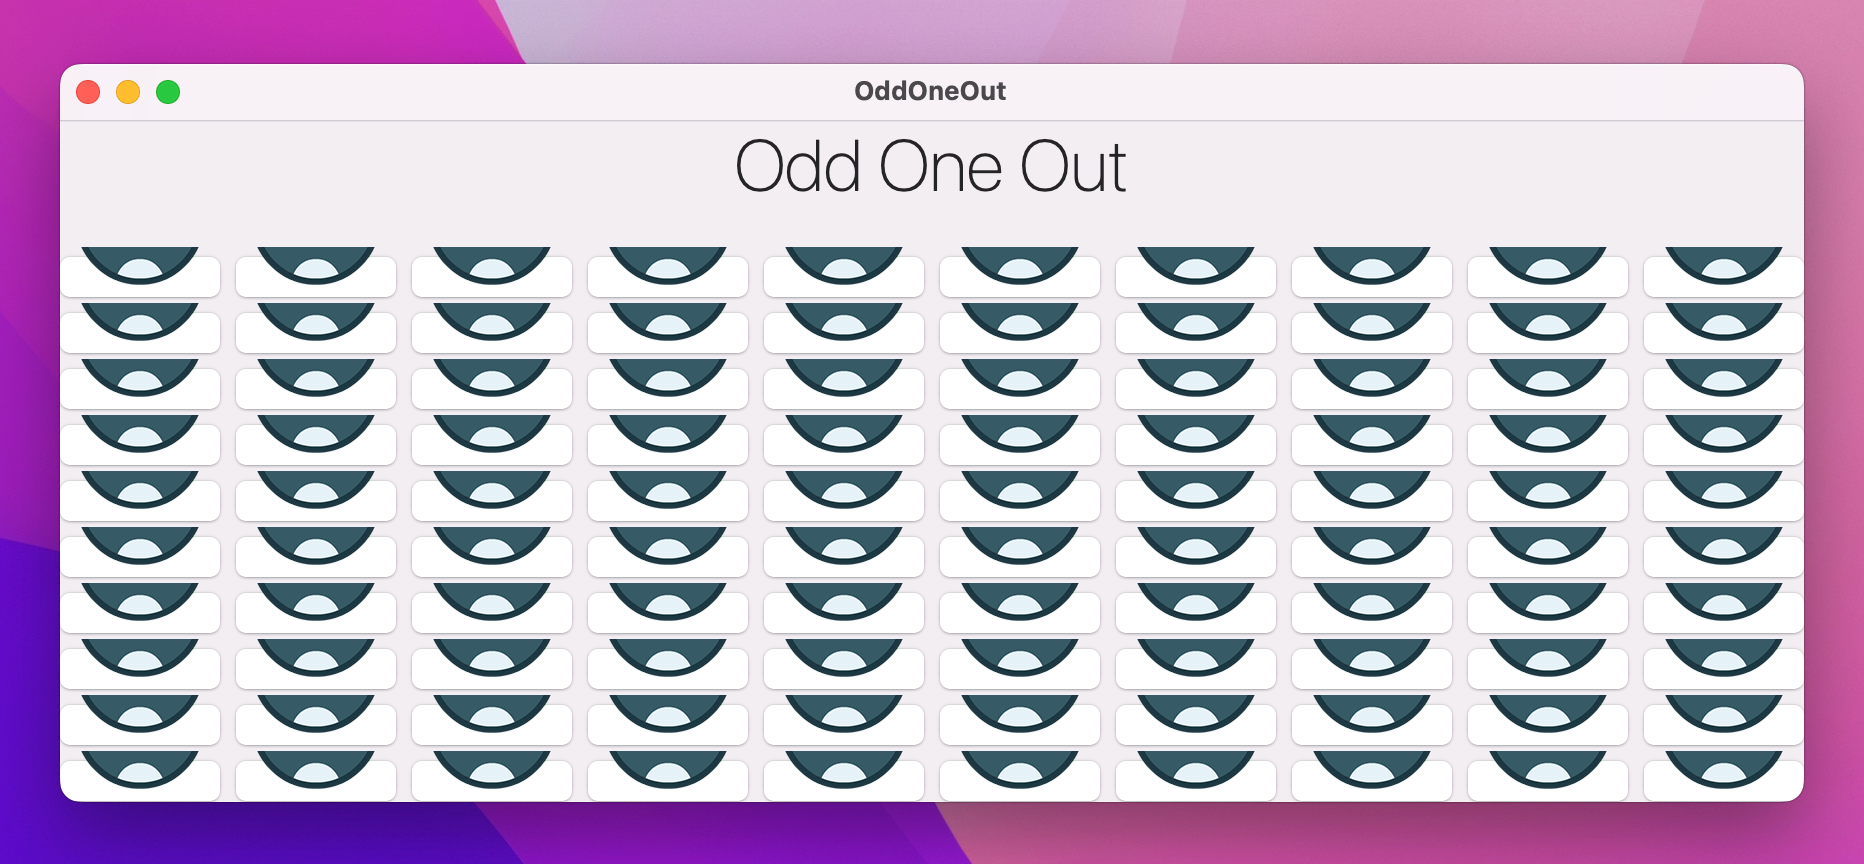
@State private var layout = Array(repeating: "empty", count: gridSize * gridSize)
If you run the code again you should see the window size hasn’t changed, but now the grid looks empty – it’s using clear rectangles everywhere rather than 100 penguins.
Because our UI has the game title visible on the screen, we can make the layout look a little nicer by hiding the title bar just like we did in project 5. This is an option across the whole app, not just ContentView, so you need to apply windowStyle() in OddOneOutApp.swift. While you’re there, I suggest you limit the window resizing like we did back in project 2, like this:
@main
struct OddOneOutApp: App {
    var body: some Scene {
        WindowGroup {
            ContentView()
        }
        .windowStyle(.hiddenTitleBar)
        .windowResizability(.contentSize)
    }
}
Anyway, having a large and empty grid might not look like much, but we’re going to change that next!
This game needs to start nice and easy then ramp up difficulty as players get the hang of it. To make this work, we’re going to write two methods: generateLayout() will fill the grid view with an appropriate number of animal pictures, and createLevel() will decide how many animals to create.
The layout generation algorithm isn’t just about placing animal pictures into the grid. Remember, at least one animal must always be by itself, and it’s the job of generateLayout() to ensure that will happen.
There’s one easy way to solve this: create the “odd” animal first, then create all the other animals in pairs. If we ensure that generateLayout() is called only with odd numbers until the grid is full, then creating animals in pairs will always ensure only one animal is odd.
To make that happen, we’re going to use a fairly simple approach:
numUsed that will be 0, 1, or 2 depending on how many of the current animal have been placed.itemCount, which will store the index of the current animal image being placed. This will start at 1, because animal 0 is our odd one out.numUsed. If it’s equal to 2 it means we have placed two of the same animal, so we set it back to 0 again then add 1 to itemCount so we place the next animal.itemCount is equal to the number of animal images – i.e., we’ve placed all animals at least once, we set it back to 1. (Remember, animal 0 is the odd one out.)Here’s the generateLayout() method, with extra comments from me:
func generateLayout(items: Int) {
// remove any existing layouts
layout.removeAll(keepingCapacity: true)
// randomize the image order, and consider the first image to be the correct animal
images.shuffle()
layout.append(images[0])
// prepare to loop through the other animals
var numUsed = 0
var itemCount = 1
for _ in 1 ..< items {
// place the current animal image and add to the counter
layout.append(images[itemCount])
numUsed += 1
// if we already placed two, move to the next animal image
if (numUsed == 2) {
numUsed = 0
itemCount += 1
}
// if we placed all the animal images, go back to index 1.
if (itemCount == images.count) {
itemCount = 1
}
}
// fill the remainder of our array with empty rectangles then shuffle the layout
layout += Array(repeating: "empty", count: 100 - layout.count)
layout.shuffle()
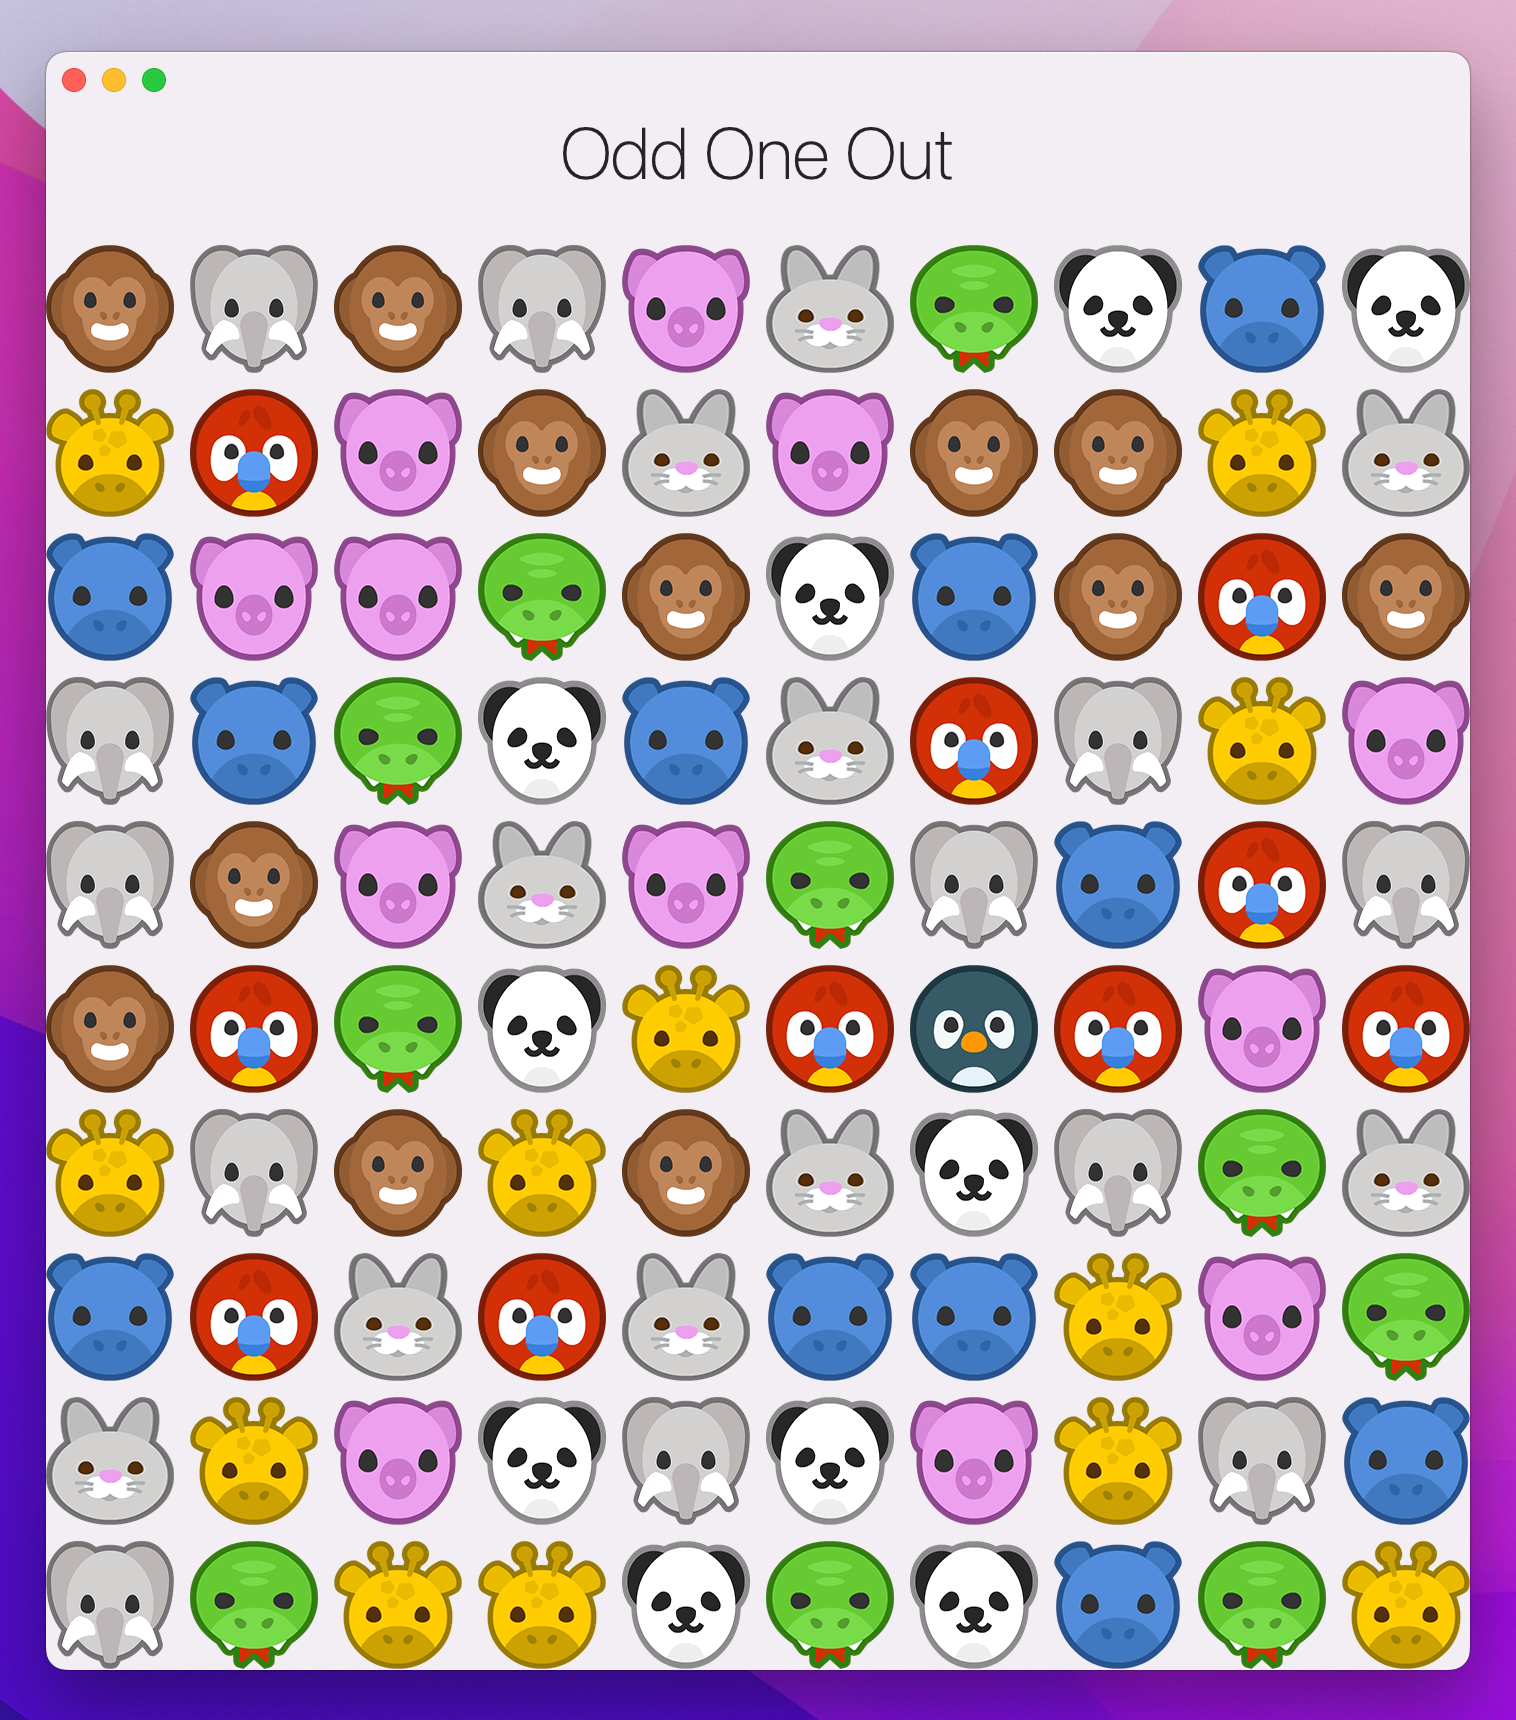
}To make the game spring into life, we need to call generateLayout() and tell it how many items to create. The game needs to start easy then get progressively harder, and we can control that using the currentLevel property we created earlier. At difficulty level 1 we’ll call generateLayout() with 5 items. At level 2 that will be 15 items. At level 3, 25 items, and so on until level 8 when the game is full. When the player reaches level 9 – i.e., they find the odd one out in level 8 – we’ll set the isGameOver Boolean to true, which will show a “game over!” screen.
Anyway, we need to call generateLayout() with the correct number of items for the current level. Because the only thing different is the number of items passed as its parameter, we can place our item numbers into an array and index into them based on the current level.
Add this method to ContentView:
func createLevel() {
    if currentLevel == 9 {
        withAnimation {
            isGameOver = true
        }
    } else {
        let numbersOfItems = [0, 5, 15, 25, 35, 49, 65, 81, 100]
        generateLayout(items: numbersOfItems[currentLevel])
    }
}
So, we have a generateLayout() method that places the correct number of items on screen, and a createLevel() method that sets up how many should be created. To get the game moving, there’s one last small thing to do: call createLevel() for the first time.
To do that, add the onAppear() modifier to the ZStack in the view’s body:
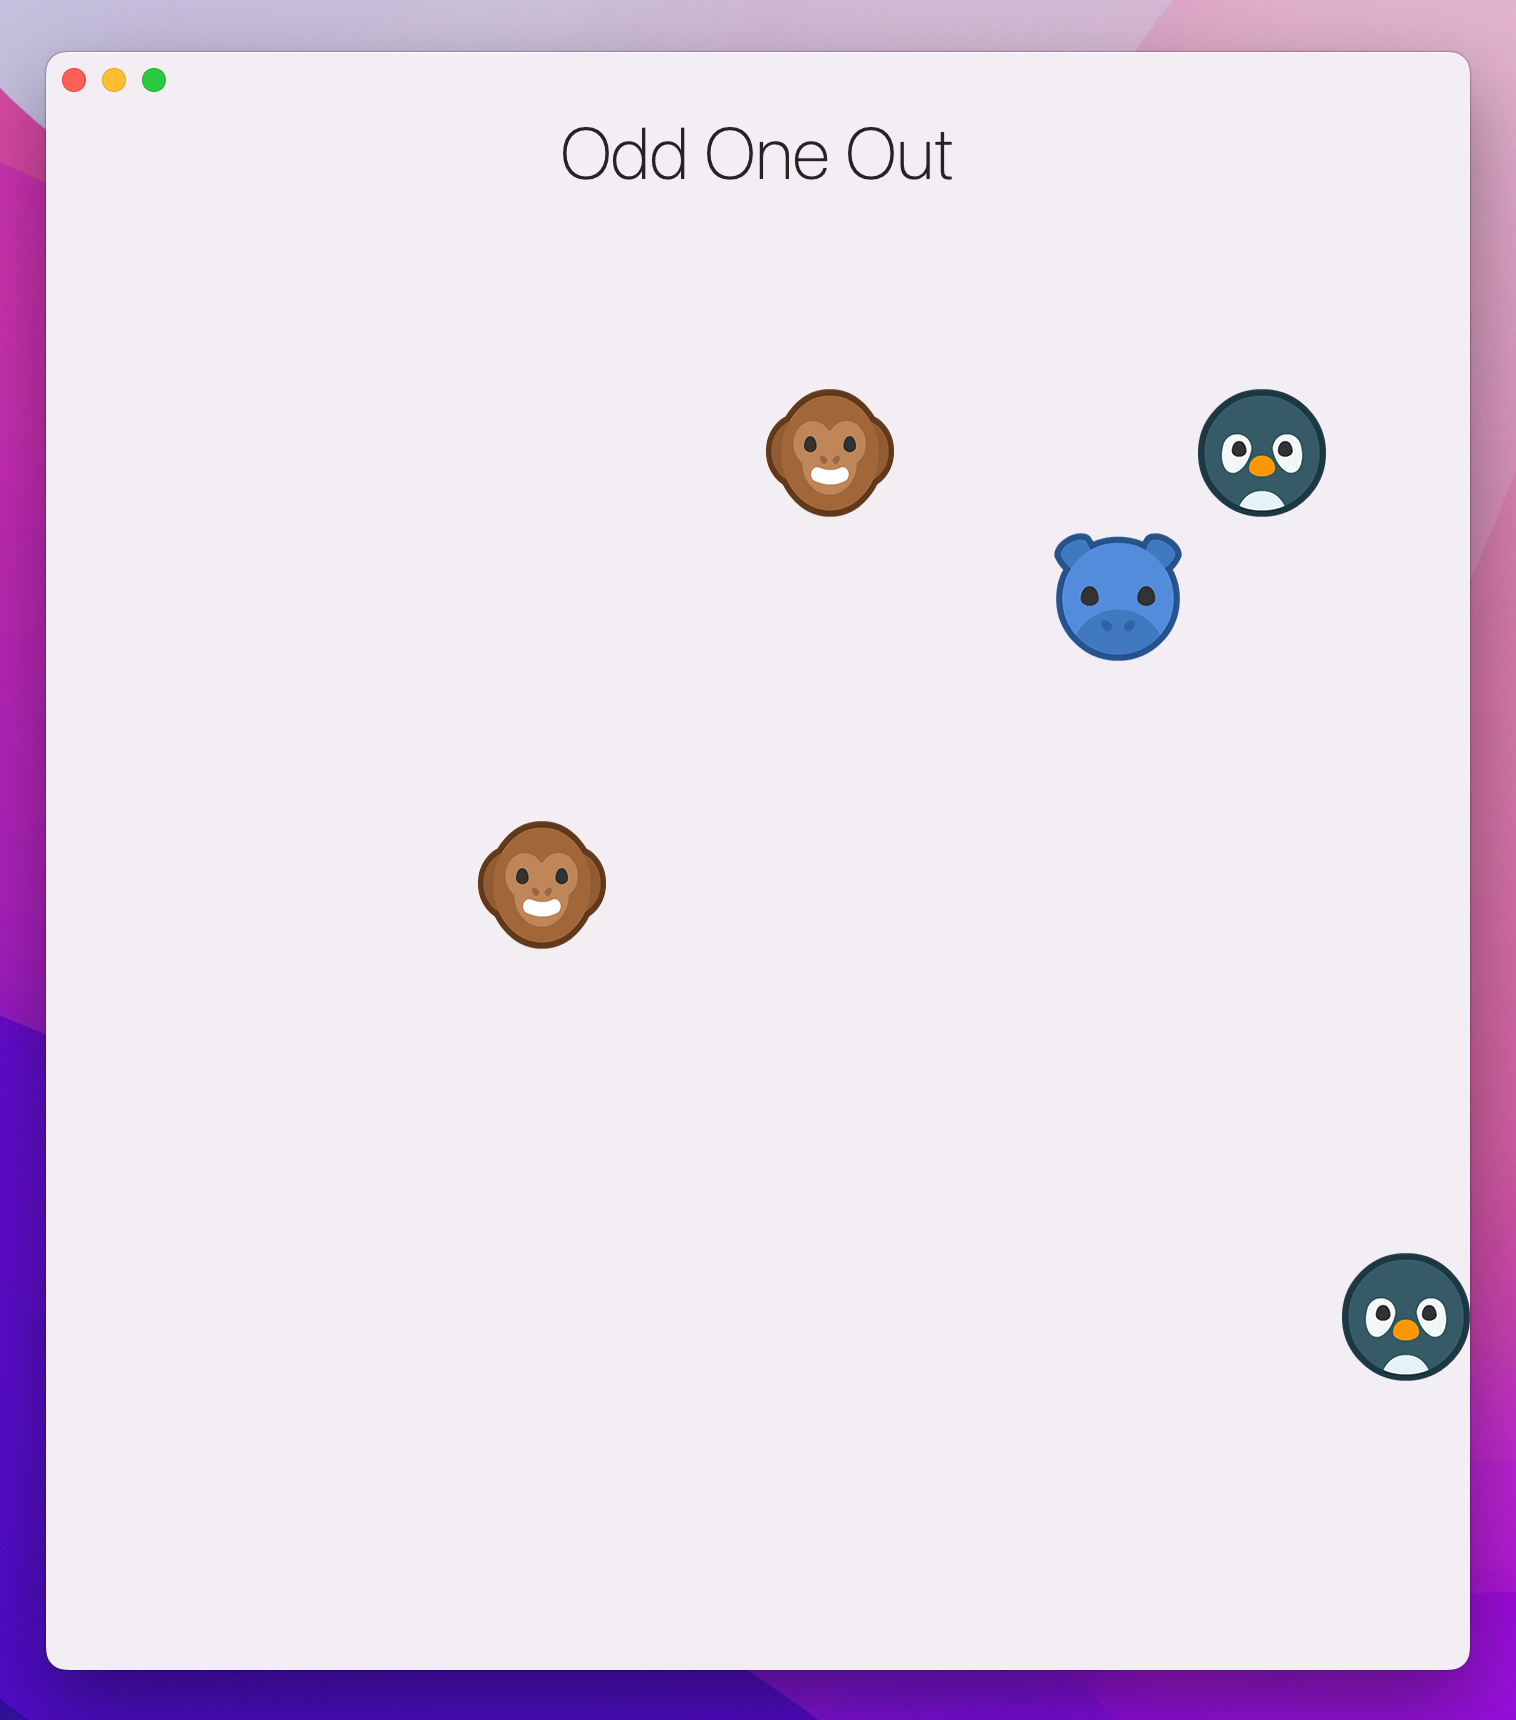
.onAppear(perform: createLevel)If you run the game again, you’ll see our grid is no longer full but instead just shows five animals – of which one appears only once, exactly as planned.
At this point we only need a small amount more code to make the game actually playable. Earlier on, when we were creating the button grid, we had this line of code:
print("Penguin was clicked")That was fine just as a placeholder, but we’re going to write the real action now. But first, what should actually happen here? Well, if the user clicks the correct answer, that should be obvious: we move them to the next level. That’s as easy as adding 1 to currentLevel then calling createLevel() again to either generate a new layout or set isGameOver to true. But if the user guesses wrong, what happens is down to you:
Of all the options, #3 seems the most evil, so naturally that’s what I’m going to be doing. The code is trivial, though, so you’re free to experiment!
I’m not going to explain the method to you any further because it really is easy, but I will add comments to explain the structure. Add this method now:
func processAnswer(at row: Int, _ column: Int) {
    if image(row, column) == images[0] {
        // they clicked the correct animal
        currentLevel += 1
        createLevel()
    } else {
        // they clicked the wrong animal
        if currentLevel > 1 {
            // take the current level down by 1 if we can
            currentLevel -= 1
        }

        // create a new layout
        createLevel()
    }
}
We can now call that method when our buttons are clicked by replacing the print() function with this:
processAnswer(at: row, column)That’s the easiest part of this whole project, but it’s pretty fundamental. In fact, just adding that has made the game work almost in its entirety, so go ahead and give it a try – I think you’ll find it deceptively hard!
As you’re playing, think about this: what if a friend comes along part-way through and wants to try? It would be nice to have an option to start a new game wherever they are, and we can get that with a context menu.
We already used these back in project 5, so this should be a cinch – put this directly below the onAppear() modifier:
.contextMenu {
    Button("Start New Game") {
        currentLevel = 1
        isGameOver = false
        createLevel()
    }
}
Now run the app and try right-clicking on the “Odd One Out” title – you should see our option appear, and clicking it will restart as expected.

You can also right-click on any of the animal pictures to see the same option appear, but you might notice that if you right-click anywhere else – any of the empty space in our grid – then nothing happens.
This is because the only parts of the UI that are considered interactive are the ones with some content inside, such as a button, a label, or an image. Sometimes this is exactly what you want, but here we want our whole window to be interactive and so we need to tell SwiftUI that the shape of our content – the parts we consider important – is just one big rectangle occupying our entire window.
Put this modifier before the context menu:
.contentShape(Rectangle())
That’s all it takes: the rectangle will automatically be as large as our window, and with that you can now right-click anywhere to get a menu – nice!
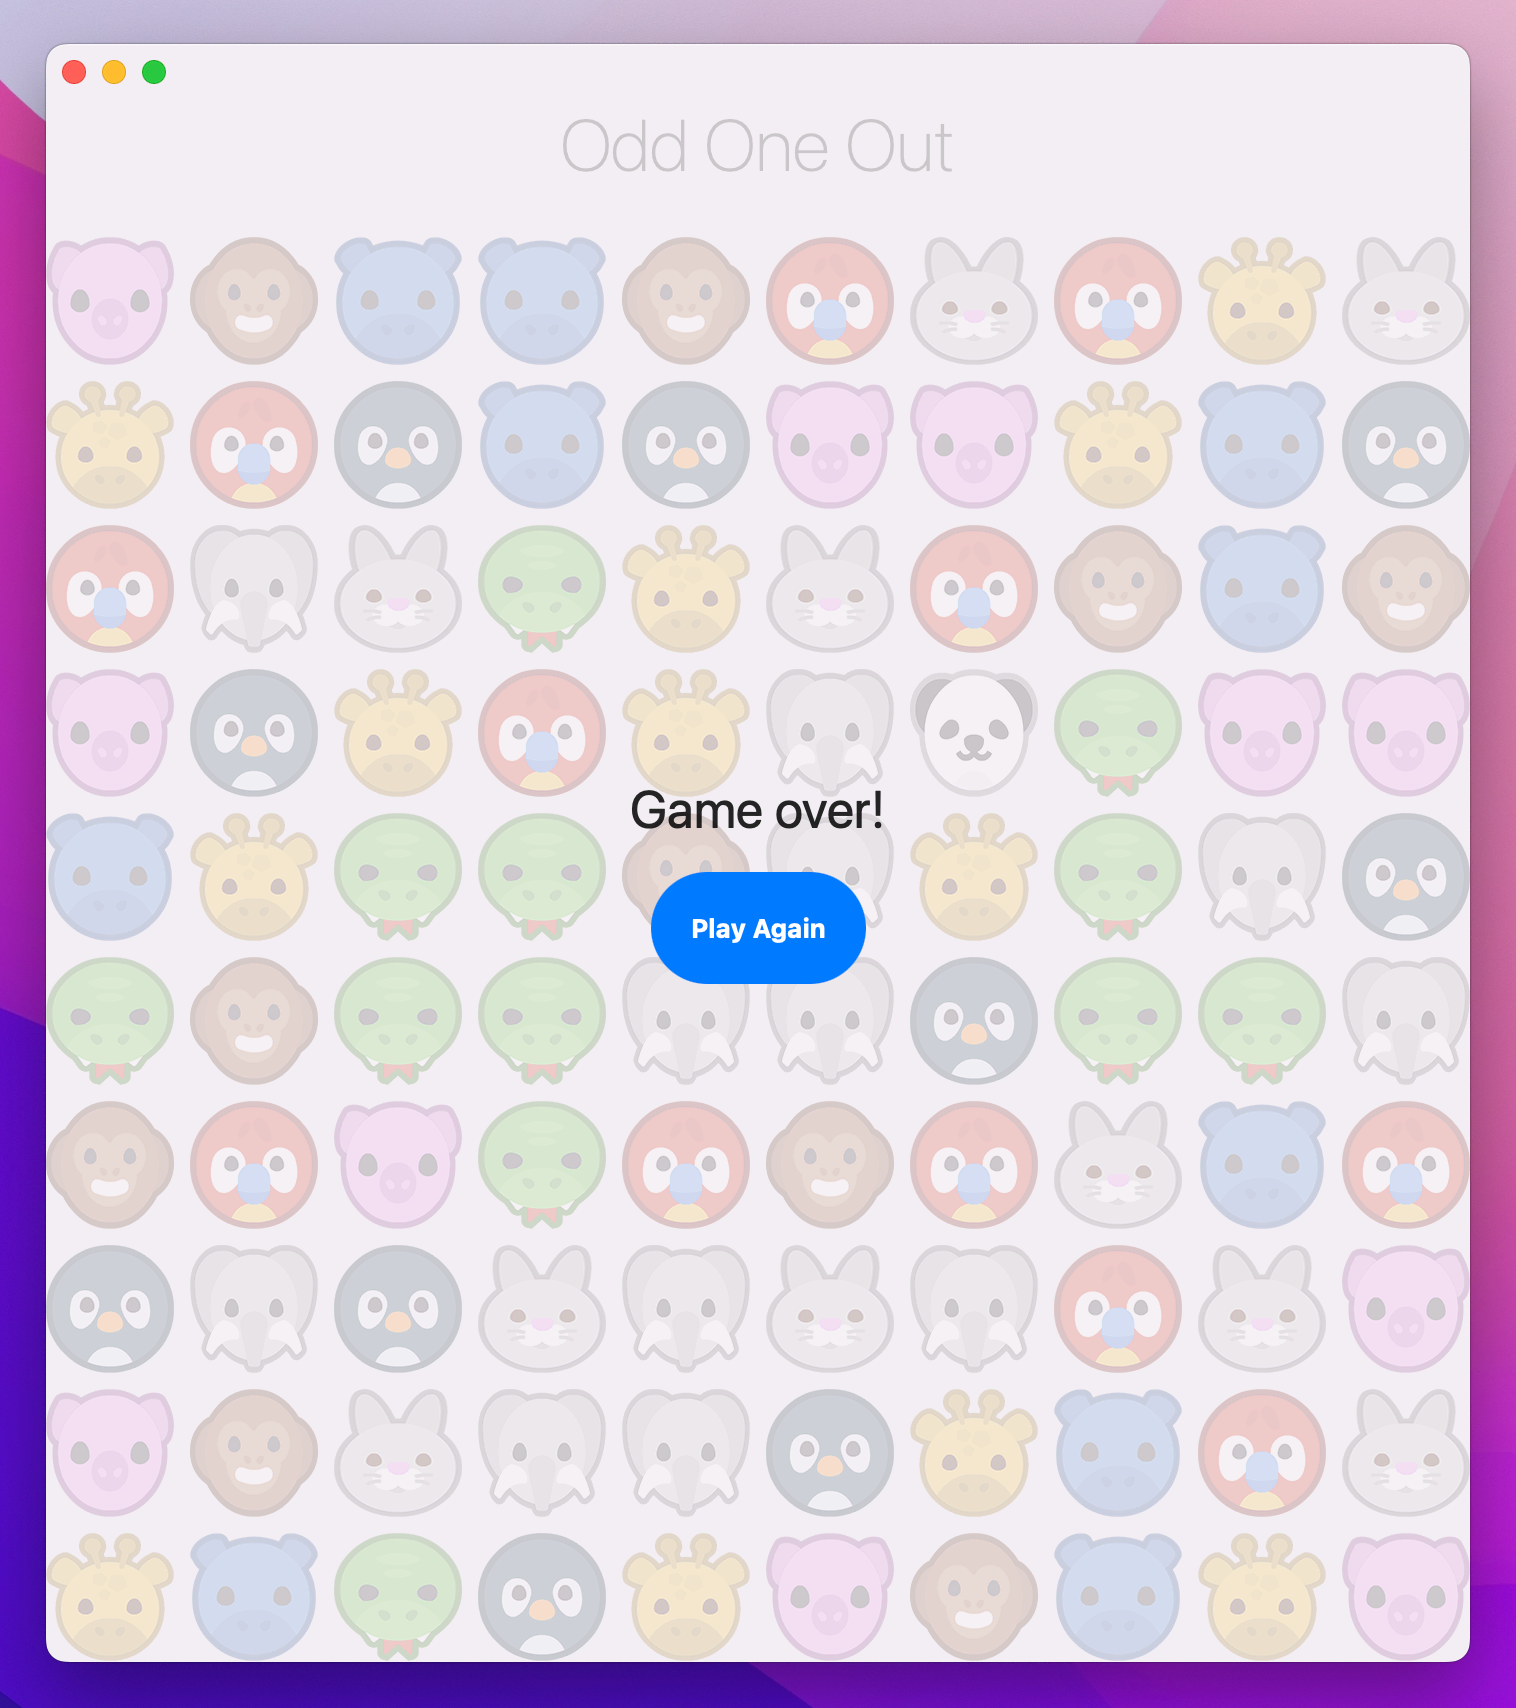
The game ends when the player has found the odd animal when the grid is full, but we’re not going to just show another alert this time. Instead, when isGameOver is true we’re going to fade out the VStack showing the game area, and place over it some new UI to let the user play again.
First, the fading out. We can accomplish this by using the opacity() modifier on our VStack, providing it with two different values depending on whether the game is active or not. Add this to the VStack now:
.opacity(isGameOver ? 0.2 : 1)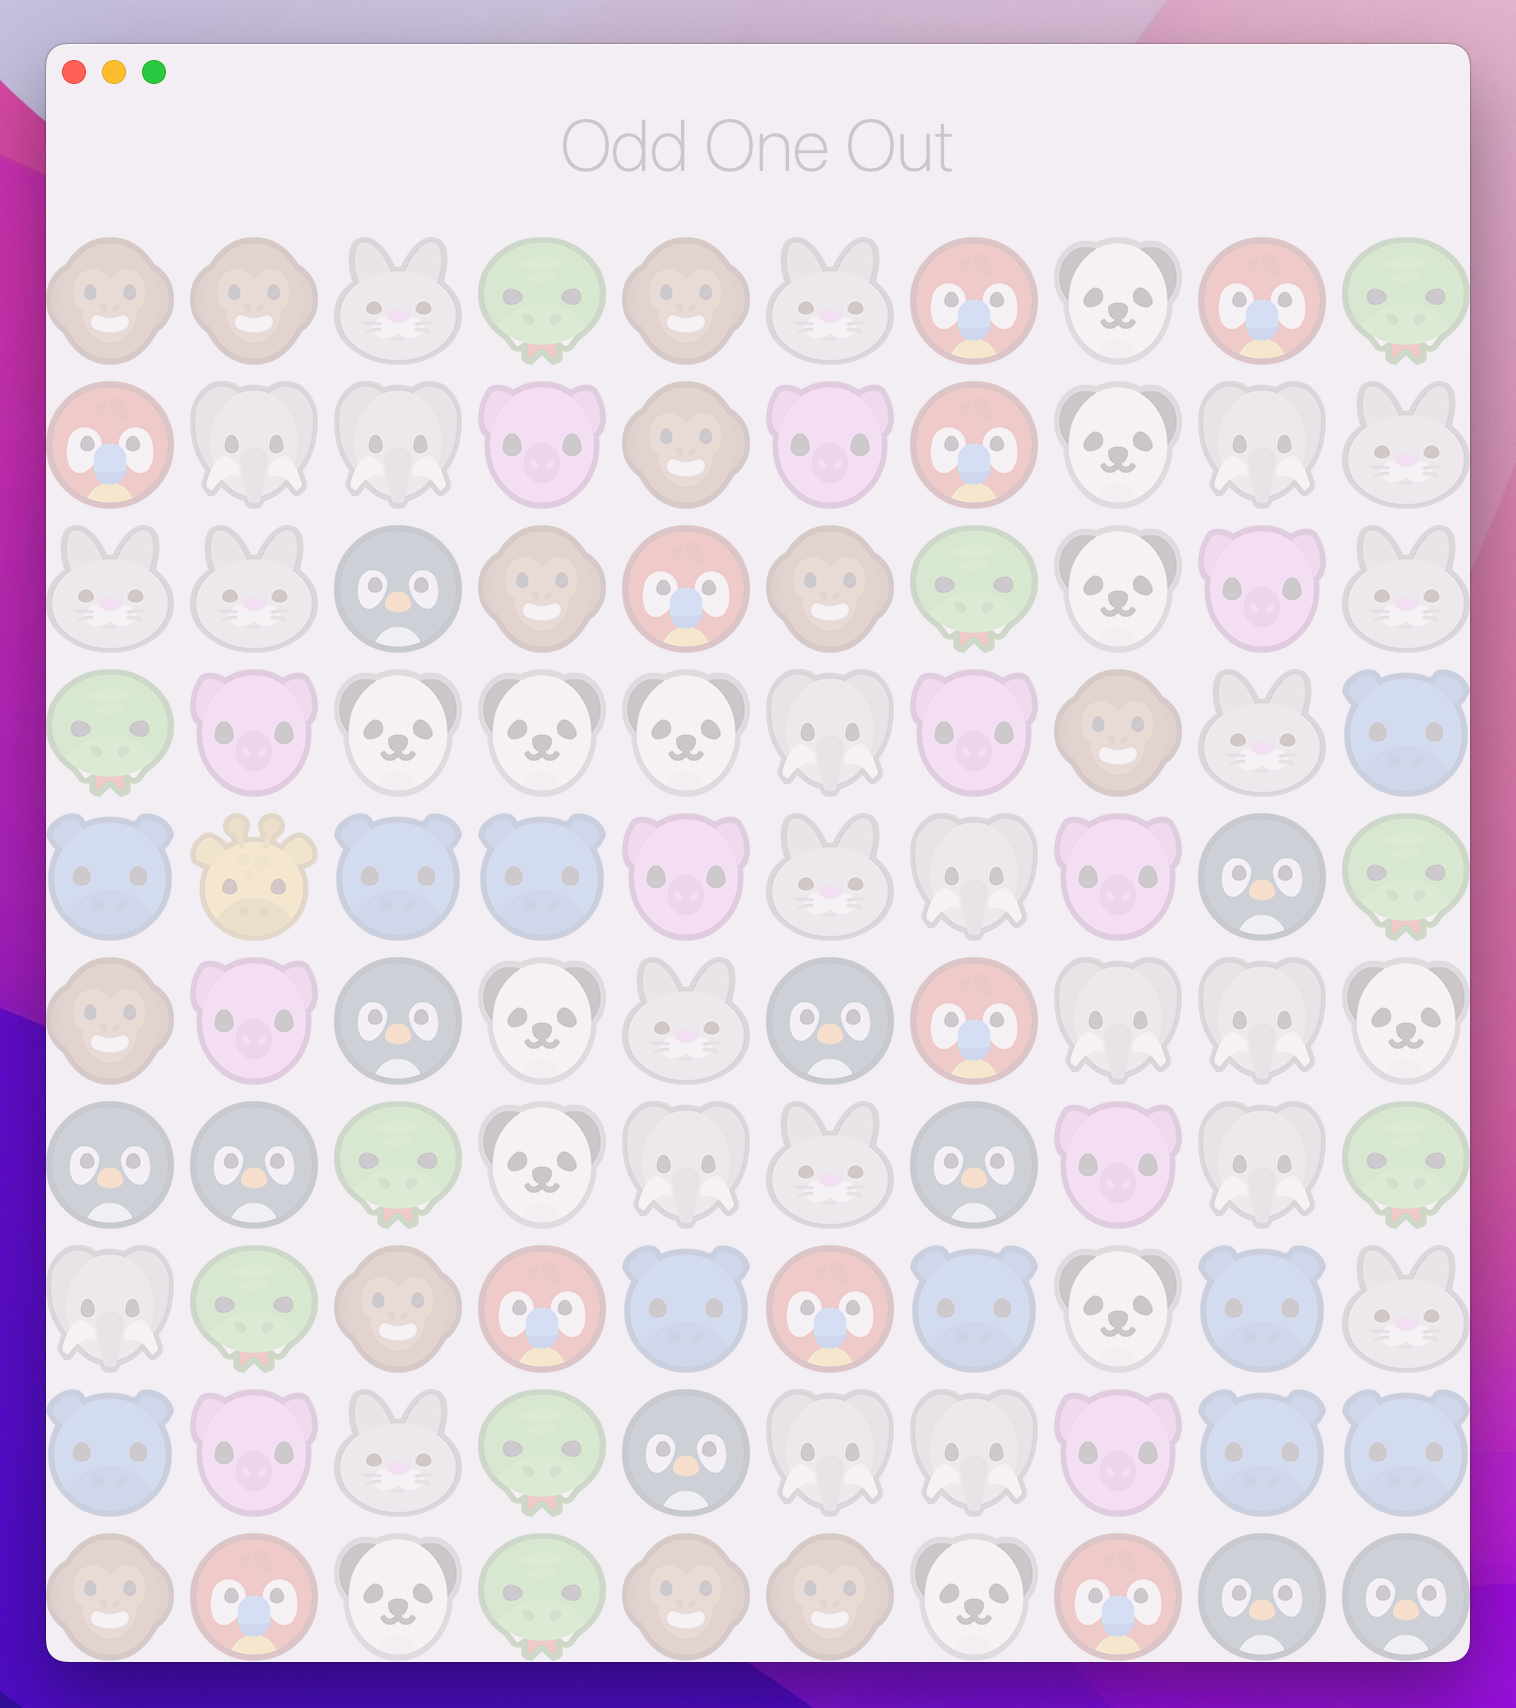
Even though isGameOver is a Boolean, we’re changing it using withAnimation so that opacity change will animate smoothly.
As for adding the extra UI, we can do that by using a regular if condition directly after the opacity() modifier we just added – SwiftUI will understand it should add and remove everything inside the condition depending on whether the condition is true or false.
This new piece of UI also needs a button so the user can play again, and rather than use the default macOS button style we’ll use buttonStyle(.borderless) again so we can customize it. This time we’re going to set a custom background color then use the clipShape() modifier to make a custom button style all of our own.
Add this directly below the opacity() modifier:
if isGameOver {
    VStack {
        Text("Game over!")
            .font(.largeTitle)

        Button("Play Again") {
            currentLevel = 1
            isGameOver = false
            createLevel()
        }
        .font(.headline)
        .foregroundStyle(.white)
        .buttonStyle(.borderless)
        .padding(20)
        .background(.blue)
        .clipShape(.capsule)
    }
}
And with that the code for our game is complete – give it a try!
Before we’re done, I want to add one extra thing that isn’t code: let’s give the game an icon. We haven’t done this in projects so far, and we won’t be doing it again, because it’s not code-related. However, I’ll show it to you once so at least you can add icons in your own apps later.
Inside the files for this project, I provided a directory called Icon. Open that now and you’ll see 10 different icons at various sizes, retina and non-retina. If you open Assets.xcassets and select “AppIcon”, you should be able to drag all 10 of those images into the window to have Xcode arrange them neatly. If it gets any wrong you can just drag them around to move them.
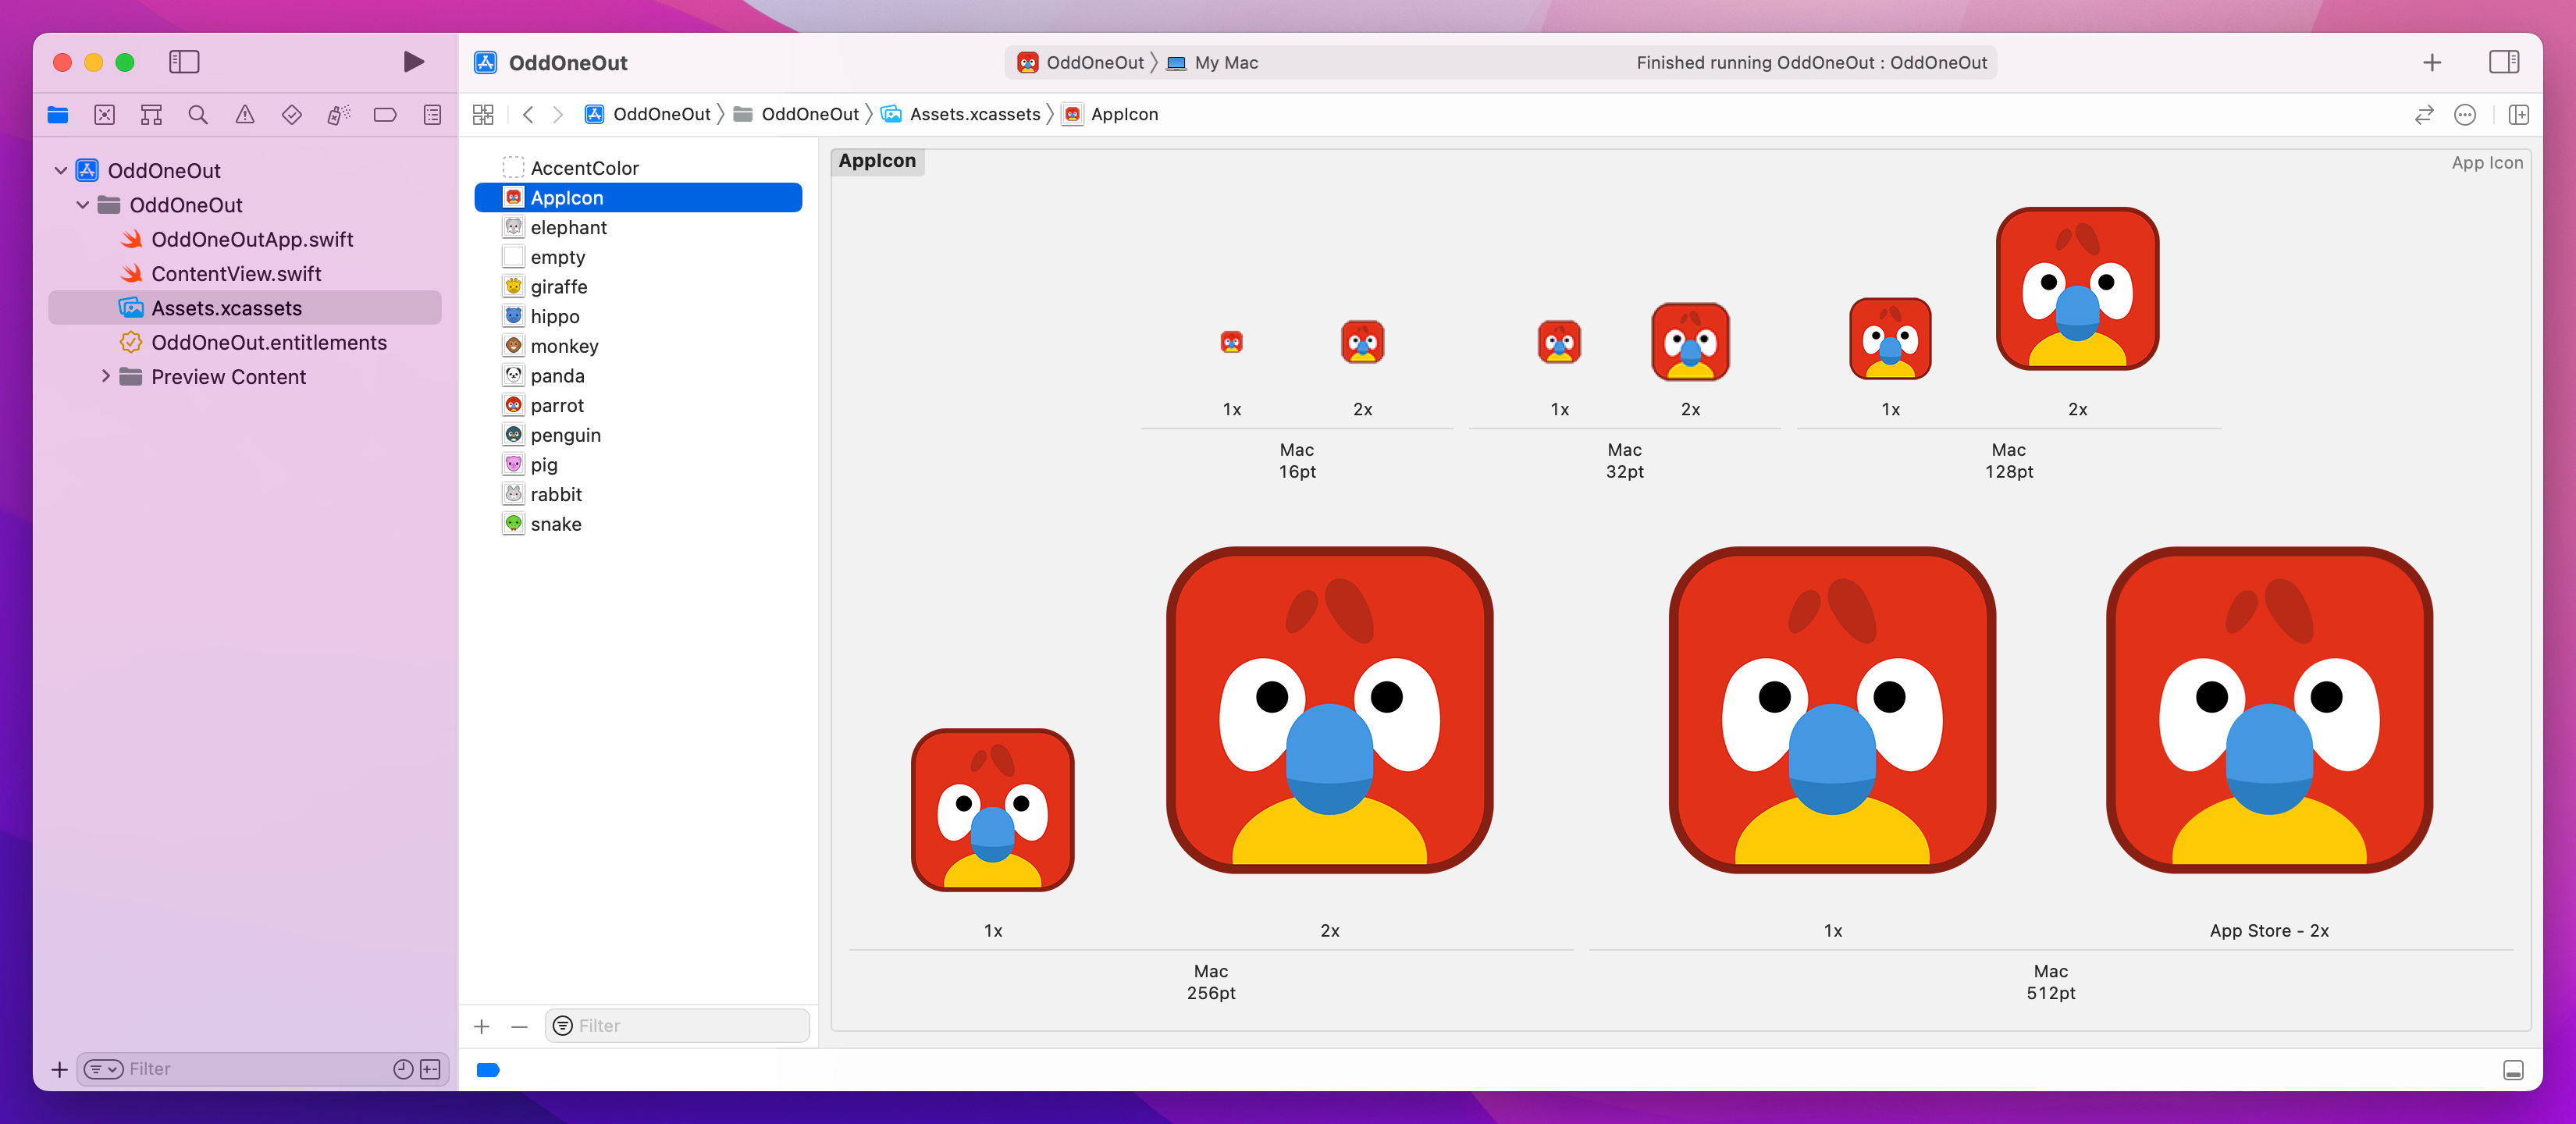
Tip: Although the image is similar to the animal graphics we use in the game, it’s not identical – macOS has a strong preference for squircle-shaped icons (part square, part circle), and so our icon shape is adjusted to fit that standard.
Adding an icon is a small but important part of completing any app, and surprisingly it’s one of the hardest to get right!
I hope you spend a little time enjoying the fruits of your labor: try playing the game, and I think you’ll find it a neat puzzle. There are 10 animals in total, which is just outside the number of things the average person can keep in their short-term memory, so you might occasionally find yourself stumped when you can’t remember what animal is missing!
Of course, you also learned lots of new things and had practice with old – which is just as important. SwiftUI’s ability to watch program state makes it super easy to build up UI, and even show wholly new UI when something happens.
It’s a game – where you take this is down to you! You could start by creating an alternative “you lose” game screen if the player selects the wrong animal three times.
You could also try adding something to the Touch Bar, such as counting their total number of guesses or showing their current level – or both.
But first, how about you fix a small bug: when the game is over, the play can still click animals to adjust the game level!
Copyright © 2023 Paul Hudson, hackingwithswift.com.
You should follow me on Twitter.