![]()
In this project you’re going to build MultiMap, an app that lets us search for and track multiple locations at the same time. This app solves a problem I hit all the time: when I look for a place on a map and want to compare it to the location of one or more other destinations, it’s hard to keep track of them all.
Along the way you’ll learn how to integrate maps and annotations into your apps, but also pick up some new SwiftUI techniques too: tracking changes to data, adding context menus, storing user settings, and more.
To get started, create a new macOS project using the App template, naming it MultiMap.
Maps are handled through a dedicated framework called MapKit, which delivers a Map view we can place into our view hierarchies, but also a variety of more advanced functionality such as the ability to search for locations, place annotations, and more.
So, the very first step in this project is to bring in the MapKit framework – add this before the SwiftUI import in ContentView.swift:
import MapKitThis is normally where I’d say something like “that’s the easy part, but the much harder part is…” Here, though, I think you’ll be pleasantly surprised by how straightforward it is to add a map to your SwiftUI app: to get started, all you actually need is some kind of state property to track the center coordinate and zoom level of the map.
In MapKit, this data is stored in a single struct called MKCoordinateRegion. Internally this stores its data as two separate values, each their own struct: a CLLocationCoordinate2D for the center point of the map, and an MKCoordinateSpan for how much of the map should be visible.
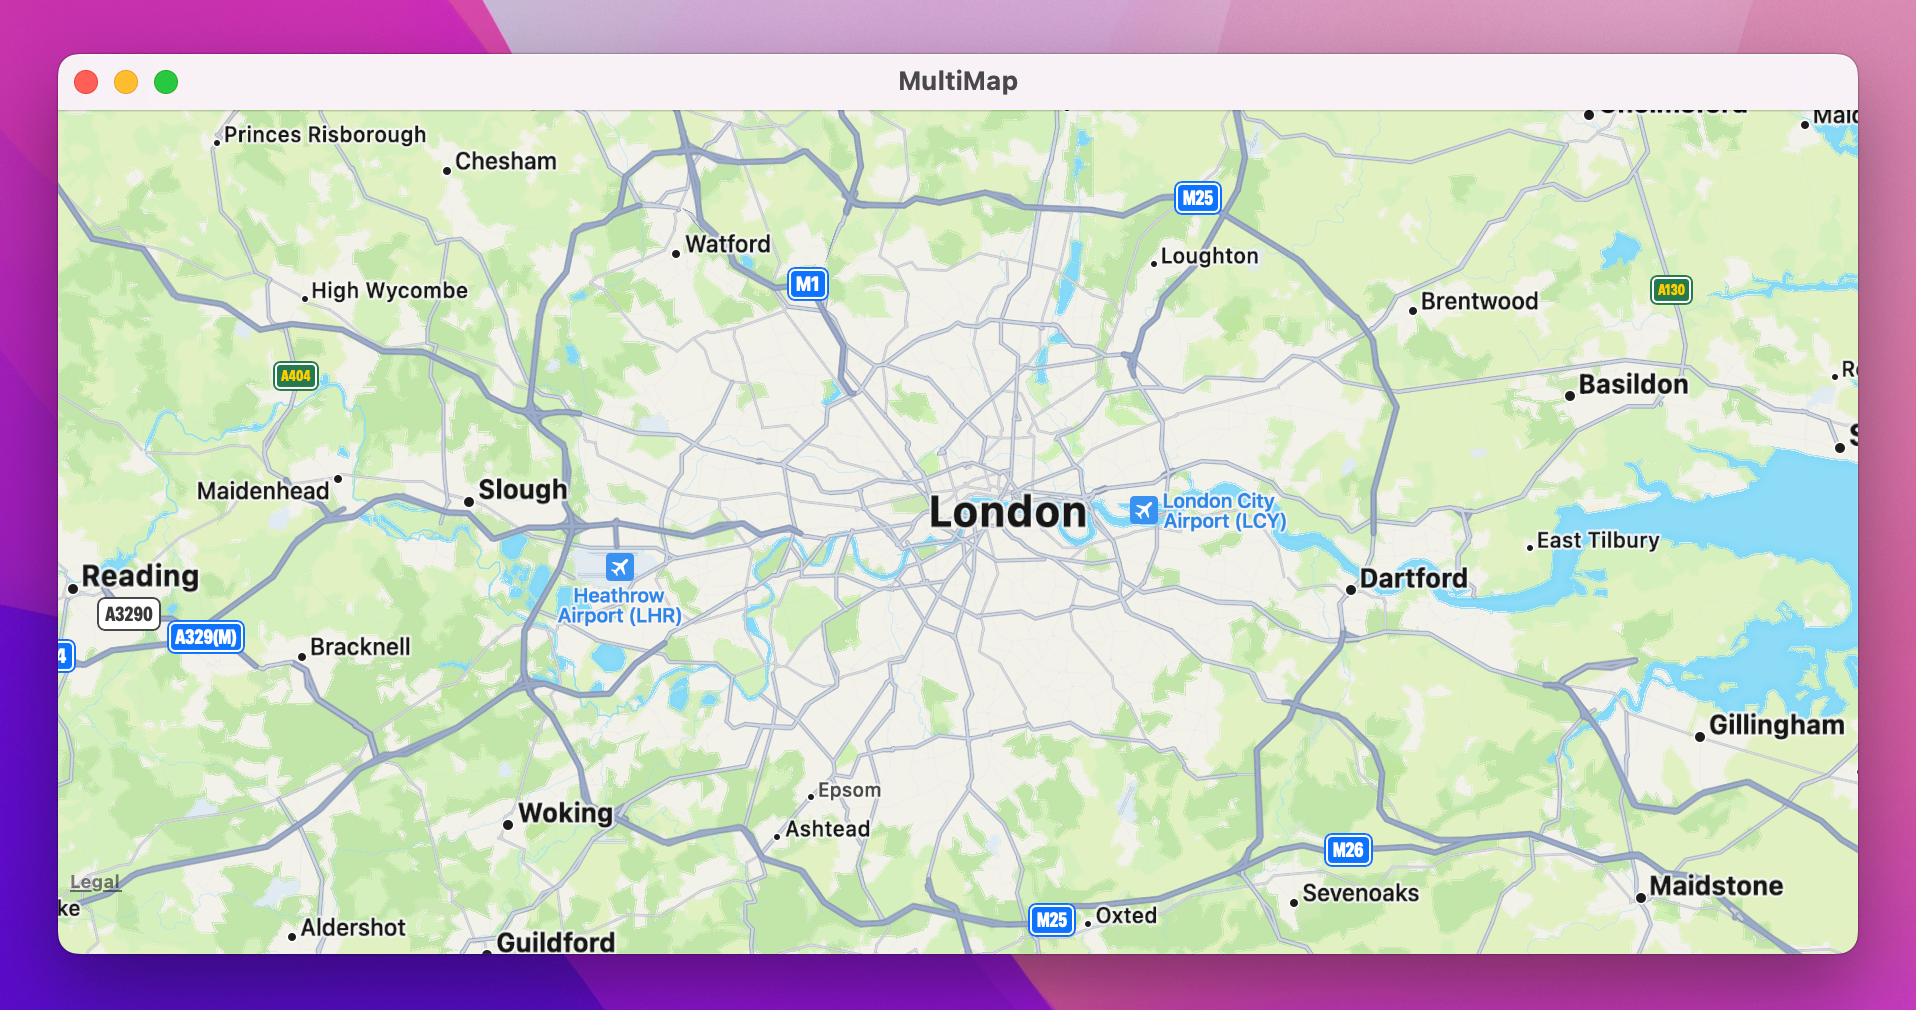
We need to give this a sensible default, so I’m going to make my map start by centering on the city of London. Add this property to your ContentView struct now:
@State private var mapCamera = MapCameraPosition.region(
    MKCoordinateRegion(
        center: CLLocationCoordinate2D(latitude: 51.507222, longitude: -0.1275),
        span: MKCoordinateSpan(latitudeDelta: 1, longitudeDelta: 1)
    )
)
That looks like quite a lot of code, but really it’s just a latitude and longitude for the center, plus latitude and longitude sizes for the span – four doubles wrapped up in two structs, wrapped up in an MKCoordinateRegion that we use as a map position.
Tip: The “MK” naming prefix means a data type comes from MapKit, and the “CL” prefix means a type comes from the Core Location framework. We didn’t explicitly import Core Location, but we didn’t need to because it’s automatically imported through MapKit.
And now the last step is trivial: we need to add a Map view, binding its position to the mapCamera property we just made. Replace the default view body with this:
Map(position: $mapCamera)That completes all the steps we need to get a basic map up and running, so go ahead and give it a try to see what you think – you should see the map occupying the entire space of our window, and you can drag it around or pinch to zoom as you would expect.
Tip: At the time of writing, Xcode was printing out lots of internal debug messages from Apple along the lines of Failed to create layer data for key – this can all be safely ignored.
To make this map more useful, we’re going to add some annotations – markers on there that let us pick out certain areas. Adding these first means creating a new data type to store the information we care about: its name, a latitude and longitude value, plus a unique identifier so SwiftUI can identify each annotation uniquely.
That identifier is important, because if you remember when working with dynamic data like an array of items SwiftUI needs to be able to identify every object uniquely. Previously we were able to use id: \.self to mean “this object is unique by itself”, but that was because we were using a fixed array of image names. Here we’re using locations found by the user, so we need a way to be certain each location is unique.
The most common approach for this is built right into Swift, and it’s called a UUID: a universally unique identifier. These are long strings of hexadecimal numbers that are pretty much guaranteed to be unique – they are so long and generated so randomly that if we generated 1 UUID every second for a billion years, we might begin to have the slightest chance of generating a duplicate. So, we’ll give each location a UUID property with a default value to make Swift ensure each object is definitely unique.
As for the location, we could store the two location values in a single CLLocationCoordinate2D instance, but that causes problems later on. You see, we’re going to add a Hashable conformance to our struct, which allows us to place them inside a Set to handle multiple selection. “Hashing” refers to the process of boiling a lot of data down to a simple value that is likely to be unique, usually a simple decimal or hexadecimal number. Sometimes that’s something like a string, sometimes it’s the contents of a struct, but it could be anything – even a 100GB Blu-ray disc can be hashed into about 40 hexadecimal digits.
Hashing is important for a number of reasons, such as the ability to check whether a large file was downloaded from the internet correctly – if my hash and your hash are the same then the file is fine. In this case, hashing is also useful for sets because they store their data in an optimized way based on the hash value of each object. It’s a bit like a dictionary: when the set wants to find an object, it computes the hash value of that object then uses that as its “key”. This process is much more efficient than looking for the same object in an array by examining index 0, then index 1, then index 2, 3, 4, and so on.
Anyway, Swift lets us conform to Hashable by hand if needed, but if our struct only contains simple data that already conforms to Hashable then the conformance can be synthesized – Swift can do all the work for us. As CLLocationCoordinate2D does not conform to Hashable out of the box, making the coordinate a computed property allows us to get the protocol synthesis and save some work!
So, create a new Swift file called Location.swift, change its Foundation import for MapKit, then give it this code:
struct Location: Hashable {
    let id = UUID()
    let name: String
    let latitude: Double
    let longitude: Double

    var coordinate: CLLocationCoordinate2D {
        CLLocationCoordinate2D(latitude: latitude, longitude: longitude)
    }
}
For now, we’re going to hard code our locations so that we can get moving quickly. Add this property to ContentView so we have something we can place on our map:
let locations = [
    Location(name: "London", latitude: 51.507222, longitude: -0.1275),
    Location(name: "Glasgow", latitude: 55.8616752, longitude: -4.2546099)
]
Now that we have annotations to work with, we can focus on the main event: rendering them on the map somehow. SwiftUI gives us several ways of doing us, including MapCircle, Marker, and Annotation, but the latter is most useful because it lets us place arbitrary SwiftUI views on the map.
At the core, they all work in the same way: you can create them statically inside your map, or use a ForEach to create them from an array. So, we might start off with something simple like this:
Map(position: $mapCamera) {
    ForEach(locations) { location in
        Marker(location.name, coordinate: location.coordinate)
    }
}
However, that code won’t actually compile, and to understand why I want to repeat something I said previously: SwiftUI needs to know how to identify each view uniquely. When we write them out individually in code – e.g. a VStack with some text, then an image, then a button – then the exact layout is fixed, and SwiftUI identifies views by the structure of your layout. But when we generate views dynamically, such as a List showing rows or in this case a Map showing annotations – we need to tell SwiftUI exactly how it can uniquely identify each view we create dynamically.
This pattern is so common, Swift has a protocol baked right in to make it easier, called Identifiable. I want to use it now, so please adjust the Location struct to this:
struct Location: Hashable, Identifiable {The Identifiable protocol has only one requirement, which is that the conforming type must have a property called id that is unique. We already added that with our UUID, which means we don’t need to change Location at all – we just needed to add that conformance to its definition, and we’re done.
So, what has changed? Well, now that we conform to the Identifiable protocol, we’ve made a promise to Swift that each instance of this type has a unique identifier called id. As a result, when we create our Map and pass in an array of locations to draw as annotations, SwiftUI knows how to identify each of those annotations uniquely.
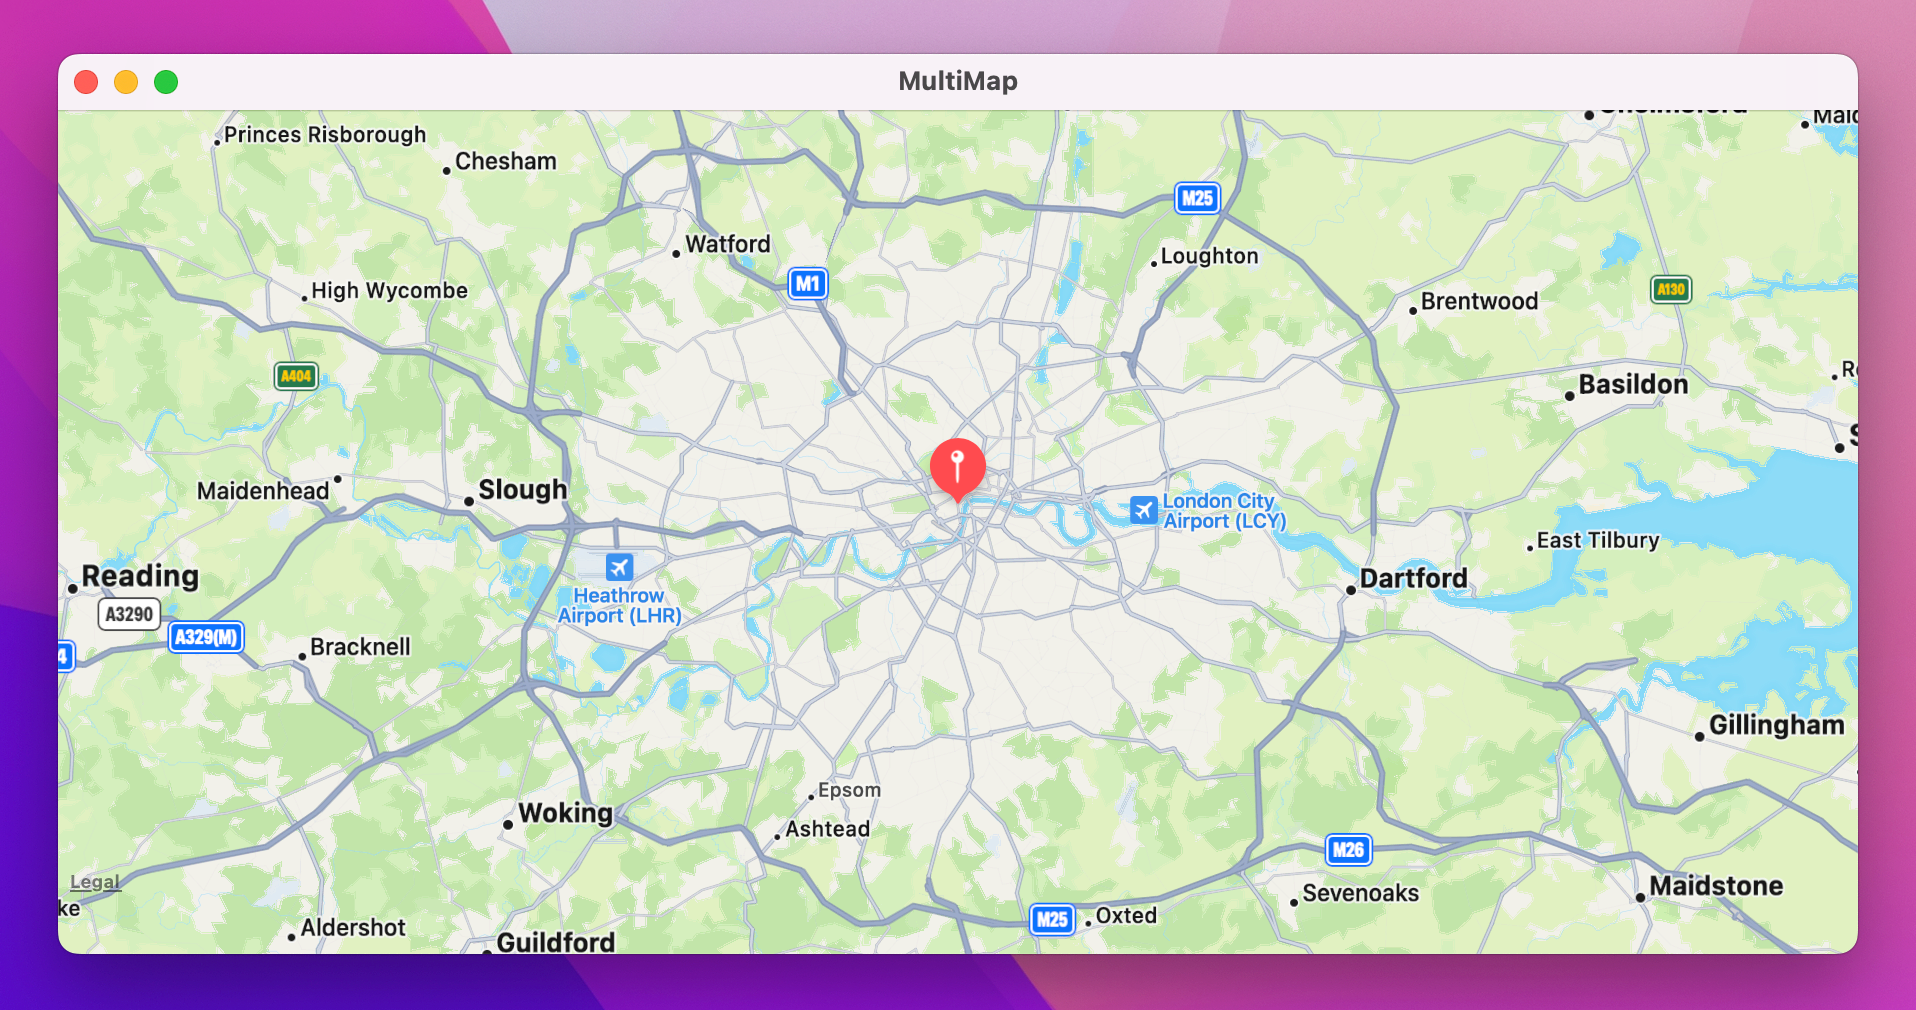
This means our map annotation code now compiles correctly, so try running it and see what you think. You should see that Marker gives you the default look and feel for map annotations, which is nice but also not very interesting – there’s no indication what those markers mean. This is where the Annotation type comes in, because it takes a view closure as its second parameter so that we can customize how it looks and works.
So, let’s be more adventurous: we can draw the location’s name with some custom styling to help it stand out from the background – replace your current MapMarker code with this:
Annotation(location.name, coordinate: location.coordinate) {
    Text(location.name)
        .font(.headline)
        .padding(5)
        .padding(.horizontal, 5)
        .background(.black)
        .foregroundStyle(.white)
        .clipShape(.capsule)
}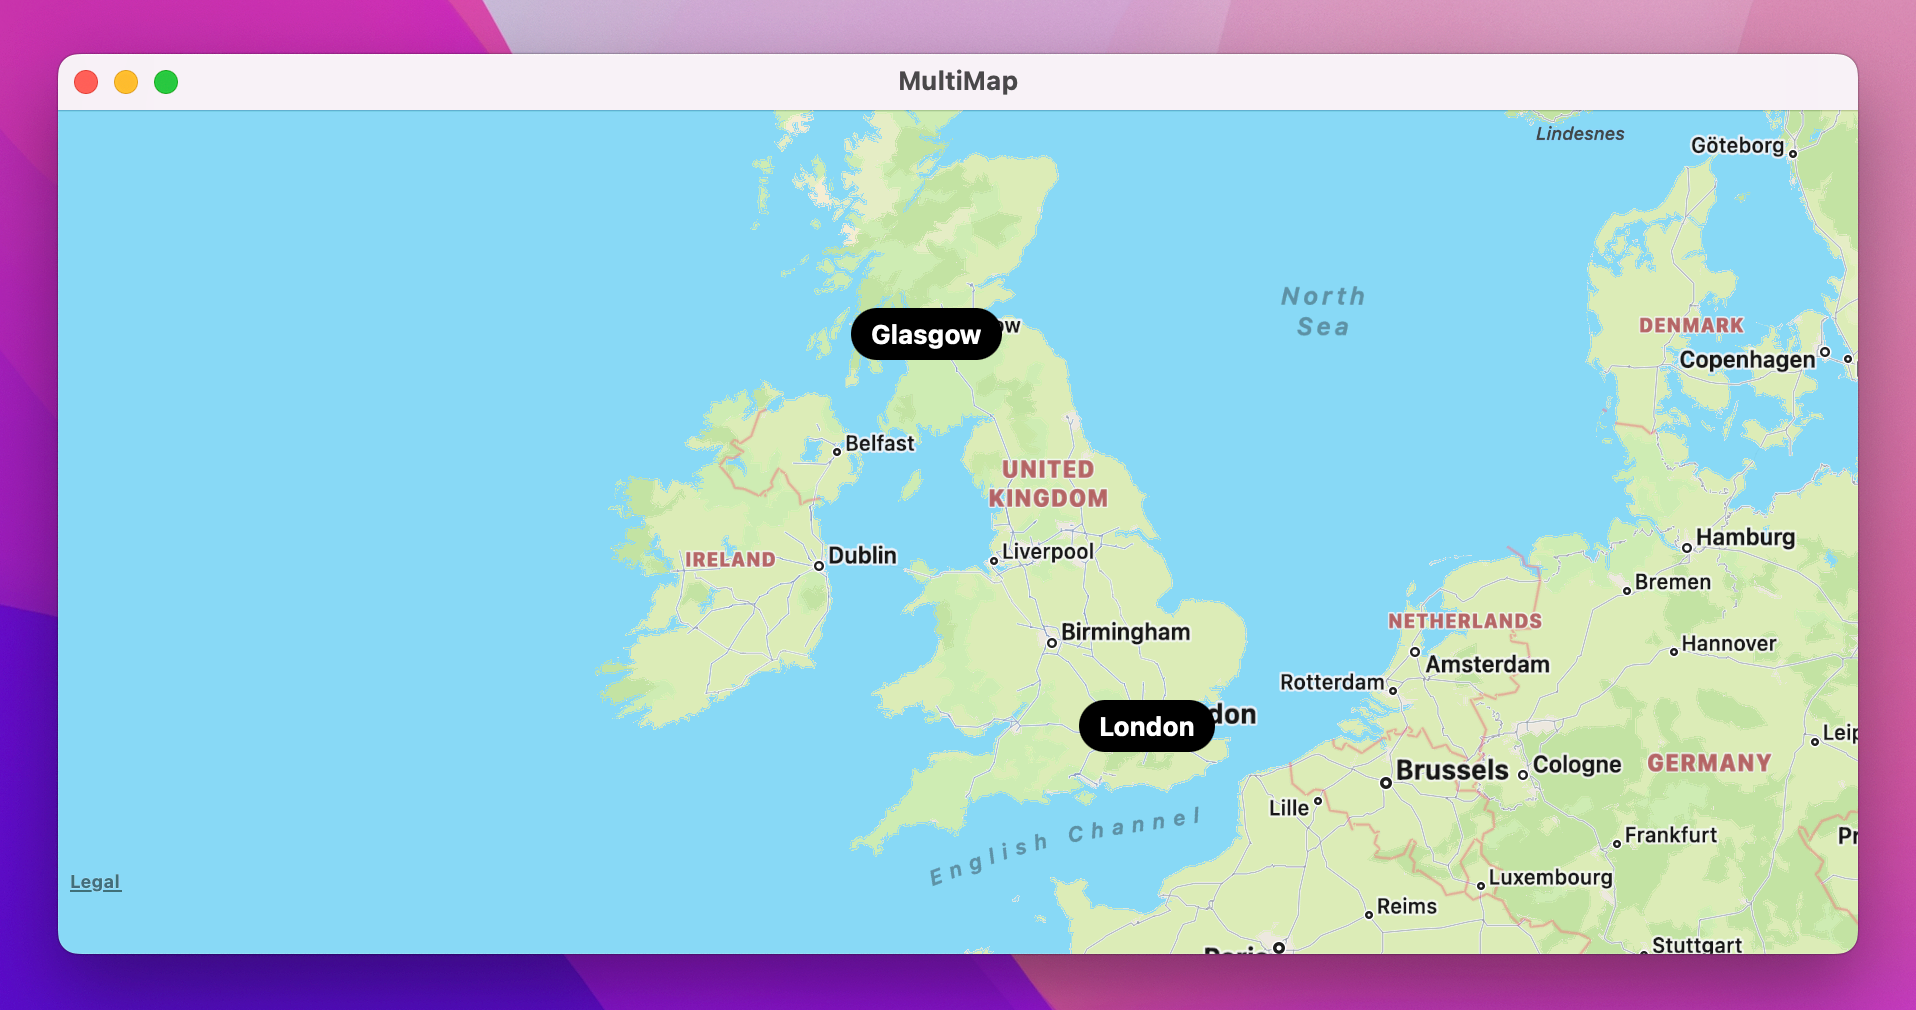
Much better, I think! Notice how it applies the padding() modifier twice – once with 5 points on every edge, but then a second time to add 5 extra points of padding specifically on the horizontally sides. This is useful because macOS naturally adds a bit of vertical spacing to text to accommodate line spacing, ascenders, and descenders (the parts of letters that stick up high or fall down below the line), so some extra horizontal spacing helps to equal things out a bit.
Rather than hard-coding locations such as London and Glasgow, we’re going to let the user search for things that interest them. This is one of the most powerful parts of MapKit, but also surprisingly one of the least-used – I just don’t think enough people know about it!
Map searches are done with a class called MKLocalSearch, and it allows us to use natural language queries – to feed user text strings straight into the search, and have MapKit figure out what it means. This works everywhere in the world, and at every granularity: you can search for Machu Picchu, or you can search for a particular coffee outlet near your house, and MapKit handles them both.
Let’s start by adjusting our user interface to include a search box. First, add a new ContentView property to store the text the user is typing:
@State private var searchText = ""Next, I want to add a text field and button above the map, so that the user can search for locations freely. This is as simple as a HStack with two subviews, but first we need to add a method stub that we can call from both those views – when the text field is submitted or when the button is pressed.
We’ll fill this in shortly, but for now we just need a placeholder method in ContentView. This will do all its work in a background task, because it will fetch data from the internet:
func runSearch() {
Task {
// more code to come
}
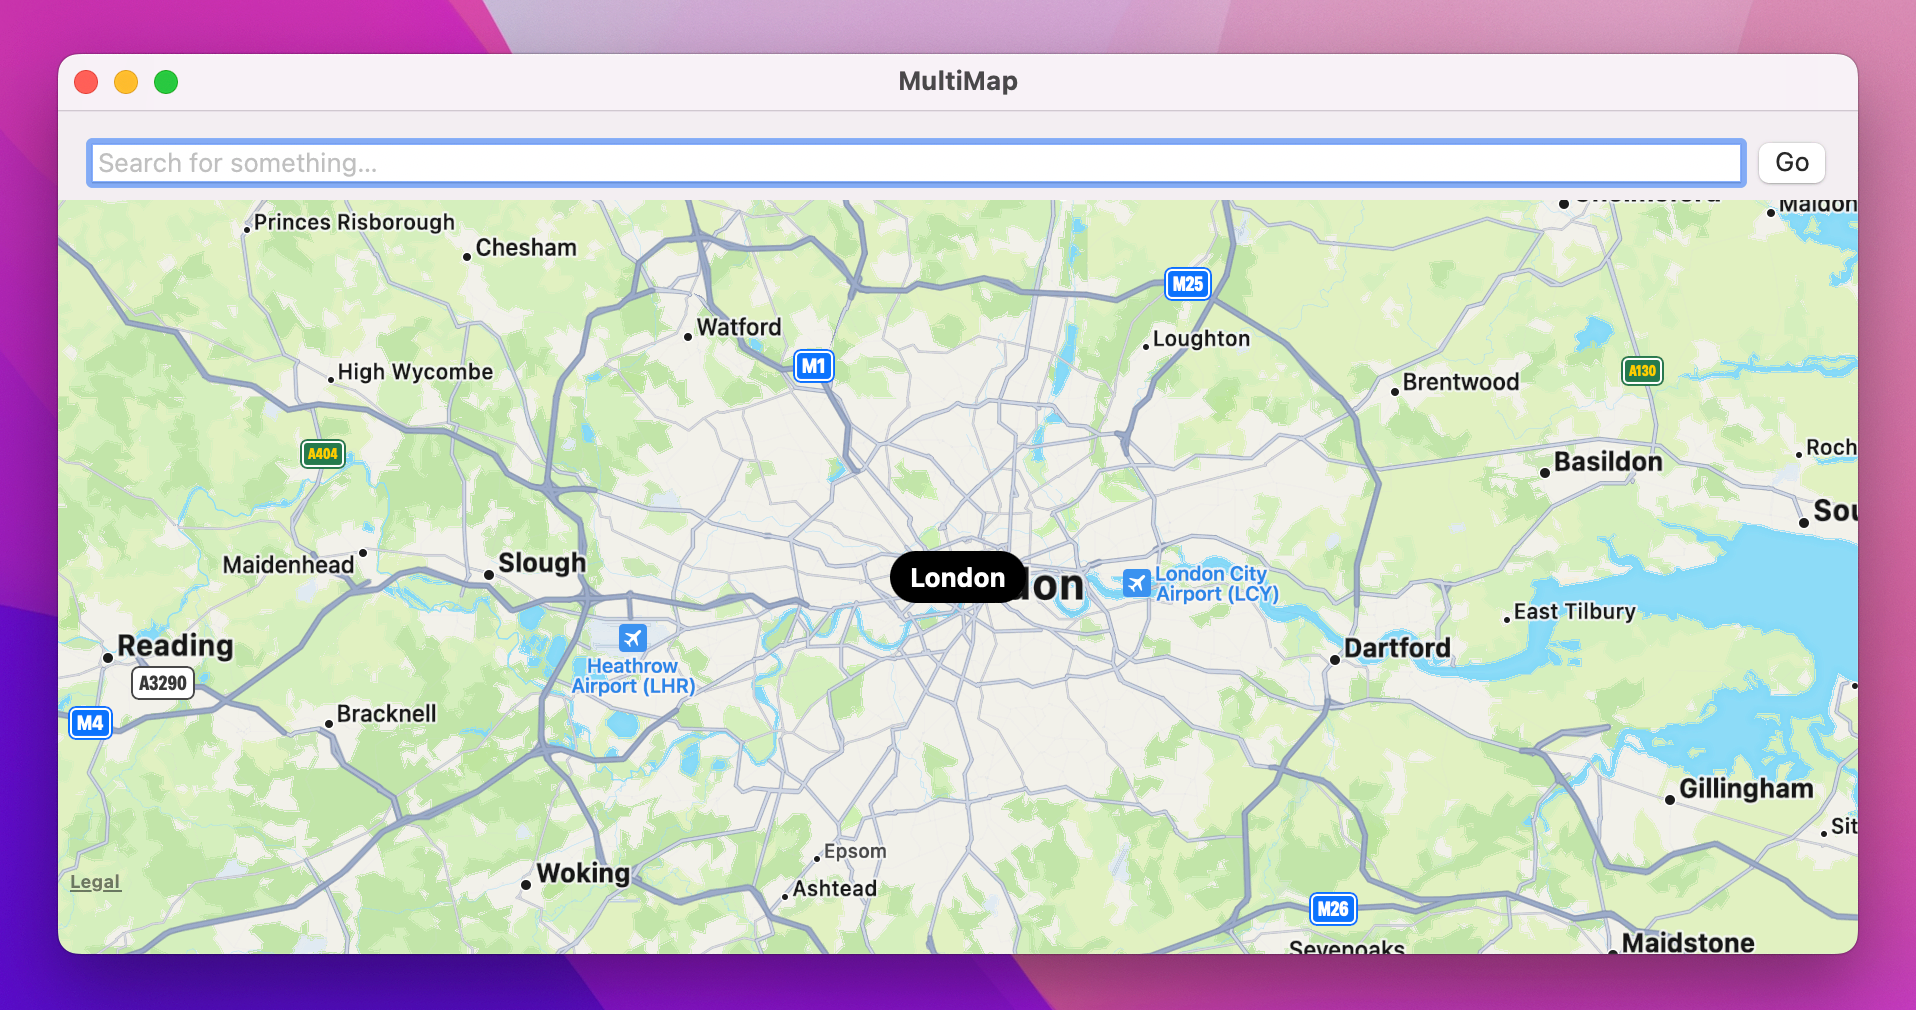
}With that in place, we can now add our search area before the Map view:
HStack {
    TextField("Search for something…", text: $searchText)
        .onSubmit(runSearch)

    Button("Go", action: runSearch)
}
.padding([.top, .horizontal])
Notice that I’m passing two edges to the padding() modifier. Previously we’ve used it with no parameters, with a fixed value such as 10, or with a fixed value plus one side, such as .horizontal. Well, that last part can actually be given several sides at once using array-like syntax – you might say [.top, .leading], for example, to get spacing above and on the leading edge. In left-to-right languages, the leading edge is the same as the left edge, but SwiftUI is smart enough to flip this around in right-to-left languages such as Hebrew.
Now, we’ve just placed two views side by side in our body: the HStack, then the Map. We haven’t specified how they should be placed on the screen, but if you run the code now you’ll see SwiftUI makes a sensible choice for us: it places the search area above the map, as if they were inside a VStack.
We could leave it like that, but if there’s one thing I’ve learned with SwiftUI it’s this: in cases of uncertainty, it’s a good idea to be explicit about your intentions rather than relying on the framework magically doing the right thing.
So, I want you to wrap the contents of our body property in a VStack, like this:
VStack {
    // HStack

    // Map
}
Okay, let’s turn our attention to the important part here: when we want to run a search for some kind of place or landmark in the world – I think you’ll be impressed by how easy this is.
We’re going to fill out runSearch() piece by piece, starting with creating the search request and providing it with our user’s search string. Add these two lines to the method now:
let searchRequest = MKLocalSearch.Request()
searchRequest.naturalLanguageQuery = searchText
Now, we could add an extra piece of information here if you wanted. I’m not going to do it in my version, but I at least want to show you this because it might be exactly what you want for your own projects: you can give MapKit a hint for the search area. This gets factored into MapKit’s search and is likely to affect the results that come back, although it is ultimately only a hint – if the user searched for “coffee”, for example, then the location hint might restrict the search to coffee houses that are in a particular part of the map.
Anyway, if you’d like to try this location hint, you’d use this code next:
if let region = mapCamera.region {
    searchRequest.region = region
}
That passes in our existing map region as the location hint. Again, I won’t be using it here because I’m more interested in an app that lets me search a variety of places around the world, but you might find it useful.
Now that we’ve configured our search request, we can place it inside an MKLocalSearch object. This is the part that actually handles searching and sending us back the results it finds, so add this next:
let search = MKLocalSearch(request: searchRequest)The final step is to start the search. This is done by calling start() on the MKLocalSearch object and waiting for it to come back – it will pass us all the results it found if any, but it might also throw an error if something went wrong.
So, we'd start with this:
let response = try await search.start()If that returns data successfully, it means we have a valid response from the map search and it’s now our job to decide what to do with all the results – do we want to drop pins at every location, the top 5 locations, or perhaps just the top result? If our goal were to show just one search result at a time then I think adding all the annotations at once would be a great idea, but as the plan is to show many search results at the same time we’re just going to read the first result – the one that the API returned as its top hit.
So, add this line directly after the previous one, making our closure bail out if we could read the first result:
guard let item = response.mapItems.first else { return }That gives us the top search hit, which will contain properties such as its name, phone number, website URL, time zone, and more – all optional, because they might or might not exist. For our purposes we care about two values:
Again, both of those are optional, so our next step will be to read them out if possible:
guard let itemName = item.name, let itemLocation = item.placemark.location else { return }Now we’re guaranteed to have a string for the name and a CLLocationCoordinate2D for the location, which is all we need to create an instance of our Location struct and add it to our locations array:
let newLocation = Location(name: itemName, latitude: itemLocation.coordinate.latitude, longitude: itemLocation.coordinate.longitude)
locations.append(newLocation)
That code is correct, but Swift will throw up a big warning because we’re currently creating the locations array using fixed data.
So, the fix is to replace our hard-coded locations array with an empty @State equivalent so we can modify it over time, like this:
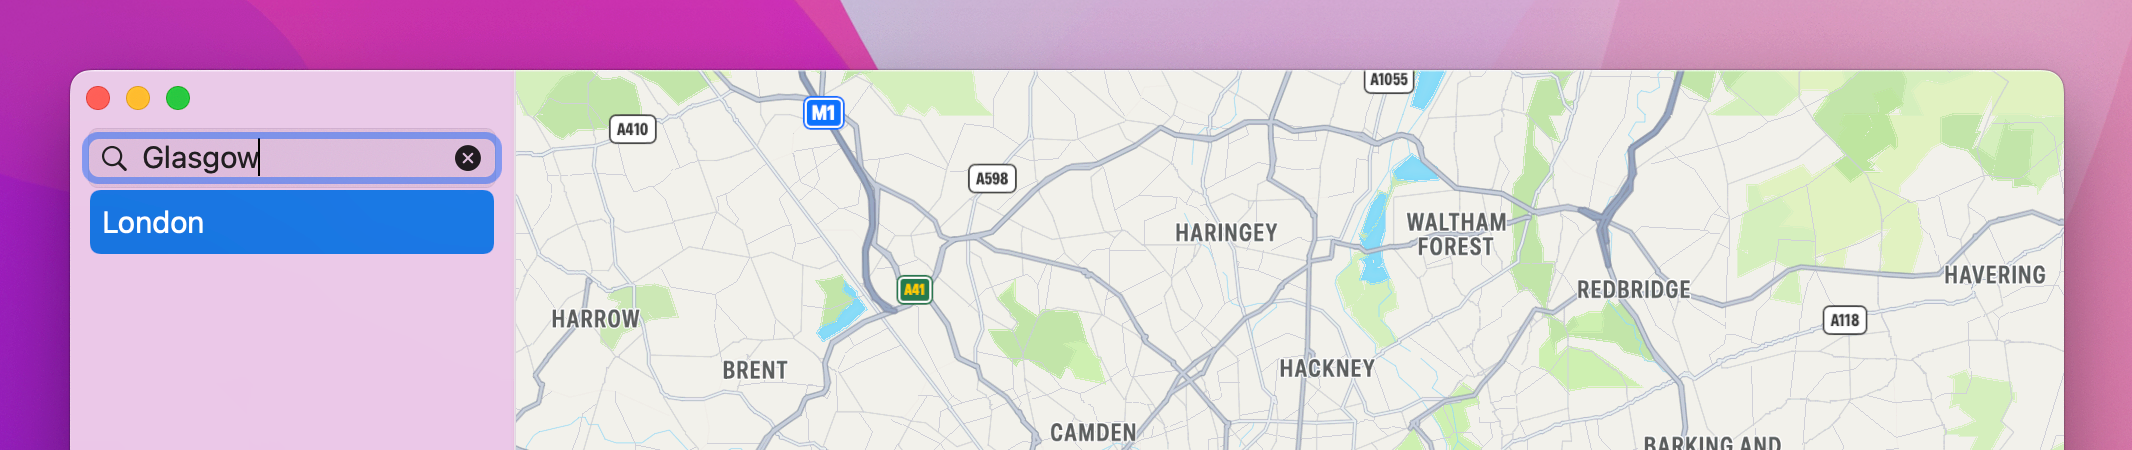
@State private var locations = [Location]()That’s all it takes to get our code to compile and run, and it will work too – for a very specific definition of “work”, at least. You see, if you try searching for something like “Glasgow” you might think the app hasn’t worked because nothing will happen, but if you try zooming out and panning around you’ll find it has correctly found the city of Glasgow and there’s a map annotation placed exactly where it ought to be.
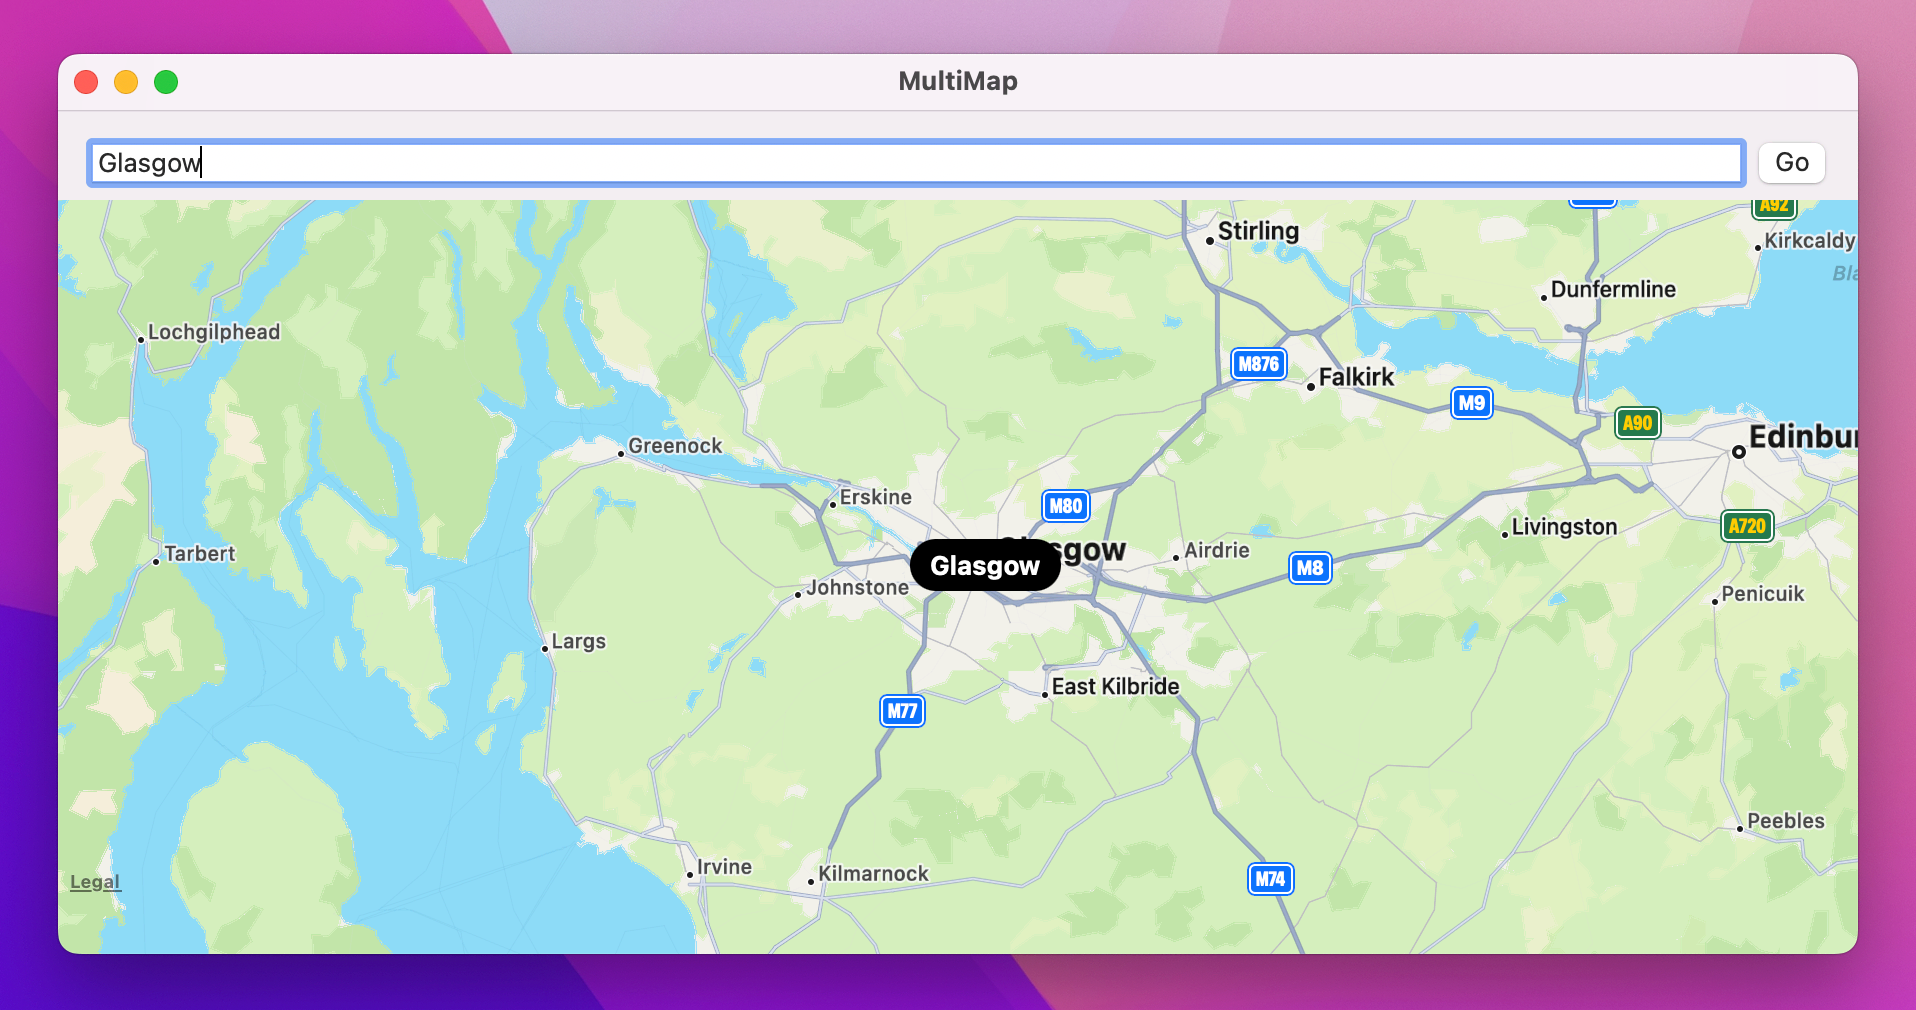
Tip: Cunningly, there is more than one city of Glasgow – unless you add the location hint, which you see depends on which Apple Maps thinks better suits your location.
The problem, of course, is that although our map and search are all linked up correctly, there’s no obvious user feedback to show that anything actually happened. To fix this we could just force the map to jump to the new pin location, but I have a much better idea…
Back in project 1 we looked at how to handle list selection, but now I want to go to a step further and handle multiple list selection – the ability for the user to select a single item, or hold down various key combinations to select multiple items at the same time.
This is astonishingly straightforward in SwiftUI: rather than having a single optional value for our selection, we instead create a Set that SwiftUI will automatically add and remove objects from as they are selected. Sets are like arrays except they can’t contain duplicates and they don’t have a specific order, which makes sense for our purposes here – you can’t select the same row twice, after all, and the exact order of selection doesn’t matter.
So, start by adding this new property to track the selected locations:
@State private var selectedLocations = Set<Location>()Tip: This is why we added the Hashable conformance to Location earlier – you can only add hashable objects to sets.
As soon as we add to our locations array, I want to make it the currently selected location. Shortly we’ll be using this inside a List, but I also want to use the selection to update what’s visible on the map.
So, first add this extra line of code to the runSearch() method, below the call to locations.append():
selectedLocations = [newLocation]Now for the fun part: whenever selectedLocations changes, I want to recenter the map to show everything that was selected. This will happen whenever we get a search result back thanks to the line of code we just added, but once we add a list of all search results that will also trigger the map update. This is another place where onChange() comes in handy, just like in project two.
In this project, we’re going to try to reposition our map so that all our selected locations are visible at the same time. Like I said, this solves a real problem I have with maps when I’m trying to plan something – I want to be able to show multiple locations at the same time so I can try to see them in context as a group.
MapKit can help us with this problem, but it takes a small amount of work using two MapKit structs: MKMapRect, for handling the overall rectangle that should be visible on the map, and MKMapPoint, which converts a latitude/longitude coordinate into a 2D X/Y pair – it’s like forcing the coordinate on the globe into 2D space.
Here’s the plan:
MKMapPoint.MKMapRect from that point, but adding some padding around it so we can see some amount of space around it.Once that’s done we can convert the MKMapRect back into an MKCoordinateRegion, add a touch more padding so our location doesn’t go edge to edge, then use that for our map’s new position.
That’s quite a bit of work, so let’s break it down into parts. First, we need the onChange() modifier to watch selectedLocations for changes. This can be attached anywhere in your view hierarchy, so perhaps attach it to the VStack:
.onChange(of: selectedLocations) {
    // more code to come
}
Next we need to create an empty map rectangle. This will ultimately contain a rectangle encompassing all our locations, but for now it will be empty. Add this in place of the // more code to come comment:
var visibleMap = MKMapRect.nullNow we can loop over all the locations in our set, convert their coordinate to an MKMapPoint then into an MKMapRect, and add that to our visibleMap value:
for location in selectedLocations {
    let mapPoint = MKMapPoint(location.coordinate)
    let pointRect = MKMapRect(x: mapPoint.x - 100_000, y: mapPoint.y - 100_000, width: 200_000, height: 200_000)
    visibleMap = visibleMap.union(pointRect)
}
Those numbers in there – 100,000 and 200,000 – are there to ensure we don’t focus too tightly on each location, otherwise having just one location selected would zoom in so tightly that users would have no idea what they were looking at.
Notice how combining this new location’s rectangle with our previous one is just a matter of calling union()? It’s a really nice API!
Once that loop finishes, visibleMap will contain a rectangle encompassing all our locations – that’s X and Y coordinates, plus width and height. We need that as a latitude/longitude pair plus a coordinate span, but we can convert the MKMapRect right into an MKCoordinateRegion with just one line of code – add this after the loop:
var newRegion = MKCoordinateRegion(visibleMap)We could put that more or less straight into our mapCamera property, but first I want to make a small change: we’re going to multiply the span's values by 1.5 to add some extra padding. So, rather than our locations lying at the edge of our map region, we will instead have some extra padding around them. This is particularly important given that our annotations contain text, so having a little extra padding helps reduce the likelihood of them being clipped.
So, finish the onChange() modifier with this code:
newRegion.span.latitudeDelta *= 1.5
newRegion.span.longitudeDelta *= 1.5
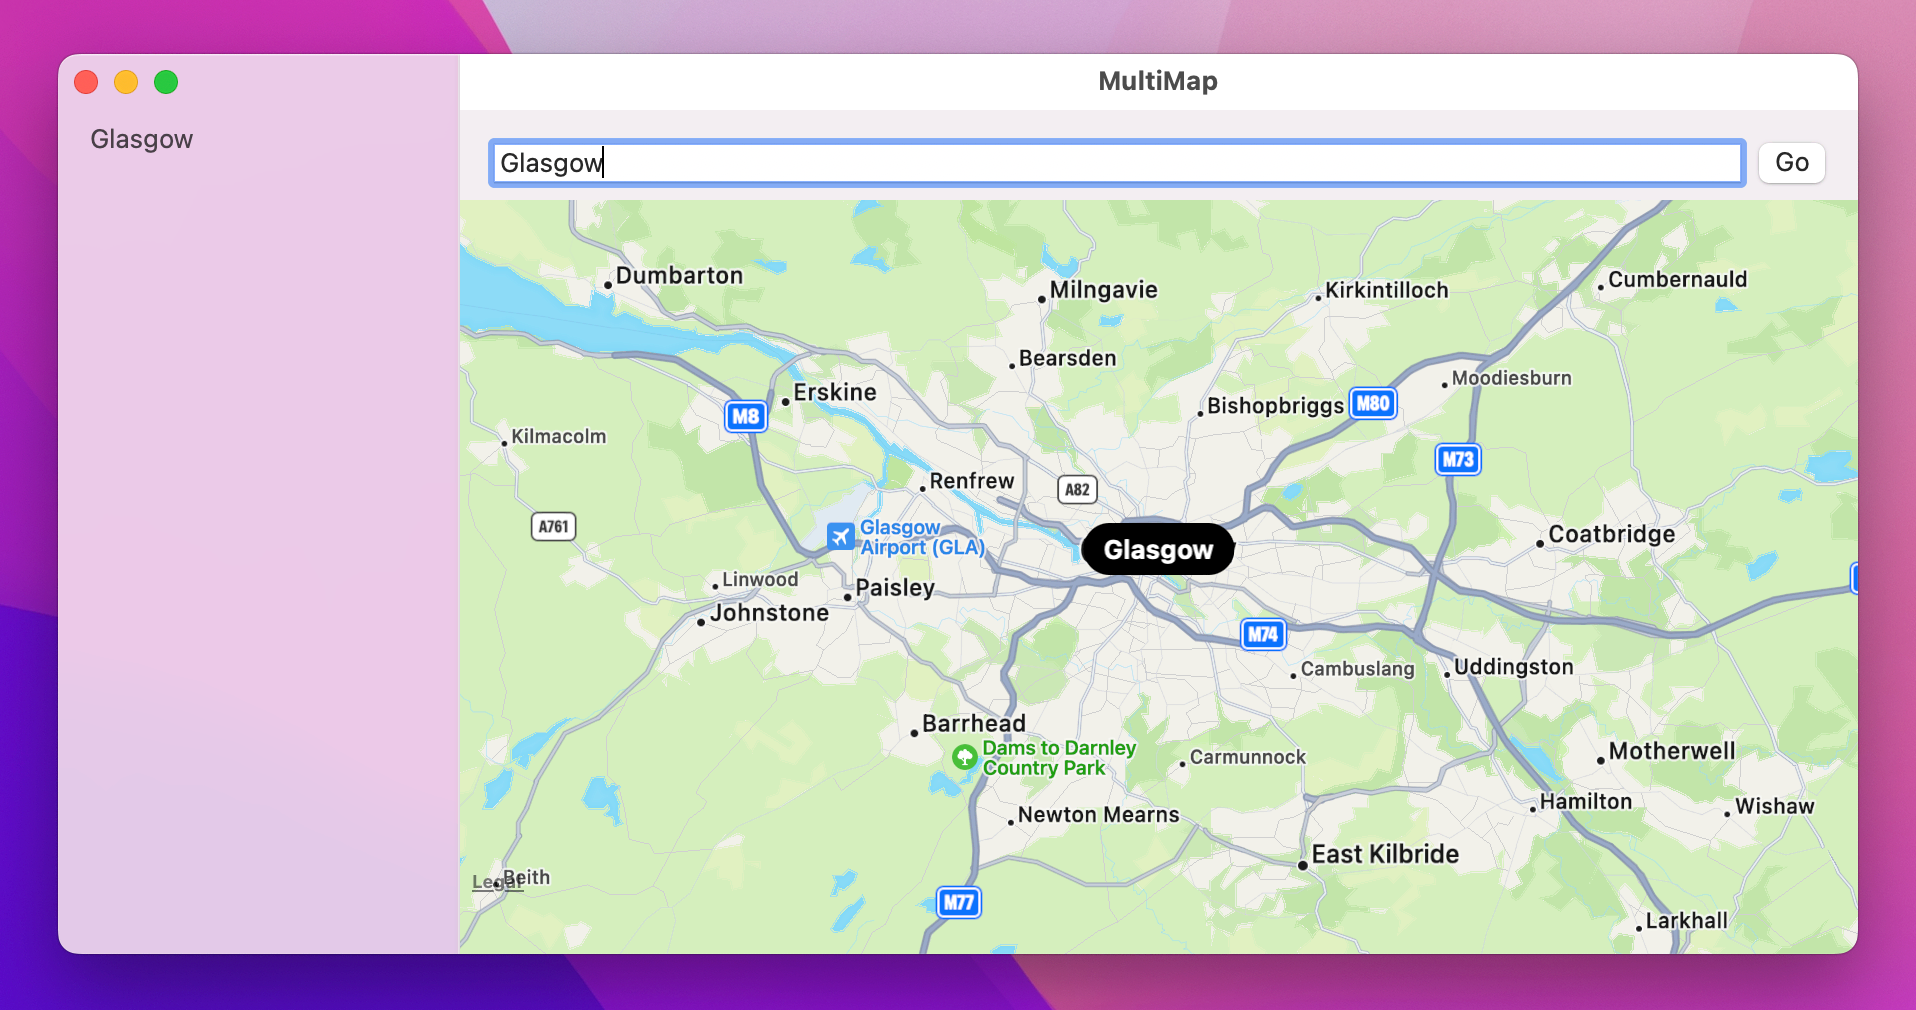
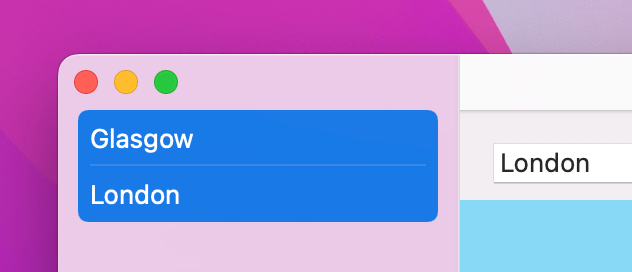
mapCamera = .region(newRegion)If you run the project again you’ll see this is a huge improvement – when you search for places the map will now correctly jump to show your result. That’s great by itself, but now we can bring in the final part of our user interface: a List showing all the locations the user has searched for, with multiple selection enabled so we can use our new map code to display them all.
This takes two steps, the first of which is easy because it means wrapping our current VStack in a NavigationSplitView, to split our user interface into two parts:
NavigationSplitView {
    // New sidebar code to go here
} detail: {
    // Map code
}
And now we can add a List as the sidebar view inside that NavigationSplitView. This is similar to code we wrote previously:
locations array into the List, so it creates one row for each location.id: \.id this time, rather than than using id: \.self – we’re telling the list that each item can be identified uniquely by its id property rather than trying to evaluate the whole struct instance.selection parameter we’re going to pass in a binding to our selectedLocations set. This means the UI will update when the selection changes, but also that changing the UI will adjust the set.All that is just a handful of lines of code – put this in place of the // New sidebar code to go here comment in the NavigationSplitView:
List(locations, id: \.id, selection: $selectedLocations) { location in
    Text(location.name)
}
.frame(minWidth: 200)
Go ahead and run the project again – what do you notice?
Chances are you’ll notice that despite all our work, list selection doesn’t do anything – you can’t select even a single row, never mind multiple.
The problem here is a subtle one, but it matters: we create each of the rows in our list from the locations array, and SwiftUI looks inside the selectedLocations set to see which should be selected. That part is straightforward, but consider this: when we identify each view uniquely using the id property of a location, how can SwiftUI figure out which id belongs to which location?
The answer is that it can’t, or at least won’t. As far as SwiftUI is concerned, the Text view we’re placing inside each row has the identifier of whatever UUID belongs to its location, which won’t match what’s inside our selectedLocations set – and our selection won’t function.
We can fix this in two ways. First, we can go back to the original id: \.self code, like this:
List(locations, id: \.self, selection: $selectedLocations) { location in
    Text(location.name)
}
Now we’re saying that the Text view is identified by the whole Location object, which does match what is inside our selectedLocations set, and so selection will now work.
The other option is to use the previous id: \.id code with the list, but tell SwiftUI explicitly that those text views identify as the locations themselves. This is done using a new modifier called tag(), like this:
List(locations, id: \.id, selection: $selectedLocations) { location in
    Text(location.name)
        .tag(location)
}
Honestly, there’s no real difference between them – the only advantage to the latter is that we actually don’t need to provide the id: \.id part – we don’t need to tell SwiftUI what the unique identifier is for each object, because that’s exactly what the Identifiable protocol does. This means we can simplify our List code a little:
List(locations, selection: $selectedLocations) { location in
    Text(location.name)
        .tag(location)
}
Regardless of which approach you choose (and again, this is really just personal preference!), there is one further tweak I’d like to make. You see, we’re using Hashable for our Location struct so that it can placed inside a set to store the selected locations, but we haven’t written any code to make that conformance – we’re relying on Swift to generate it for us.
This approach was fine to get us started, but I’d like you to think about the work that happens behind the scenes: Swift will automatically generate a function that computes the hash value of our struct, which means it will convert all four computed properties (id, name, latitude, and longitude) into a finished hash value. If you think about it, our id property is already guaranteed to be unique because that’s the point of UUIDs, and so we can write our own hash function that skips three out of the four properties – it can use id, and be equally as good as Swift’s generated function.
This all might sound hard to do, but Swift actually does most of the work through a type called Hasher. If we write our own hash(into:) method to replace the built-in one, we can call hasher.combine() with any data we want to have it added to our hash. So, for example the default Swift-generated Hashable conformance looks a bit like this:
func hash(into hasher: inout Hasher) {
    hasher.combine(id)
    hasher.combine(name)
    hasher.combine(latitude)
    hasher.combine(longitude)
}
Tip: As you can see, the hasher only includes stored properties, so it won’t attempt to include the value of coordinate.
As I said, the id value alone is enough to generate a unique hash for this object, so we can write a simpler hash(into:) implementation – add this to the Location struct:
func hash(into hasher: inout Hasher) {
    hasher.combine(id)
}
That tells Swift it can calculate the hash value for each Location struct just using the id property, which is perfect.
Now, in terms of user functionality nothing has actually changed here, but this extra code does matter because we’re saving our app from doing pointless work – we don’t need to hash every property to get something useful, and ultimately the fastest code is the code that never gets run.
Right now, our user can search for map locations using a dedicated textfield and button we placed above the map, but SwiftUI has a dedicated searchable() modifier for this exact purpose. This creates a stylized search box right in the title bar of the app, which looks a lot better for many apps including this one, I think.
Converting our app to use this new modifier takes only two changes, starting by adding these two modifiers to the NavigationSplitView:
.searchable(text: $searchText)
.onSubmit(of: .search, runSearch)
The first one tells SwiftUI this view is searchable, and that we want to track the user’s current search entry in the searchText property that we’re already using. The second one is a slight variation of the onSubmit() modifier we’ve used already, because now we’re explicitly looking for searches being submitted.
The second change is even easier: we need to delete the HStack containing our search box and button, and with that gone we can also remove the VStack wrapping both it and our Map view, making the whole code much easier.
Run the app and see what you think – do you prefer that kind of search bar over one we made ourselves? This approach does have the advantage that the search box automatically collapses down to an icon when space is restricted, but given that search is the main functionality of the app you might find it odd to have it off to one side.

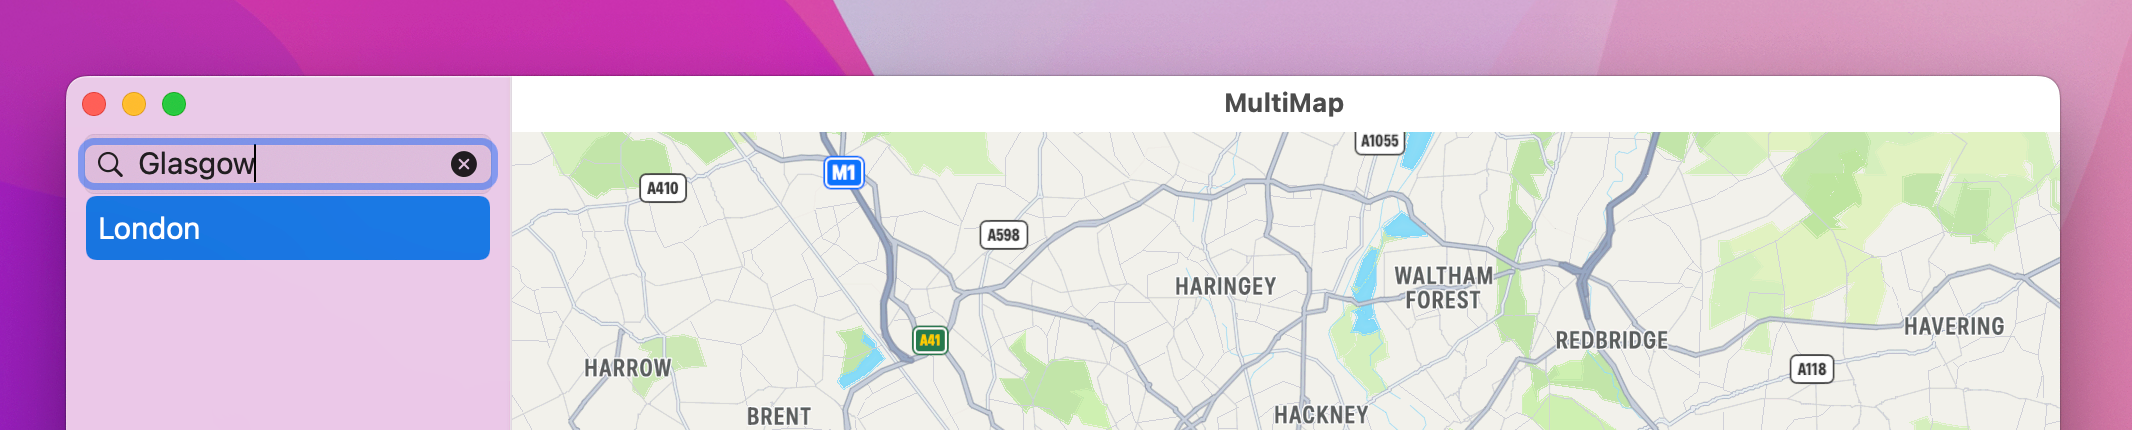
There is a slight searchable() variation you can try, and you might prefer it:
.searchable(text: $searchText, placement: .sidebar)That asks the search bar to appear above the search results, which you might find is a more natural position.
This change does put our title bar back to being a bit skinny looking, though, so I want to show you a useful technique that helps reduce the amount of UI on screen for situations like this.
If you head to MultiMapApp.swift, you’ll see the usual WindowGroup code there for creating our content view. Well, that WindowGroup struct has a windowStyle() modifier that lets us hide the titlebar completely, like this:
.windowStyle(.hiddenTitleBar)If you run the app again you’ll see things might not quite be what you expect: the title bar has now gone, but there’s just a gray space there instead – the map hasn’t move up to fill the gap.
This happens because of the safe area: the parts of our UI that SwiftUI considers safe for important UI controls. The titlebar, hidden or not, is outside the safe area, so the map will naturally stay away from it. We can allow the Map view to expand to fill the space by adding a new ignoresSafeArea() modifier to it:
.ignoresSafeArea()For more advanced situations you can add extra parameters to ignoresSafeArea() to control which parts of the safe area you want to ignore, but by default it ignores them all and it solves our problem perfectly – if you run the app again you’ll see the map extends all the way to the top of the window, but you can still click and drag the window using that part of the window.
Before this app is done, I want to make four small improvements that make the whole experience better:
None of these are difficult, but they all help make the app feel a lot better. That last one in particular is a really important step in building a macOS app, where users expect common keyboard shortcuts to Just Work.
Anyway, let’s work through these changes in order, starting with animating the map movement. Animating changes in SwiftUI is often as easy as wrapping your changes in a call to a function called withAnimation(), which in our case means adjusting the mapCamera = .region(newRegion) line in our onChange() modifier to this:
withAnimation {
    mapCamera = .region(newRegion)
}
That’s one done already!
Next, when the user successfully searches for something, we’re going to clear the text input so they are ready to search again. This takes just one line of code in runSearch() – place this after the selectedLocations = [newLocation] line:
searchText = ""That’s two down!
Third, if the user quits the app without having completed their current search, we’re going to store their text for next time the app runs. This can be done by using @AppStorage for their search text, instead of plain old @State:
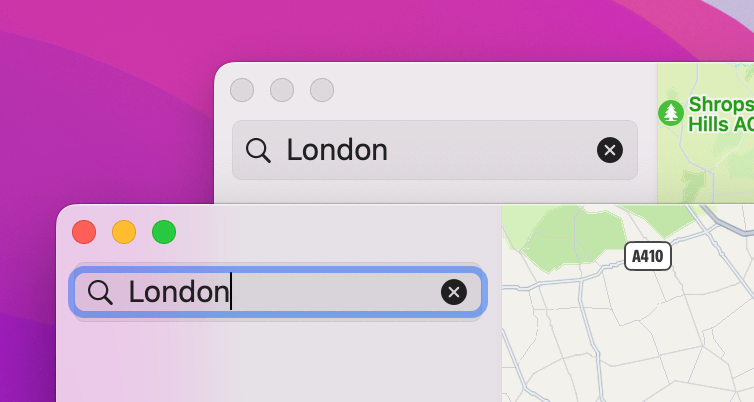
@AppStorage("searchText") private var searchText = ""That small change is all it takes to have our app remember what the user had partly typed – you can now run the app, type something without submitting the search, quit, then relaunch it to see the saved text. Even more impressively, if you press Cmd+N to open a new window you’ll find that your typing automatically and instantly synchronizes between both windows, without any extra work from us.
The final improvement we’re going to make is to allow the user to delete locations they no longer want. When we added the Hashable conformance to Location, Swift silently added conformance for a second protocol for us: Equatable. This is what provides access to == comparison for two objects, but it also provides access to the firstIndex(of:) method for arrays. This method scans through the array to find the first location where an object exists, or returns nil if the object isn’t in the array. In this case it’s the ideal way to find a location before we call remove(at:) on the array to remove it.
Add this method to the ContentView struct now:
func delete(_ location: Location) {
guard let index = locations.firstIndex(of: location) else { return }
locations.remove(at: index)
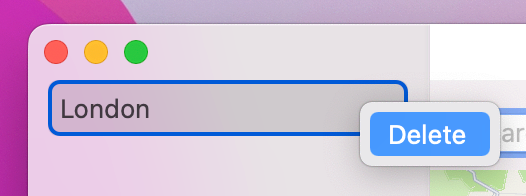
}We want to run that whenever the user asks to delete things using a context menu – a popup menu triggered with a right-click, Ctrl-click, or two-finger tap on a particular row. This is another task that SwiftUI makes almost trivial thanks to its contextMenu() modifier: attach this to any view, then provide it with a list of buttons you want to have in the menu.
These buttons can be just normal SwiftUI buttons, but in this instance we’re going to use a slight variant: we’re going to give the button a role that marks it as being destructive, because it will destroy locations when activated. If you were building SwiftUI apps for iOS this would color the context menu item red, but on macOS I think it’s identical – I certainly can’t see a difference between destructive buttons and regular buttons. Still, I think it’s good practice to get into, not least for when you want to start porting your code to other Apple platforms.
Here we want a context menu attached to each row so we can show a delete button, and when it’s pressed we’ll call delete() with the current location. So, change your current list row code to this:
Text(location.name)
    .tag(location)
    .contextMenu {
        Button("Delete", role: .destructive) {
            delete(location)
        }
     }
And that’s the fourth and final piece of polish all done! Honestly it doesn’t take a lot to make our app work better, but it really matters to users – you’re making the user interface a bit slicker, you’re adding common pieces of functionality, and also helping save their time, all of which will make your users much happier!
At the core of this project is MapKit, and as you’ve seen it’s not too hard to bring interactive maps and custom annotations into our apps. If you explore the Map initializer you’ll find it’s capable of even more: you can customize the gestures the user can work with, whether it should show the user’s location, and even whether it should follow the user’s location.
But alongside just maps, this project was also my way of introducing you to a number of really important SwiftUI features, particularly for macOS:
@AppStorage to save user information for lateronChange()MKLocalSearchUUID to identify objects uniquelyHashable conformance…and more, all in a deceptively simple app. Good job!
If you’d like to try taking this app further, here are some suggestions:
item.placemark.country in your Location struct, then showing that on the screen?Copyright © 2023 Paul Hudson, hackingwithswift.com.
You should follow me on Twitter.