![]()
This is going to be a project entirely unlike all the others in this book, because you’re going to learn how to build a command-line tool – a program that runs through the macOS Terminal app rather than being graphical.
Now, you might well think this doesn’t affect you, because perhaps you plan to use SwiftUI for everything. But hold up: alongside learning how to build a command-line tool, I’ll also be showing you how to bring in third-party libraries using Swift Package Manager, and how to use Apple’s NaturalLanguage framework to perform sentiment analysis, detect names of people and places in text, suggest alternative for words to make searching more useful, and more – there are lots of really useful skills that you can use in any other projects you build, so it’s definitely worth following along.
When we’re done, users will be able to run our program and feed in a bunch of text of their choosing, which will then be analyzed in all sorts of useful ways.
To get started, create a new macOS project in Xcode using the Command Line Tool template. Call it TextParser, then save it on your desktop – let’s get started!
When the project opens you’ll notice it’s much simpler than a SwiftUI project: only a single file called main.swift, with no asset catalog in sight. That main.swift file does a bit of magic in Swift because of its name – when you include a file called main.swift in your project, Swift will automatically make sure its code gets run immediately when the program runs.
Try it now: press Cmd+R to build and run your code. You should see “Hello, World!” printed out, because of that print() line in main.swift. Behind the scenes, all Swift programs need to start with a function call main() that will be run by macOS when they start, but to make command line tools easier to build Swift does this magic: it effectively wraps code in main.swift inside a synthesized main() function, which gets called.
We don’t want this magic here, because having lots of loose code that runs in sequence is a messy way to program. Instead, we want complete control over our code, so we can decide exactly how it works. So, I’d like you to rename main.swift to be App.swift – you should be able to click the filename in the project navigator to do that.
Now when you press Cmd+R you’ll see a compiler error: “Expressions are not allowed at the top level”. This means it’s no longer possible to just write print() in your code, because Swift has no idea when that should be run.
Instead of just writing “loose” Swift code, we’re going to create a formal struct that contains properties and methods – it’s the clearest and easiest way to organize our code. So, replace the existing print() code with this:
struct App {

}
And now you’ll see the dark underbelly of Swift’s magic come to the foreground: a new compiler error, saying “Undefined symbol: _main”. This is Swift’s way of telling us it’s looking for a main() function to run when the program starts, but it doesn’t have one – and it doesn’t have one because we renamed our file to something other than main.swift, so it won’t generate one for us any more.
To fix this we need to tell Swift where the program’s entry point is – which piece of code it should run when it’s time to launch our app. This is done in two steps, starting with a special attribute called @main. If you look back you’ll also notice it in our SwiftUI projects because it’s used everywhere to mean “this is the part that starts your program.”
So, change the struct to this:
@main
struct App {

}
And now you’ll get a different error, because when we use the @main attribute on a struct we must also add to that struct a new static method called main(), like this:
@main
struct App {
    static func main() {
        print("Hello, World!")
    }
}
That effectively becomes the main() function that macOS calls when our program runs, except now there’s a lot less magic – it’s our function, in our struct, and can be organized or added to as needed.
Of course, just printing “Hello, World!” isn’t interesting. Our program needs to be able to accept text from the user and print it out, and we can read the list of all command-line arguments (extra text passed into our program) like this:
static func main() {
    print(CommandLine.arguments)
}
When you run that you’ll see a long path name, because the very first command-line argument is the name of our program itself. To try adding more, go to the Product menu and choose Show Build Folder in Finder. This will bring up a directory containing Products, and inside there is another folder called Debug.
This next part is important: I’d like you to run the macOS Terminal app, then drag the Debug folder into your Terminal window and press return. This will cause Terminal to change into the Debug directory, which is exactly what we want because it allow us to run the program directly inside Terminal and add our own options.
Important: If you see “Permission Denied”, try writing “cd” into the terminal before the path to your Debug directory, e.g. “cd /path/to/Debug”.
So, try running this now: ./TextParser This is a great app. You should see the following output:
["./TextParser", "This", "is", "a", "great", "app"]Tip: The ./ at the beginning is there as a security feature of macOS – it stops you from accidentally running a program in the local directory.
If you don’t see that output it means you’re in the wrong directory – make sure you drag the Debug folder from Finder into Terminal, not Products or anything else!
That simple array of input is a good start, but it’s not quite what we want for two reasons: we don’t want the program name at the beginning, and we want a simple string of all the input rather than an array.
We can get both those things cleaned up inside main(), and it leaves us all prepared for the rest of the features we plan to implement. We can remove the program name from the start by calling dropFirst() on the array, and we can convert the remaining strings into one single string using the joined(separator:) method, like this:
static func main() {
    let text = CommandLine.arguments.dropFirst().joined(separator: " ")
    print(text)
}
I recommend you continue running the program in Terminal rather than through Xcode, because it lets you control the input more precisely – just make sure you always press Cmd+B in Xcode first, so that it rebuilds all the code!
The first step in our program will be to perform semantic analysis – to read the text our user entered and try to decide whether it conveys positive or negative emotion. This is used in all sorts of places, with the most public recent example being Twitter’s “Are you sure you want to tweet that?” warning that appears if someone tries to write a very negative reply to someone else.
I think you’ll be impressed by how little code it takes to perform semantic analysis with Swift, although I have to admit the code itself is pretty ugly – Apple has a bad habit of trying to make individual classes do a great many different things, and so the exact syntax API is pretty gnarly. We don’t want it to pollute the rest of our program, though, so we’re going to wrap it up a method that accepts a string and returns a Double in the range of -1 (very negative emotion) to +1 (very positive emotion.)
Start by adding an import for the NaturalLanguage framework, which is what provides sentiment analysis and all the other core functionality we’ll be using in this project. I prefer to put this below import Foundation because I find it easier to read imports in alphabetical order, but you can put it wherever:
import NaturalLanguageNow add this method stub to the App struct:
static func sentiment(for string: String) -> Double {
}
Tip: That needs to be marked static because it’s being called from the static main() method. Don’t worry, we’ll be cleaning this up later!
We’re going to fill that in piece by piece, mostly to shield your eyes from the rather ugly API here.
First, we create an instance of NLTagger, whose job it is to analyze our text and “tag” it with meaning. What that meaning is depends on what we ask NLTagger to do – we’re looking for sentiment here, but it can also divide text into sentences, or a dozen other tasks.
Add this to the method:
let tagger = NLTagger(tagSchemes: [.sentimentScore])Notice how we’re giving it an array of tag schemes to work with – it can perform multiple analyses at the same time if you want, or in our case we can just tell it to prepare for one job.
Next we need to provide it with some input, which in our case is whatever string was sent into the method. Add this next:
tagger.string = stringNow we need to ask the tagger to scan through the string and send back a sentiment score. This is done using the tag(at:unit:scheme:) method, which needs to know:
NLTagger to evaluate many different things at the same time if you want, so now we’re saying which of those active schemes we’re actually inquiring about.When we call this method, it sends back two pieces of information: an optional instance of NLTag describing what was found, plus the range where it was found. We don’t care about the range, only the result, so add this line of code next:
let (sentiment, _) = tagger.tag(at: string.startIndex, unit: .paragraph, scheme: .sentimentScore)Now for the annoying part:
NLTag might not exist, because NLTagger might have found nothing.NLTagger is able to scan for and return a wide variety of lexical information.When performing semantic analysis, the resulting NLTag should ultimately contain a value between -1 and +1 to represent a value between very unhappy and very happy respectively, but we need to dig a little:
rawValue property of the tag, which is a string. Remember, this could be a particular word in the text, for example, but we know it’s actually a number that’s just stored as a string.Double, so we can use it in a sensible way.Double conversion might fail because the string could contain anything, so we need a second default value of the number 0 for times when the conversion fails.Yes, it’s quite messy, and honestly I rather wish Apple had just exposed a single sentiment() method that returned a Double directly, but we’re stuck with it, and at least this one method isolates the mess away from the rest of our program.
So, finish the method with this final line:
return Double(sentiment?.rawValue ?? "0") ?? 0Yes, double nil coalescing, plus numbers hiding inside strings, but… well, at least we’re done with it now.
Now that the method is complete, we can call it from the main() method. We already have code there to convert the array of command line arguments into a single text string, so now we can add some code there to print an empty line, calculate the sentiment using our new method, then print out the result, like this:
print()
let sentiment = sentiment(for: text)
print("Sentiment analysis: \(sentiment)")
Press Cmd+B to rebuild the app, then try running the command again. Try entering a variety of input:
You’ll find the output isn’t perfect – sometimes it will think a very negative string isn’t as bad as a less negative string, for example – but mostly it does a great job, and it takes so little code to use.
For fun, try entering “Swift” to see how much your program likes Swift, then try entering “Objective-C” – I think you’ll be surprised!
The next feature we’re going to add to our program is the ability to pick out similar types of words for things the user said. In the NaturalLanguage framework this is called word embeddings: maps of strings that are associated by their context, rather than the specific meaning.
This is less useful for whole strings of text, but is really useful for any time you want to let the user search for information – if they tag a photo with “blizzard”, “family”, and “vacation” for example, then they would reasonably expect searches for “snow”, “child”, or “trip” to match that photo.
Apple’s NaturalLanguage framework is really smart here, because it doesn’t think in terms of simple synonyms for a word. Instead, it thinks about how words are used and sends back other words that are used in the same context along with roughly how far away from the original word they are. So, if we looked up “dog” we might get back “canine”, “puppy”, and “pet”, but also specific breeds like “poodle”, “pug”, and “beagle”, words that are dog-related such as “kennel”, and even words that relate to other pets such as “cat” and “feline”.
Okay, let’s get into some code, starting with the stub of a new method. Just like semantic analysis, this is going to hide all the complexity inside the method to keep the rest of our code clean, so add this:
static func embeddings(for word: String) -> [String] {
}
Notice how that takes an individual word, not the whole string – you’ll see why later on, when we add some preprocessing to the user’s input.
Inside our method we’re going to create an array of all the results we find, which will contain all the nearby words for the input string, along with their distances. We can then load up the list of word embeddings for English, then do the work of processing the neighbor words.
Add this to the method now:
var results = [String]()

if let embedding = NLEmbedding.wordEmbedding(for: .english) {
    // more code to come
}

return results
As you can see, you do need to be precise when it comes to asking which language you’re looking for, and only a handful actually support these word embeddings: English, Portuguese, French, Italian, German, and Spanish all work (they are such a popular group you might hear them shortened to just “EPFIGS”), but Mandarin, Dutch, Hungarian, Norwegian and many others aren’t so lucky.
Anyway, obviously the important work happens in place of that // more code to come comment, where we need to ask our language embedding to provide some number of similar words. We’ll ask for 10 here, so start by replacing our comment with this:
let similarWords = embedding.neighbors(for: word, maximumCount: 10)When that runs, similarWords will contain an array of our results in a particular format: it’s an array of tuples, where each tuple contains a neighboring word and also its distance – roughly how “far” away the word is from the input. Remember, this does not mean how much of a synonym these two words are, but instead it’s more like “how likely is this word to be used in the same context as the input word.”
We’re going to loop over each word that was sent back, adding its neighbor and distance to our results array, so put this code after the previous line:
for word in similarWords {
    results.append("\(word.0) has a distance of \(word.1)")
}
That’s the whole method finished, so now we can head back to main() and put it to use – add this after the current sentiment analysis code:
print()
print("Found the following alternatives:")

for word in text.components(separatedBy: " ") {
    let embeddings = embeddings(for: word)
    print("\t\(word): ", embeddings.formatted(.list(type: .and)))
}
That does a few things:
formatted() on a string array, asking it to parse the list into a single string so that the final element has “and” before it like in natural English.Press Cmd+B to build the program, then try running it with the text “rainy vacation”. You should get a sentiment analysis of -0.4, along with alternative words such as monsoon, summer, rain, wettest, and rainfall for “rainy”, then trip, weekend, honeymoon, and sightseeing for “vacation”.
That’s a good start, but we can do better: rather than feeding the text string directly into the word embedding, we can first lemmatize it. Lemmatization is the process of reducing any word to its root form, which might be the stem of the word or might be something else entirely.
For example, the stem of “running” is “run”, and the stem of “fastest” is “fast” – we can just remove some letters to get to the root form of the word. But for other words such as “geese”, the root form of the word is “goose”, so we actually need some knowledge of the language’s grammar and vocabulary.
Fortunately, this knowledge is baked right into macOS thanks to the NaturalLanguage framework: we can lemmatize a string to reduce every word in it to its root form. This by itself is a huge win because it means users who search for “geese” (as I’m sure is very common!) will find data in their app matching the tag “goose”. Even better, we can then pass that lemmatized list through our word embedding search, which might be able to provide better results.
Lemmatization is another task accomplished through NLTagger, except now rather than reading one single value like we did with sentiment analysis, instead we need to loop over all the results and add them individually to an array. This slightly more complex approach allows us to remove whitespace as we go, but also to skip over any results that end up being empty once that whitespace is stripped.
Let’s start with the easy part: creating a new method that will turn a single string into an array of strings. Internally this will create another NLTagger using the .lemma scheme, send in the string we want to work with, then create and return an array of strings that will contain the root form of each word.
Add this method to your struct now:
static func lemmatize(string: String) -> [String] {
    let tagger = NLTagger(tagSchemes: [.lemma])
    tagger.string = string

    var results = [String]()

    // more code to come

    return results
}
Now for the important part: we need to replace the // more code to come comment with a call to tagger.enumerateTags(), which will loop over all the words and find the lemmatized form of each one. Reading that word stem is a little ugly, just like it was when working with semantic analysis, because there might not be a tag attached, but once again we’re wrapping up all the mess inside one method so the rest of our code doesn’t have to worry about it.
Add this method call in place of the comment:
tagger.enumerateTags(in: string.startIndex..<string.endIndex, unit: .word, scheme: .lemma) { tag, range in
    let stemForm = tag?.rawValue ?? String(string[range]).trimmingCharacters(in: .whitespaces)

    if stemForm.isEmpty == false {
        results.append(stemForm)
    }

    return true
}
As you can see, the last parameter to enumerateTags() is a function that accepts a single tag plus the range where it was found in the text. This gets called once for each match, and there are four important parts to that code:
rawValue string.range, making sure to remove any whitespace.results array.true after each word tells enumerateTags() to keep going – you can return false if you want to bail out early.That’s the new method complete: we can give it a single string, and get back an array of strings containing all the root words from our text.
Now, earlier we wrote some odd code: we combined the user’s input array into a single string for semantic analysis, then split that string back up into an array for word embeddings. Hopefully now you can see why: rather than using text.components(separatedBy: " "), we can instead lemmatize the text and use its returned string array for our word embeddings. So, change your word embeddings code to this:
let lemma = lemmatize(string: text)
print()
print("Found the following alternatives:")

for word in lemma {
    let embeddings = embeddings(for: word)
    print("\t\(word): ", embeddings.formatted(.list(type: .and)))
}
And now we get much more power: our app will print all the root forms for each word the user entered, then use those root forms for word embeddings – nice!
To try it out, press Cmd+B in Xcode to rebuild the compiled app, then run it from the command line – try a complex sentence like “The fluffiest mice are running towards me” to see how lemmatization correct finds the stems for each word. In this case it will send back “the, fluffy, mouse, be, run, toward and I”, so you can see how it turns superlatives into their plain adjective, singularizes nouns, unconjugates verbs, and more.
We’re going to add two more useful features to our program before we move on: the ability to detect the language used inside our text, and also the ability to detect the names of people, places, and organizations.
We’ll start with detecting the language, because it’s trivial. In fact, it’s so easy you can just put this straight into main(), right after the CommandLine.arguments.dropFirst() line:
let language = NLLanguageRecognizer.dominantLanguage(for: text) ?? .undetermined
print()
print("Detected language: \(language.rawValue)")
That’s all it takes – it couldn’t be much easier! Note that it detects the dominant language, which is an important consideration:
Anyway, we can now focus on the harder part of this task, which is detecting various names inside text. This is another use for NLTagger, and at the basic level it’s almost identical to the code for lemmatization.
So, start by adding this new method:
static func entities(for string: String) -> [String] {
    let tagger = NLTagger(tagSchemes: [.nameType])
    tagger.string = string
    var results = [String]()

    tagger.enumerateTags(in: string.startIndex..<string.endIndex, unit: .word, scheme: .nameType, options: .joinNames) { tag, range in
        // more code to come
    }

    return results
}
That’s more or less the same code we started out with for lemmatization, except now we’re using the .nameType tag scheme. Notice I snuck an extra option into there: .joinNames. This is really important when working with names because it combines multiple words into a single name – “New York” gets read as a single place name, for example, and “Steve Jobs” gets read as single person’s name.
Anyway, once again the important work is inside the closure, where we’re given one matching tag (a person, place, etc), along with the range where it occurs. In this instance we don’t read the raw value of the tag, because it will be a value telling us what kind of data was found: .personalName, .placeName, or .organizationName. We can then print out an appropriate message based on the range of the string that was matched.
So, replace the // more code to come comment with this:
guard let tag = tag else { return true }

let match = String(string[range])

switch tag {
case .organizationName:
    results.append("Organization: \(match)")
case .personalName:
    results.append("Person: \(match)")
case .placeName:
    results.append("Place: \(match)")
default:
    break
}

return true
You’ll notice that all other types of tag are ignored – NLTagger can detect all sorts of things, but we’re only looking for organizations, places, and people here. Once again, the return true at the end tells enumerateTags() to carry on scanning after it gets a match, so it will look through the entire text.
Before you try running the code, make sure and actually call it in main() somewhere – add this to the end of the method:
let entities = entities(for: text)
print()
print("Found the following entities:")

for entity in entities {
    print("\t", entity)
}
Now press Cmd+B, then try running the app with text such as this: “Designed by Steve Jobs in New York”.
Detection of organizations, people, and places is all done using a fairly rough heuristic, so don’t expect magic – you’ll probably find that London comes up as an organization and Las Vegas comes up as a person, for example. So, it’s definitely a useful tool to have in your arsenal, but use it judiciously.
Much as some people might think otherwise, we can’t write all the code: sometimes it’s complicated, sometimes it requires specialist knowledge such as encryption, or sometimes the functionality just changes so fast that it would be a real time sink to follow.
Fortunately, Swift comes with a package manager built right in, called simply Swift Package Manager or SPM. Package managers let us add third-party code to our projects, and more importantly also help keep that code up to date over time so you can bring in bug fixes and more.
Being able to bring in and use third-party packages is a really important skill, but many developers for Apple’s platforms don’t like it – they like to use Apple’s own APIs and nothing else. I’m not going to get into that here, because helpfully Apple actually publishes several amazing Swift packages that include useful functionality. So, I get to show you how to bring in these packages, folks who fear third-party packages will be happy that it’s Apple’s own package, and we get to add great features to our app all in one.
The package I want to use here is called Swift Argument Parser, which is designed to read command-line arguments in a flexible way. If you’ve used other command-line programs you’ll know that you can provide options to them, such as using grep -i to get case-insensitive searching, or swift --version to see which version of the Swift compiler you have. It’s possible to add lots of these, and making sure they all work correctly is hard.
This is where Swift Argument Parser comes in: it makes it trivial to add support for even complex command-line configuration options, all through a mix of property wrappers.
First we need to actually ask Xcode to add Argument Parser to our project. This is done by going to the File menu and choosing Add Packages, then selecting Apple Swift Packages from the list of collections, and finally choosing swift-argument-parser. If you don’t see that option, try entering the following URL into the “Search or enter package URL” box in the top-right corner: https://github.com/apple/swift-argument-parser.
Before you click Add Package, I’d like to point out one really important part of this screen: where it says Dependency Rule, Xcode probably says “Up to Next Major Version”. This is really important, and is also what provides us with safety when bringing in third-party packages like this one.
Most open-source software follows a very precise version numbering convention called semantic versioning, or semver for short. If a fictional package called AwesomeTool had the version 1.2.3, it means:
So, when Xcode suggests “Up to Next Major Version”, it means it will download updates such as 1.2.4 or 1.3, all the way up to something like 1.999.999, and it can do so safely because minor version number changes like this mean our code won’t break as a result of the update. It won’t go to AwesomeTool version 2.0.0 or later, because the change in major version means breaking changes have been made.
Anyway, Xcode’s default setting is fine, so please click Add Package to have Xcode download the Swift Argument Parser code, then click Add Package again to have Xcode install it into our project ready to use. You’ll see it appear in the project navigator under Package Dependencies, and if you ever change your mind and want to remove it you can open your project’s settings, go to the Package Dependencies tab, then delete it from there.
Now that we’ve added Argument Parser to our project, we can use it inside main.swift with a simple import line – add this before the other two we have already:
import ArgumentParserThat was the easy part. The slightly trickier part is how we adapt our program to use Argument Parser, because there is an inversion of control: rather than our program trying to use Argument Parser’s APIs to read values in after it has been launched, instead Argument Parser handles the launching of our app – it provides its own main() function – so that it can read all the command-line data, and then hands over control to us when it’s ready.
In order to flip this around, we need to start by making the App struct conform to a protocol that comes from Argument Parser, called ParsableCommand. This is what provides the default main() implementation, which means we shouldn’t provide our own any more.
Instead, we need to implement a new, non-static function called run(), so change this code:
struct App {
    static func main() {
To this:
struct App: ParsableCommand {
    mutating func run() {
The final step is to remove the static keyword from all the other methods – just turn static func sentiment into func sentiment, for example.
Those changes are enough to make our code compile again, so press Cmd+B now and try running it from the Terminal app using something like “./TextParser Designed by Steve Jobs in New York”. If everything has gone to plan you should see an error message: Error: 7 unexpected arguments: 'Designed', 'by', 'Steve', 'Jobs', 'in', ‘New’, ‘York’. Yes, our program no longer works, but that’s okay – it’s intentional.
What’s happening here is that we haven’t told Argument Parser to expect a string typed in after our command line, so it thinks the user has made a mistake. In fact, if you look just below the error you’ll see Argument Parser actually prints some information on how the command should be used.
So, now things are turned around: rather than our program trying to read in its command-line options, Swift Argument Parser does that for us and only runs our code when all the data is ready. This means we need to tell Argument Parser exactly what data it should expect and how it will be provided, which is done using one of several property wrappers.
There are three we care about in this project:
@Flag property wrapper is designed to represent a simple Boolean value: either the flag is set to enable a feature, or it isn’t.@Option property wrapper lets us read a specific value, such as how many alternative words to print.@Argument property wrapper represents a positional value being passed in, which means Argument Parser identifies it based on its position rather than a specific name.We’ll be using each of these eventually, but for now it’s that last one we need to use: everything that doesn’t have a specific name should be used as text input for our program.
Each of those property wrappers has a help parameter that lets us control how it appears in the program’s usage description, which in this case should be some text telling the user that their input string is the text to analyze.
So, add this property to the App struct now:
@Argument(help: "The text you want to analyze")
var input: [String]
There are two things I want to point out there:
Now that we have a dedicated array for user input, we can replace the whole CommandLine.arguments.dropFirst() code in the run() method with something much simpler:
let text = input.joined(separator: " ")Press Cmd+B to build the code again, then try running it from the command line – you should see the app is back to working normally again, but even better if you run it without any text input you’ll see Argument Parser’s help text now mentions the input string help.
So, not only does Argument Parser automatically take care of reading all the user’s input before calling our run() method, but it also automatically generates help text based on the property wrappers we use!
Now that we have Swift Argument Parser working well, we can go ahead and add a bunch more configuration options that let the user configure exactly what our app should do – do we want name parsing? Do we care what language is used? Rather than always doing everything, we can make our tool configurable!
Start by adding five new @Flag properties to the App struct:
@Flag(help: "Show detected language.")
var detectLanguage = false

@Flag(help: "Prints how positive or negative the input is.")
var sentimentAnalysis = false

@Flag(help: "Shows the stem form of each word in the input.")
var lemmatize = false

@Flag(help: "Prints alternative words for each word in the input.")
var alternatives = false

@Flag(help: "Prints names of people, places, and organizations in the input.")
var names = false
As you can see, these are all Booleans and all default to false. That’s exactly how flags work: they are simple options that are either set or not set, so by default our flags are all unset.
Of course, just creating some properties doesn’t actually change the behavior of our project – we need to read those flags somewhere and make our app respond appropriately. Mostly this is just a matter of putting simple if conditions around the work in run(), like this for detecting the language:
if detectLanguage {
    let language = NLLanguageRecognizer.dominantLanguage(for: text) ?? .undetermined
    print()
    print("Detected language: \(language.rawValue)")
}
Or this for finding word alternatives:
if alternatives {
    print()
    print("Found the following alternatives:")

    for word in lemma {
        let embeddings = embeddings(for: word)
        print("\t\(word): ", embeddings.formatted(.list(type: .and)))
    }
}
Or this for detecting named entities:
if names {
    let entities = entities(for: text)
    print()
    print("Found the following entities:")

    for entity in entities {
        print("\t", entity)
    }
}
There is one exception, though: if lemmatization isn’t enabled by itself we need to do it anyway so we have input for word embeddings, but we don’t want to do the work twice in the situation where both lemmatization and embeddings are requested.
Swift has a beautiful solution here, and honestly it’s something not enough people know about: we can use the lazy keyword with local variables, meaning that we can delay some work until it’s actually used without needing to create it twice if it’s used twice.
And so that whole lemmatization and word embedding section can be rewritten like this:
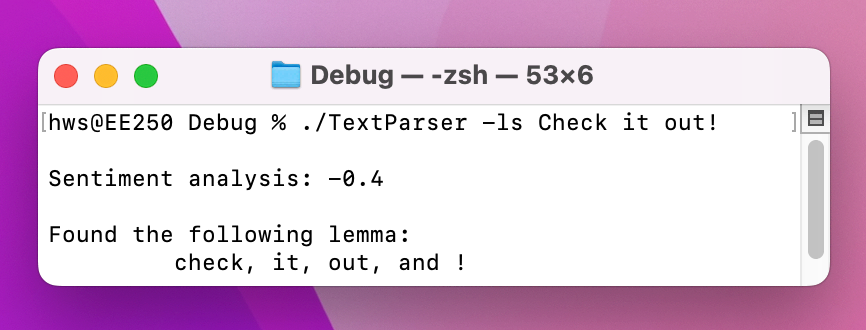
lazy var lemma = lemmatize(string: text)

if lemmatize {
    print()
    print("Found the following lemma:")
    print("\t", lemma.formatted(.list(type: .and)))
}

if alternatives {
    print()
    print("Found the following alternatives:")

    for word in lemma {
        let embeddings = embeddings(for: word)
        print("\t\(word): ", embeddings.formatted(.list(type: .and)))
    }
}
Yes, we’re calling lemmatize(text:) no matter what options are set, but that’s okay – it’s marked lazy, so the work to lemmatize the input will only be done if it’s actually used.
With all those options in place, our program behaves very differently because by default it won’t perform any of the analyses we’ve built – it will accept the user’s input text then do nothing with it. To fix this, I think a sensible behavior is to enable everything automatically when no specific options are requested, meaning that the app does everything unless the user specifically requests otherwise.
Add this to the start of the run() method:
if detectLanguage == false && sentimentAnalysis == false && lemmatize == false && alternatives == false && names == false {
    detectLanguage = true
    sentimentAnalysis = true
    lemmatize = true
    alternatives = true
    names = true
}
Before we’re done with this project, there are three last features I want to implement that help make it work better.
First, we’re going to use a third Argument Parser property wrapper to let the user customize how many alternative words should be shown when word embeddings are enabled. This is almost identical to using flags, except now rather than handling a simple true/false value we instead provide any value.
Add this new property now:
@Option(help: "The maximum number of alternatives to suggest")
var maximumAlternatives = 10
We can then add use that in the embeddings(for:) method:
let similarWords = embedding.neighbors(for: word, maximumCount: maximumAlternatives)Second, I want to make the command a little easier to call. To see the problem in action, press Cmd+B in Xcode then run “./TextParser --help”. You’ll see all our configuration options there along with the help we added, but notice how they are quite hard to type – writing “--sentiment-analysis” or “--maximum-alternatives 20” is really verbose.
To improve this, we can allow the user to specify those names if they want, or provide short alternatives for folks who know exactly what they want. This is enabled by adding a name parameter to all of our property wrappers except for the @Argument, which doesn’t use a name.
So, amend the others like this:
@Flag(name: .shortAndLong, help: "Show detected language.")
var detectLanguage = false

@Flag(name: .shortAndLong, help: "Prints how positive or negative the input is.")
var sentimentAnalysis = false

@Flag(name: .shortAndLong, help: "Shows the stem form of each word in the input.")
var lemmatize = false

@Flag(name: .shortAndLong, help: "Prints alternative words for each word in the input.")
var alternatives = false

@Flag(name: .shortAndLong, help: "Prints names of people, places, and organizations in the input.")
var names = false

@Option(name: .shortAndLong, help: "The maximum number of alternatives to suggest")
var maximumAlternatives = 10
And with that users can now run our program using long names such as --lemmatize --sentimentAnalysis, but they can also use short names such as -l -s to get the same result. Even better, they can combine those short names together into something like -ls for extra brevity.
The final change I want to make is to adjust the core description of the app itself. If you run it with --help you’ll see the usage description says “USAGE: app” followed by all the options. Our program isn’t called “app”; Argument Parser gets that name from the name of our @main struct.
To fix that we can either rename the struct to something more meaningful, or, better, add a configuration for the command. This latter option is better because it also allows us to provide an overall help description for the command, to go alongside the help text for each configuration option.
This is done through a static property called configuration, so add this now:
static var configuration: CommandConfiguration {
    CommandConfiguration(commandName: "analyze", abstract: "Analyzes input text using a range of natural language approaches.")
}
When you build and run again, you’ll see SwiftUI’s usage text has now changed so that the program is called “analyze” rather than just “app”. Note that this doesn’t change the program’s actual name on your filesystem – that still comes from Xcode’s project name. The best way to change that is while you copy the project across to your main filesystem so that it can be used anywhere, like this: cp TextParser /usr/local/bin/analyze.
Once you’ve run that copy command, you’ll find the analyze works everywhere on your Mac – it’s much more convenient than having to look inside Xcode’s build directory each time!
At first sight you might have thought this wouldn’t be an interesting project – although it does show another important area of macOS development, it’s not based around SwiftUI. However, I hope you can see how each of the text analysis techniques you’ve built can be used in any number of other apps you build – it takes surprisingly little work to implement, because Apple’s NaturalLanguage framework does all the heavy lifting for us.
Just as importantly, I hope you’re impressed by how easy Xcode makes it to pull in and use third-party packages. We use a command-line package here, but there are literally tens of thousands of others out there, including some real powerhouses from Apple – Swift Algorithms, for example, is one of my personal favorites!
If you’d like to try taking this app further, here are some suggestions:
if condition at the start of the run() method that enables all options if none were requested, and try making a dedicated --everything option instead – which do you prefer?Copyright © 2023 Paul Hudson, hackingwithswift.com.
You should follow me on Twitter.