![]()
In this project we’re going to build a game called Cows and Bulls, in which players must enter a string of four numbers into a text field in an attempt to guess a hidden number. If one of their digits is in the correct place it’s a “bull”, if it exists in the hidden number but is in the wrong place it’s a “cow”. The hidden number doesn’t contain any duplicate digits.
For example, if the hidden number were 1234 and the player guess 1389, they would have one bull (“1” is in the correct place) and one cow (“3” is in the hidden number but in a different position.)
To make this game work in SwiftUI we’re going to use the @State property wrapper and List like you’ve seen before, but we’re also going to use several more really important views as you learn how to let the user enter text, click buttons, and more.
Let’s get started now: create a new macOS App in Xcode, using SwiftUI for the user interface. Name it CowsAndBulls, then make sure all the checkboxes are unchecked.
Cows and Bulls requires three UI components: a text field for the user to enter their guess, a “Go” button that submits their answer, and a large list that contains their previous guesses.
Each time the user adds a new guess, we’ll be adding it to the list. This means we want the user interface to be able to resize vertically so the player can see more answers if they want, but we want it to have a fixed horizontal size.
First things first: we’re going to place all our UI out on the screen, connected up to example data just so we can see how things look.
If you want to return more than one view, you need to tell SwiftUI how they should be arranged. In this app we’re going to have a text field and a button side by side, then below that a big list of all their previous guesses and how right or wrong they were. In SwiftUI terms, this means having a horizontal stack (things placed side by side) and a vertical stack (things placed above and below) working together to make a grid-like structure.
We’re going to look at grids a lot more later on, but for now let’s start simple – replace your current body property with this:
var body: some View {
    VStack {
        HStack {
            TextField("Enter a guess…", text: .constant("1234"))
            Button("Go", action: submitGuess)
        }
    }
}
We’ll come back to what that does in just a moment, but first you need to add this simple submitGuess() method to ContentView in order to make your code compile:
func submitGuess() {
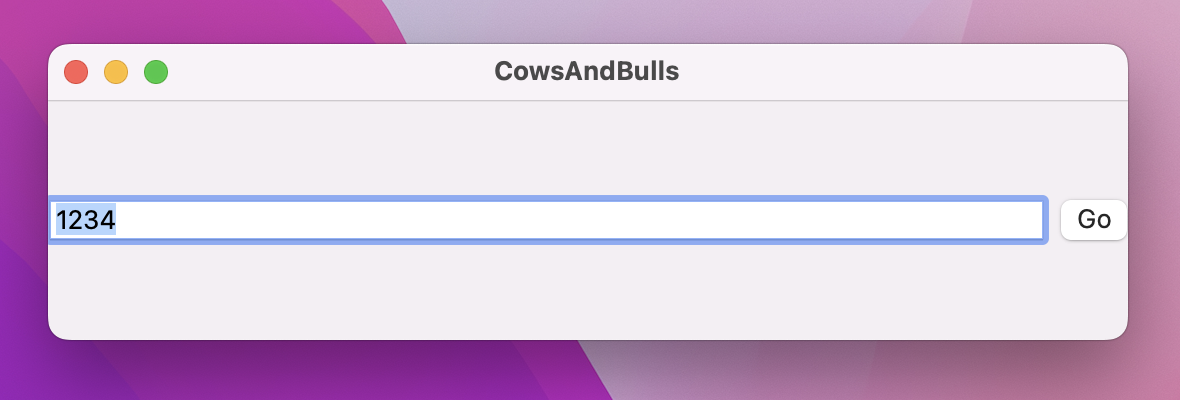
}Go ahead and run your project now, and you’ll see a window containing our text field and button – you should be able to resize it freely by grabbing any of the edges, but the text and button will always stay centered.
Before we go ahead and tweak that design, let’s stop and examine the handful of lines of code we already wrote. First, our two stacks:
VStack {
    HStack {
        // more code here
    }
}
That creates a vertical stack with a horizontal stack inside. Each stack can contain up to 10 views, and will place them side by side – that’s vertically for VStack and horizontally for HStack. For more advanced layouts, you can mix and match HStack and VStack to create grids.
Tip: There’s also a third stack type called ZStack, which lets us place views over each other to create depth, but we don’t need it here.
Inside our horizontal stack we added this view to create a textfield the user can type into:
TextField("Enter a guess…", text: .constant("1234"))As you can see, that takes two parameters: a string to display as the placeholder so the user has a hint as to what they should type, and the actual text to put inside. For the text we’ve specified a constant value of “1234”, which means the text field will be pre-filled with that when the app launches.
After the text field we create a button:
Button("Go", action: submitGuess)macOS gives us a number of button styles, but if we don’t request anything specific we get a default “push button” style – it has a light 3D effect, a gray background, and a color when pressed down. When the button is clicked it will call our submitGuess() method, which currently does nothing.
Before we add a list of guesses to our UI, let’s first make our window take up more space. Start by adding this modifier to the HStack, to add a little space around each edge of our layout:
.padding()Your code should look like this:
HStack {
    TextField("Enter a guess…", text: .constant("1234"))
    Button("Go", action: submitGuess)
}
.padding()
By default, the padding() modifier adds some amount of padding to all edges – the exact amount depends on what SwiftUI thinks is appropriate, and it usually does a good job. If you decide the default padding isn’t quite right, you can pass a number to padding such as padding(40) to get an exact amount of spacing.
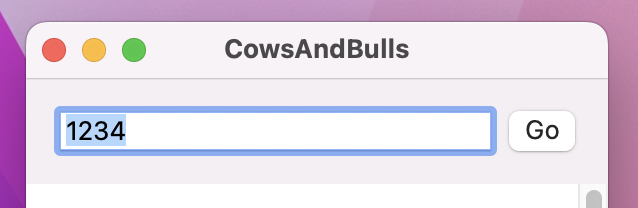
If you run the app again you’ll see the text field and button no longer sit right against the edges of their window, which looks better.
Now add these two modifiers to the VStack:
.frame(width: 250)
.frame(minHeight: 300)
Yes, that’s the same frame() modifier twice, which highlights one of the interesting features of SwiftUI: you can apply the same modifier multiple times, and they just combine. In this case we’ve told our VStack that it has a precise width of 250, which means it can’t get any wider or thinner than that. We then add to that a minimum height of 300, which means the VStack must be at least that height but could be much more.
Now, just telling the VStack it has a fixed size isn’t enough to force the whole window to be that size. For that to happen, we need to add a new windowResizability() modifier inside the CowsAndBullsApp.swift file – this will tell SwiftUI that the window size should be calculated based solely on its contents, rather than trying to resize freely.
So, add this modifier to the WindowGroup:
.windowResizability(.contentSize)If you run the app again you’ll see two things:
So, if we get a fixed height when using frame(minHeight:) why bother using it – why not just specify the fixed height?
What’s happening here is that SwiftUI is looking at the contents of our view, and doing its best to fit the window around what we have. Us saying that there is a minimum height means SwiftUI will always make sure at least that much space is available, but without a maximum height specified SwiftUI will go back to its previous behavior of making the window wrap tightly around its content.
Now, we could fix this by saying that the maximum height could be anything at all, like this:
.frame(minHeight: 300, maxHeight: .infinity)However, in this project there’s no need because we’re going to add a list directly below that VStack, showing a list of all the guesses made by the player. Remember, SwiftUI’s lists have a flexible frame of their own, because they are designed to scroll, so as soon as we add one SwiftUI will make the height flexible regardless.
Let’s add the guesses list now. First, we need some sample data to show in the list, so add this as a property to ContentView:
let guesses = Array(repeating: "1234", count: 20)That will create an array of 20 strings, each one being “1234” – we won’t be using that in the final project, but it gives us enough to prototype with here.
Now place this after the padding() modifier in the body property:
List(guesses, id: \.self) { guess in
HStack {
Text(guess)
Spacer()
Text("4c 0b")
}
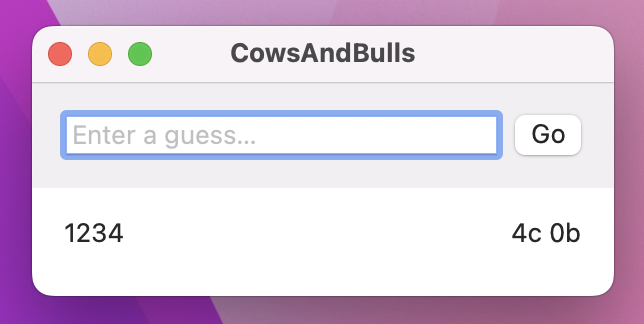
}Just like last time, I’d like you to run the project before I explain what the code does. You should now see a scrolling table of items below the text field and button, with each row in the table containing “1234” then a space then “4c 0b” – short for “4 cows 0 bulls”, which means all four guessed numbers were somewhere in the answer (cows), but none were in the correct position (bulls).
OK, let’s break down the code, starting with this:
List(guesses, id: \.self) { guess in
    // more code here
}
That creates a new list using our guesses array, which will automatically create one row in the list for each element in the array. We looked at \.self previously, and it tells SwiftUI that it can identify every item in our guesses array by just looking at the text itself – we’re saying that every string in the array will be unique.
To be blunt: this is a lie. Our guesses array does not contain unique data because we asked for the string “1234” to be repeated 20 times, and if you look in the bottom right of your Xcode window you’ll see we’ve been busted – there’s a big warning message saying “ID 1234 occurs multiple times within the collection, this will give undefined results!”
It’s critically important that you understand what’s happening here, and why it’s a problem, so I want to pause for a moment to dig into it a little.
When we make a list from an array, SwiftUI will automatically watch the array so that when items get added or removed they automatically get inserted or removed from the list.
Imagine we had an array like this:
Hello
World
If we inserted one item, we might get this:
Hello
SwiftUI
World
It’s pretty clear to us what changed, because we can see the first and last items are the same and an item was inserted into the middle. Swift can also see this for itself, because it has built-in functionality for detecting differences. So, SwiftUI leans on that to update its list: it would animate some space, then insert a new row with “SwiftUI” in.
When given an array of data, SwiftUI wants to know how it can uniquely identify each item in the array so that it can insert and remove rows as things change. In the case of string arrays, the only thing we have to work with is the string itself, so when we write id: \.self we’re saying “you can identify each item in the array using the item itself.”
This usually works well, but it does come with an important caveat that you’re making the promise that all your items will be unique. For example, imagine if we went from this:
Hello
SwiftUI
To this:
Hello
SwiftUI
SwiftUI
We can see that visually the list has changed, but now we don’t know how it changed – did we add a new “SwiftUI” to the end, or was it inserted into the middle? SwiftUI can’t tell how this changed, and so although it will update the list to reflect the change there’s a good chance you’ll get the wrong animation.
In our design we’ve repeated “1234” 20 times, which is what makes SwiftUI print its warning in Xcode, but that’s okay – it’s just temporary, until we get our actual game going.
The last piece of code is for the list rows themselves:
HStack {
    Text(guess)
    Spacer()
    Text("4c 0b")
}
The Text view is a simple label, but Spacer is new: its job is to take up all free space, which in this case means our two text views will have a large gap in the middle. You can add as many spacer views as you want and they’ll divide space up evenly between them.
OK, that’s explained all the code, but before we’re done with our design I want to add one more thing. Do you notice how there is equal space above, to the left, and to the right of our text field and button, but the space below is a little larger?

This is SwiftUI trying to be helpful: when you place two views into VStack it will add a little bit of spacing between them so they don’t sit edge to edge.
Our design already adds some padding to the HStack, so we don’t want SwiftUI to add its own spacing to the VStack. So, change the VStack code to this:
VStack(spacing: 0) {That disables SwiftUI’s automatic spacing, and looks much better.
The next step in this project is to let the user type values into the text field, and have those be added to the answers list when they tap “Go”. Each row in the answers list needs to show what the user guessed (e.g. “1234”) and the result of comparing that against the hidden answer (e.g. “2c 1b”).
To make our code easier to read (and write!) the result calculation will be done in a separate method. We’ll fill it in later, but for now please add this placeholder method to ContentView:
func result(for guess: String) -> String {
    "Result"
}
We can put that to work immediately by replacing the hard-coded “0c 4b” string with this:
List(guesses, id: \.self) { guess in
    Text(guess)
    Spacer()
    Text(result(for: guess))
}
That now uses the result() method to figure out how close each guess was – it will just show “Result” for each of them, but we’ll fix that soon enough.
The next step in this project is to create a random four-digit number for the player to guess. This shouldn’t repeat any digits, and it needs to be different every time. We’re going to make this a new method called startNewGame() so that we can call it again to reset the game to play again.
Before I show you the code, let’s walk through what the startNewGame() method needs to do:
guesses array of any previous guesses. Remember, SwiftUI will be watching this for changes, and will automatically clear the list at the same time.answer string.Most of that requires some new functionality, so let’s break it down even further.
First, add this method stub for startNewGame(), so we have somewhere to write our code:
func startNewGame() {
}
Right now we specify the text in our text field like this:
TextField("Enter a guess…", text: .constant("1234"))That forces a value of 1234 in there, but really what we want is for the user to type whatever they want and store that value somewhere. This means the value will change over time: it might start out as 1234, but then the user will change it repeatedly as the game is played.
This is another example of state, which means we need to use the @State property wrapper so SwiftUI lets us bind a property’s value to our user interface and automatically update the UI when the value changes.
Let’s put all this into practice: we know our text field should store a string, and that string will change over time because the user will type something new into the text field. So, we can use @State to add a property to ContentView that will store the text field’s string.
Add this property to ContentView:
@State var guess = ""Now rather than using .constant("1234") to specify the contents of the text field, we can use that guess string instead, like this:
TextField("Enter a guess…", text: $guess)Notice that dollar sign in there? Yep, TextField takes another two-way binding – we can put text into there by adjusting guess, but if the user types into the text field then guess will be updated.
Now that our guess string is state that we can change whenever we want, it becomes easy to clear that string when we start a new game. Add this first line of code to startNewGame():
guess = ""That uses guess rather than $guess, which is intentional: when you say guess we mean “read or write the guess string”, but when we say $guess we mean “read and write the guess string at the same time” – the dollar sign refers to the two-way binding that ensures if the property changes then the text field is updated, and if the text field changes then the property is updated.
That’s not the only piece of state we need in this game, because at least two other pieces of data will change as the game is played: the answer they are trying to guess will change every time we start a new game, and the list of their current guesses will change as they add new guesses.
Right now our guesses array is created as a constant with fixed data, but that’s obviously not going to work in our game because we want to track the user’s actual guesses. Instead, this needs to be a variable array, and also use the @State property wrapper so it can change over time.
Replace the current guesses array with this:
@State var guesses = [String]()With that change we can return to writing startNewGame(), because we can now write code to remove all the items from the guesses array when a new game starts. Add this below the previous code:
guesses.removeAll()The removeAll() method can accept a parameter called keepingCapacity – if that’s true, the array will have its items removed but still have room to add as many items. This can be a small performance optimization if you’re really struggling, but we can ignore it here.
The next step is to create a third @State property to store the answer the player is trying to guess, but I’m also going to store the length of the answer here to avoid repeating the number 4 everywhere in our code:
@State var answer = ""
let answerLength = 4
We can now generate an answer for the player to guess as part of startNewGame(). Remember, the answer they are trying to guess is a four-letter string of numbers 0 through 9, with no digits repeated. We can get that by:
To create an array of numbers we can use Swift’s closed-range operator, ..., with 0 and 9. That will generate a range from 0 to 9, which we can then shuffle into a random order:
answer = ""
let numbers = (0...9).shuffled()
That will clear whatever was already in answer, then create a new array containing [0, 1, 2, ... 8, 9] in a random order.
The final step is to pull out the first four numbers from our shuffled array, which means we can be guaranteed no number appears twice. Each number is an integer in the array, so we need to pull it out of the array and convert it to a string, like this:
for i in 0..<answerLength {
    answer.append(String(numbers[i]))
}
That’s everything you need to know – here’s the full code for startNewGame():
func startNewGame() {
    guess = ""
    guesses.removeAll()
    answer = ""

    let numbers = (0...9).shuffled()

    for i in 0..<answerLength {
        answer.append(String(numbers[i]))
    }
}
That method should be triggered when ContentView is shown, and that means using the same onAppear() modifier you met in project 1.
So, put this below the two frame() modifiers for the VStack:
.onAppear(perform: startNewGame)If you run the code now you’ll see it looks like we’ve taken a massive step back, because now our list is completely empty. However, we just put in place all the groundwork required to make this game happen, and if we insert a couple of lines of code in submitGuess() you can see that for yourself.
Here, try this out:
func submitGuess() {
    guesses.append(guess)
    guess = ""
}
That’s not the final code for our game, but it’s enough that you can actually try out what we made – you can type whatever you want into the text field, and when you press Go it will slide into the list below it. This all happens because of that @State property wrapper: that tells SwiftUI to watch the guesses array for changes so that it can keep the list synchronized as items are added.
Behind the scenes, what’s actually happening here is that @State will reinvoke our view’s body property every time its value changes, which is a fancy way of saying it will run all its code again with whatever the latest property values are. This means our view always stays up to date for all its @State properties, because whenever any of them change the whole view gets updated.
Before we’re done, I want to remind you that whenever you use the @State property wrapper it’s generally a good idea to use private access control – it’s a reminder that this piece of program state is owned by the current view. This isn’t required, but it is recommended. So, change your three properties to this:
@State private var answer = ""
@State private var guess = ""
@State private var guesses = [String]()The final part of the game is marking player guesses – i.e., reporting how many cows and bulls they had. This means filling in the result(for:) and submitGuess() methods, both of which will require you to learn some new things.
Let’s start with result(for:), because it’s the easier of the two. This needs to count how many bulls were in the player’s guess (correct numbers in their correct position) and how many cows (correct numbers in their incorrect position).
Swift’s strings use something called grapheme clusters, which are Really Very Clever Indeed, but at the same time Extremely Painful To Work With when you want to read individual characters. We want to loop over the characters in the player’s guess and compare each character to its equivalent in the answer string, which is quite painful using Swift strings. Fortunately, we can convert both character strings into arrays, which makes everything much easier.
Here’s how this method will work:
bulls and cows, both initialized to 0.bulls.cows.bulls and cows as part of a string for the player to read and act on.To accomplish all that you need to learn a few new things.
First, Swift strings are sequences, but indexing into them to read individual characters is quite painful. So, we’re going to convert them into real arrays like this:
let guessLetters = Array(guess)Second, we need to compare guess letter 0 against answer letter 0, guess letter 1 against answer letter 1, and so on. This means our loop needs to know both the letter and its array position at the same time. We could loop over the letters like this:
for letter in guessLetters {That would set letter to be (for example) 1, then 7, then 5, then 9. But it wouldn’t tell us the position of each letter in the array, so we wouldn’t know what letter to compare it against in the answer characters.
Swift provides a solution to this in the form of its enumerated() method: this returns an array item as well as its index at the same time. It’s used like this:
for (index, letter) in guessLetters.enumerated() {Now we’ll be given (index 0, letter 1), (index 1, letter 7), (index 2, letter 5), and (index 3, letter 9), which is exactly what we need.
Finally, we can check whether an array contains a value by using its contains() method, like this:
if answerLetters.contains(letter) {That will return true if the answerLetters array contains the letter in question.
The last thing you need to use is string interpolation: Swift’s system of letting you inject variables directly into a string. We’ve used it in the introduction and project 1, and as a reminder it looks like this:
let name = "Paul"
let message = "Hello, \(name). How are you?"
The first line creates a new constant called name, and the second one creates another constant called message. However, the second one creates a string using string interpolation – that’s the \(name) part. It means “write the value of name here”, and it’s a concise and efficient way of creating dynamic strings.
We’ll be using this for the return value of result(for:). We already have two variables to count the number of cows and bulls, so we’re going to combine them into a single string like this:
return "\(bulls)b \(cows)c"That will yield return values like “1b 2c”, for “one bull, two cows.”
That’s everything you need to know, so you can now replace the dummy result(for:) method with the real thing:
func result(for guess: String) -> String {
    var bulls = 0
    var cows = 0

    let guessLetters = Array(guess)
    let answerLetters = Array(answer)

    for (index, letter) in guessLetters.enumerated() {
        if letter == answerLetters[index] {
            bulls += 1
        } else if answerLetters.contains(letter) {
            cows += 1
        }
    }

    return "\(bulls)b \(cows)c"
}
That’s one method down, so we only have one more to fill in before the game is finished: submitGuess().
This method needs to do four distinct things: check the guess is valid, add it to the guesses array if so, show a “You win!” message if the hidden number has been guessed correctly, and clear the value in guess so the user can enter another guess.
To be valid, a guess has to fit two criteria: it needs to have precisely four unique letters, and those letters need to be one of “0123456789”.
We can check part of the first condition by using a Set. This is a built-in data type that is like an array, except it can’t contain duplicate values and doesn’t remember the order in which you add objects. You can creates sets from arrays and they will automatically remove any duplicates, so if we feed it the character array of the players we can count the resulting items in the set and check there are the correct number.
That check only solves half the problem: if the user enters 1111 then the Set check will fail because it has only one unique character. But if they enter 11223344 the test will pass because even though the user entered eight numbers there are four unique numbers.
So, to complete the first condition we need two tests:
guard Set(guess).count == answerLength else { return }
guard guess.count == answerLength else { return }
The second condition is a little more tricky, and involves learning two new things. First, macOS has a data type called CharacterSet, which comes with built-in character groupings such as “alphanumeric” that contain all the letters and numbers. We can create a character set from the string “0123456789”, but, more usefully, we can invert that character set to match everything that isn’t in “0123456789”.
Using an inverted character set, we can use a string method called rangeOfCharacter(from:) that accepts a character set. It will return the position of any characters it finds that belong to the character set you provide, or nil if none were found. Putting it all together, we can create a character set from “0123456789”, invert it, then check that no characters in that set exist in the player’s guess.
If those two checks pass, it means the player has provided four unique digits, so we can proceed to the second part of the method: inserting the guess in the guesses array, then adding a new row in the table.
Swift arrays have an append() method for adding items to an array, but that wouldn’t work so well here because it would place new guesses at the bottom of the list. A better solution is to use insert() to add each guess to the start of the array, so it appears at the top of the list.
That’s two of the four tasks that need to go into submitGuess(), so let’s convert them into code now. Change your existing submitGuess() method to this:
func submitGuess() {
    guard Set(guess).count == answerLength else { return }
    guard guess.count == answerLength else { return }

    let badCharacters = CharacterSet(charactersIn: "0123456789").inverted
    guard guess.rangeOfCharacter(from: badCharacters) == nil else { return }

    guesses.insert(guess, at: 0)

    // did the player win?

    // clear their guess string
    guess = ""
}
I put a comment near the end, “did the player win?” That’s where the final part of this method needs to be placed. We already wrote the result(for:) method, which returns a string containing something like “2b 0c”, so if we call that using the player’s latest guess we can detect a winning move by looking for the string “(answerLength)b” in the return value.
When the player does win, we want to show a message telling them so. This takes a little thinking in SwiftUI, because it doesn’t work the way you might expect. Elsewhere – for example in AppKit – you just create an alert then show it, but SwiftUI uses a declarative approach instead: we create the alert, tell SwiftUI the conditions under which the alert should be shown, then forget about it. SwiftUI will actively monitor those conditions on our behalf, and as soon as they become true the alert will get shown automatically.
So, first we need to create an @State property that tracks when the game is over:
@State private var isGameOver = falseNext, we need to create an alert and define the conditions under which it should be shown. For us, that will be when isGameOver is true, but here again SwiftUI is clever: rather than just making isGameOver our condition, we make $isGameOver our condition so that the alert reads the value and is shown when it’s true and also writes the value so it’s set back to false when the alert is dismissed.
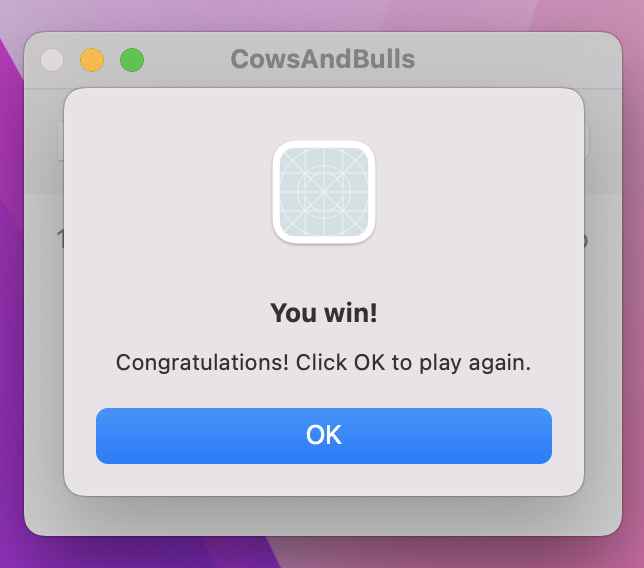
As for the contents of the alert, we’re going to use “You win” and “Congratulations! Click OK to play again” as the title and message, but we’re also going to add an “OK” button to dismiss the alert and call startNewGame() when it’s clicked.
Add this new alert() modifier below onAppear():
.alert("You win!", isPresented: $isGameOver) {
    Button("OK", action: startNewGame)
} message: {
    Text("Congratulations! Click OK to play again.")
}
Now we finish our game by simply flipping isGameOver to true in submitGuess(), whenever the player found four bulls. Put this new code in place of the “did the player win?” comment:
if result(for: guess).contains("\(answerLength)b") {
    isGameOver = true
}
That’s it – the core game is done! Press Cmd+R to try it out – I think you’ll find the game to be an intriguing challenge!
Our game is done and we could easily leave it here and move on to some challenges, but before we do that I want to make four small changes. Each of them are tiny, but each help make our game that little bit better and I encourage you to give them a try.
First, our window title says “CowsAndBulls” rather than “Cows and Bulls” with correct spacing. Previously we fixed that by using a Window rather than a WindowGroup, but that would make it impossible for the player to have more than one instance of our game running at a time. So, we are instead going to add a new modifier to our VStack called navigationTitle(), which lets us customize the title without having to lose multiple window support – add this now:
.navigationTitle("Cows and Bulls")Second, we can make our list look a little more interesting by adding a translucency effect. We got this in project 1 by using List as the primary view in a NavigationSplitView, which automatically assigns it the role of a sidebar and gives it the translucent styling.
Although this effect is officially for side bars, I think it works great here because it adds a subtle amount of depth to our UI. Even better, it’s trivial to put in place – just add this modifier to the List:
.listStyle(.sidebar)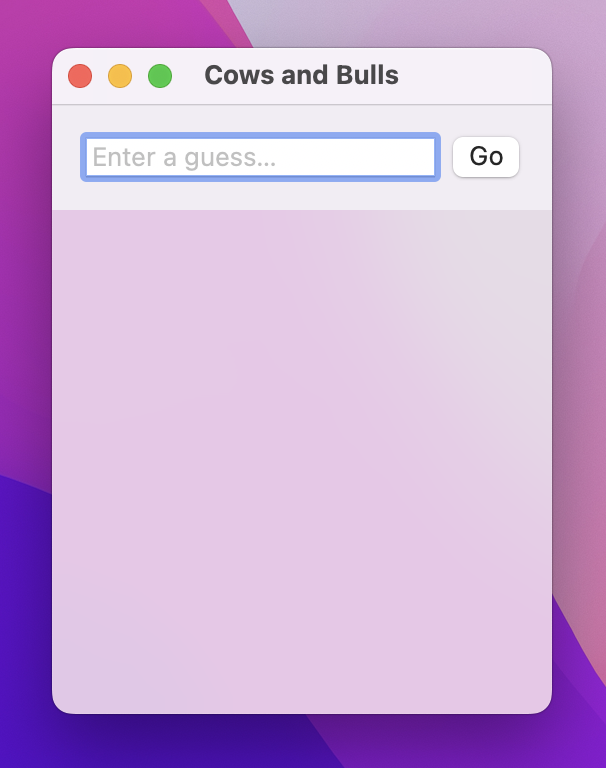
Third, it’s common for macOS users to either press a button or press return to submit the contents of a text field, but right now we insist on the button press. Fortunately, this can be solved by adding a new modifier to the TextField:
.onSubmit(submitGuess)So, when the text field is submitted – i.e., when the user presses return after entering text – SwiftUI will run the same method that would have been run if the user had clicked the button instead.
And finally, we can put the Touch Bar to use for users who still have one. SwiftUI has a dedicated touchBar() modifier that accepts any views we want to show in the Touch Bar, and this is a great way to show little bits of additional information or UI without cluttering the screen.
In this app we already let the user type guesses and submit them, but nowhere do we show how many guesses they made. To fix that, add this modifier to the VStack now:
.touchBar {
    HStack {
        Text("Guesses: \(guesses.count)")
            .touchBarItemPrincipal()
        Spacer(minLength: 200)
    }
}
There’s not a lot of code there, but I want to point out three things:
touchBarItemPrincipal() modifier tells macOS that this item should be really prominent.Spacer(minLength:) will place some empty space after the text, which means it won’t sit directly next to the emoji picker macOS automatically attaches to text views.So, that’s just five small changes, but I hope you agree they make a world of difference!
Our game works well enough, and we could easily finish here and have something that’s genuinely useful. But I want to take this opportunity to teach you a handful more important techniques, and in doing so help to bring a lot more variation to this game.
We’re going to look at settings – options that configure how an app works. Along the way you’ll meet several new SwiftUI views and modifiers, plus an important new property wrapper, but the end result will really improve our game!
To get started, create a new SwiftUI view called SettingsView. Before we add any code to it, I want you to go to CowsAndBullsApp.swift so we can tell SwiftUI that this is our app’s settings view rather than just a regular view.
Add this to the body property of the app struct:
Settings(content: SettingsView.init)To be clear, your code should look like this:
@main
struct CowsAndBullsApp: App {
    var body: some Scene {
        WindowGroup {
            ContentView()
        }

        Settings(content: SettingsView.init)
    }
}
So, we’re placing a Settings scene outside the window group the rest of our app uses, telling it to get its content by creating an instance of SettingsView. This new Settings scene is special in SwiftUI, because if you run the app now you’ll see there’s a new Settings option under the CowsAndBulls menu, and selecting it will show our new view – SwiftUI understands to present our SettingsView when the user asks to edit the app’s settings.
Okay, let’s turn to the new settings view itself: what settings do we want to expose? I’m going to tackle four in total:
Both the first two can be tackled with text fields, meaning that the user can write any number they like in there. There will be restrictions, of course: what they type must be a number and not “lizard”, and also we want to warn them if they choose an answer length lower than 3 or greater than 8.
The textfield we used in the main game allows any kind of text to be entered, which is important because the number we’re trying to guess might start with 0 and that needs to be preserved. Here, though, both these new textfields should only ever allow numbers, and SwiftUI can help us with that – we can create a textfield that accepts only numbers.
We need to start by creating some new properties to store the maximum guess and answer length values the user is typing, and you might think that means writing code such as this:
@State private var maximumGuesses = 100
@State private var answerLength = 4
While @State works great inside our game, it’s only for temporary data – we’re using it for our guesses array, for example, which means as soon as the player relaunches the game that array will be wiped. Here, though, we want these settings to be permanent: when the user sets how many guesses to allow, for example, that should be remember forever.
To make this happen we need to change the @State property wrapper into a different property wrapper called @AppStorage. This is used almost the same way:
@AppStorage("maximumGuesses") var maximumGuesses = 100
@AppStorage("answerLength") var answerLength = 4
As you can see, the difference is that we need to provide a string name for our data as part of the property wrapper’s creation. This name can match the property name (“maximumGuesses” for maximumGuesses), but it doesn’t need to – I just find it more convenient. That string name is used to store our data in macOS’s UserDefaults system, and if you use that same name for other app storage properties you can read it in many places.
Tip: We’ll be returning to UserDefaults in project 10, because there are limits to what @AppStorage can do.
When we use @AppStorage, SwiftUI will automatically look for a saved value and use it, but if there isn’t one the default values of 100 and 4 will be used instead. As we change those values in our code, SwiftUI will write them safely to UserDefaults so they can be read later, and it will also reinvoke the body property of any views that use these values.
Now that we have some storage for our settings, we can go ahead and create two TextField views to edit them. This time we’re going to create the textfields slightly differently, because we want to tell SwiftUI to assign their text directly to the two integer properties we just created – we need to say that these textfields are specifically designed to hold numbers.
Replace the current SettingsView body with this:
VStack {
    TextField("Maximum guesses", value: $maximumGuesses, format: .number)
    TextField("Answer length", value: $answerLength, format: .number)

    if answerLength < 3 || answerLength > 8 {
        Text("Must be between 3 and 8")
            .foregroundStyle(.red)
    }
}
.padding()
.frame(width: 400)
So, we’re no longer using the text parameter when creating each TextField, but instead using value and format to specify that we’re reading and writing a number.
Go ahead and run the app now, and look at the settings – you should see that you have no idea of what each textfield does unless you first delete its text. You’ll also notice that despite our request for integers, you can type whatever you want in there.
That second one might seem serious, but it’s okay because SwiftUI will take care of it: as soon as the user presses Return, SwiftUI will make sure whatever remains is a valid number. But the first problem is more serious – how is the user supposed to know what each textfield means?
SwiftUI has a brilliantly simple solution here, and you can see it in action by changing the VStack for Form – no other changes, just that. Now run the app again, and now you’ll see that each of our textfields have their label placed in front of them, neatly right-aligned.
Form is a special version of List designed for times when you want to let the user enter values in your app. Maybe that’s text entry as here, but it’s also good for selecting from a range of values, toggling a value on or off, and more. We use the same views inside there as we would do in a normal List or VStack, but SwiftUI will automatically change the way they look and work to be more appropriate for input forms.
Having the extra label there is important for both our textfields, but we can also add another common way of providing information to users about what our UI does: if we attach the help() modifier to a view, SwiftUI will automatically show some text as a tooltip when the user hovers their mouse over the view.
So, modify your two textfields to this:
TextField("Maximum guesses:", value: $maximumGuesses, format: .number)
    .help("The maximum number of answers you can submit. Changing this will immediately restart your game.")

TextField("Answer length:", value: $answerLength, format: .number)
    .help("The length of the number string to guess. Changing this will immediately restart your game.")
Before we’re done with these first two options, I want to introduce another small but useful modifier called foregroundStyle(), which lets us recolor any text we want. In this case, I think the “Must be between 3 and 8” warning should be given a nice and bright warning color, so it really stands out:
if answerLength < 3 || answerLength > 8 {
    Text("Must be between 3 and 8")
        .foregroundStyle(.red)
}
Much better!
That completes the first two of our settings, so let’s look at the second two: should we show the guess count, and should we enable hard mode. We could put these directly below the first two settings, but because these are less likely to be changed often we’re going to split our settings screen in two: general game options (maximum guesses and answer length), and advanced options (show answer count and hard mode). Once you see how this looks in SwiftUI, you’ll understand why I took this approach!
First, we need two more properties to store these values. Once again we’ll use @AppStorage for them, but this time we’re going to use Booleans rather than integers:
@AppStorage("enableHardMode") var enableHardMode = false
@AppStorage("showGuessCount") var showGuessCount = false
Now, how can we show these two options next to – but separate from – the first two? Well, SwiftUI has another dedicated view for this purpose called TabView, which automatically breaks up our user interface into sections.
The best way to understand what TabView does is to try it yourself. So, place a TabView around your Form, like this:
TabView {
    Form {
        // current Form code
    }
}
.frame(width: 400)
Important: I moved the frame() modifier from the Form to the TabView, so that everything inside the tab view has the fixed width.
If you run the app now, you’ll see our settings window has a large toolbar at the top, with a highlighted square in the center. That space is where we get to add some text and an icon describing what this part of the settings screen does – something SwiftUI calls the tab item for this view.
We could specify this as two separate pieces of data by using Image and Text, all by adding this modifier to the Form:
.tabItem {
    Image(systemName: "number.circle")
    Text("Game")
}
You’ve met Image before, but notice how this time I’ve added the systemName parameter. Rather than loading an image we’ve created and placed into our asset catalog, the Image(systemName:) initializer instead draws upon SF Symbols: Apple’s built-in collection of icons. SF Symbols is huge, storing well over 3000 icons at the time of writing and growing regularly. It’s built into every Mac, comes in every line weight from ultra-light to black, and from a SwiftUI perspective works like regular text – you can resize and recolor it as needed.
You might wonder where the name “number.circle” comes from. Well, the bad news is that all the SF Symbols are accessed through string names, but the good news is that Apple has produced a free SF Symbols app where you can browse them all. Visit https://developer.apple.com/sf-symbols to download the app – it’s indispensable when working with SF Symbols.
Like I was saying, we could specify our tab item as an Image and Text pair, but SwiftUI has a special Label view that combines the two together. Replace your previous modifier with this:
.tabItem {
    Label("Game", systemImage: "number.circle")
}
That produces exactly the same result, so apart from being a bit shorter what’s the benefit? Well, the nice thing about using Label is that it gives SwiftUI the choice of what to show depending on the situation. For example, if you use labels in toolbars then SwiftUI will usually choose to show only the icon, using the text only for VoiceOver.
The power of TabView is that we can go ahead and add more views below our first Form, and they’ll all be added as new tabs the user can switch between. So, we can start to build the second tab with another form, like this:
Form {
    // new options here
}
.padding()
.tabItem {
    Label("Advanced", systemImage: "gearshape.2")
}
The question is, what should we put in there to handle our two Booleans? Well, SwiftUI has yet another view type specifically for this purpose, and it’s called Toggle. This renders as a checkbox on macOS, but it automatically adapts on other platforms – on iOS you get the nice rounded switch, for example. These are brilliantly simple to use: give them a label, then bind them to a Boolean, and you’re done.
So, please replace the // new options here comment with this:
Toggle("Enable hard mode", isOn: $enableHardMode)
    .help("This shows the cows and bulls score for only the most recent guess.")
Toggle("Show guess count", isOn: $showGuessCount)
    .help("Adds a footer below your guesses showing the total.")
And that completes our settings view! The user can now bring up the app’s settings, move between the two tabs, then adjust all four options easily.
Of course, this is only actually half the work: we’ve exposed four great options to control our app, but we don’t actually respect those options anywhere in the main app itself. I’m going to walk you through honoring three of the four options here, but the fourth will be a challenge for you to complete later on!
To get started, we need to add the same four @AppStorage properties to ContentView – you should just copy and paste these from SettingsView, replacing the existing answerLength constant:
@AppStorage("maximumGuesses") var maximumGuesses = 100
@AppStorage("showGuessCount") var showGuessCount = false
@AppStorage("answerLength") var answerLength = 4
@AppStorage("enableHardMode") var enableHardMode = false
Tip You can use different property names here if you want, but as long as the string names inside @AppStorage() are the same then these values will be shared with SettingsView.
The easiest setting to honor is showGuessCount, because we can just add a check for it after the List. Add this directly after the .listStyle(.sidebar) modifier:
if showGuessCount {
    Text("Guesses: \(guesses.count)/\(maximumGuesses)")
        .padding()
}
Next is the answerLength setting. Because we already had an answerLength constant in place, we only need to make two changes to make this code work, beginning with a check at the start of the startNewGame() method that makes sure we don’t try to make an invalid game:
guard answerLength >= 3 && answerLength <= 8 else { return }The second change for answerLength involves a new modifier. You see, when they change the length of the answer, we need to restart all our games immediately to take that new setting into account. In SwiftUI terms, this is done by using the onChange() modifier, which will watch any value for changes and run some code of our choosing when the value is modified.
When we use onChange(), SwiftUI can pass us both the old and new values to work with, or it can send nothing at all if we prefer. In this instance we don’t really care about those values because startNewGame() already looks for the newest value of answerLength, so we can safely use the parameter-less version and just call startNewGame() directly.
So, add this modifier to ContentView, below onAppear():
.onChange(of: answerLength, startNewGame)That means our game will automatically reset every time answerLength is changed in the settings view – SwiftUI will just take care of it for us.
The third setting we’re going to honor is enableHardMode, which will only show the cows and bulls result for the user’s most recent guess – they need to keep track of their previous guesses in their head!
To get this to work, we need to use a slightly different form of List that loops over integers rather than elements in our guesses array. We can then use that integer to read the correct guess from our array, but also to decide whether to show the result of their guess: we’ll show it if we’re not in hard mode, or if we are in hard mode and our index is 0, but we won’t show it otherwise.
Replace your existing List code with this:
List(0..<guesses.count, id: \.self) { index in
    let guess = guesses[index]
    let shouldShowResult = (enableHardMode == false) || (enableHardMode && index == 0)

    HStack {
        Text(guess)
        Spacer()

        if shouldShowResult {
            Text(result(for: guess))
        }
    }
}
.listStyle(.sidebar)
And now hard mode work too – hopefully you can see it doesn’t take so much work to get these settings into our app!
As for the last one, limiting the number of guesses the player can have, I’ll be leaving that for one of your challenges – you need to do some work yourself!
You’ve put in a lot of work to build this game, and to give you the credit you deserve I want to show you how to customize the About screen. This has been available since our very first project – go to the CowsAndBulls menu and choose About CowsAndBulls to see it. macOS generates this information for us using the version number from our target’s settings, but without any code we can add our own custom text in there.
First, press Cmd+N to make a new file, and this time look for Rich Text File – it will be in the Resource category. Call this file Credits.rtf, then go ahead and write in there whatever you want! Even though Xcode will show your document with a light background and dark text, it will actually use adaptive colors unless you force your own – they will flip to dark background and light text in dark mode.
Rich Text Files (RTF) support a small amount of formatting options, all of which can be adjusted using the toolbar directly above your text editor – bold, italic, underlined and more are under the Styles options, plus you can change alignment, spacing, list formatting, and more.
Once you’re done, it’s time for the hard part. Actually, I’m just kidding – there’s no hard part, or indeed any other part at all, because macOS automatically looks for a Credits.rtf file in your bundle and shows it in the About screen!
Cows and Bulls isn’t a hard game to program, but it certainly is hard to play – and we’re just using the numbers 0 through 9!
Hopefully this project served as two things for you: a chance to review previously learned subjects such as Text, @State, List, and navigationTitle(), but also a chance to learn new things, such as HStack and VStack, TextField, Button, Label, alert(), and more.
We’ll be following a similar approach throughout this book: going forward and learning new things in every project, but also giving you the chance to review previous topics to make sure they are sinking in. There’s a lot to learn, as you’ll see!
Players win at this game by finding all four bulls, but the skill of the game is doing that in as few moves as possible. Right now our alert shows the message no matter how well (or badly!) the player performs, so see if you can make it better. Start by showing the score in the message using string interpolation, but then have it show one of three messages: one when the player wins in fewer than 10 moves, one when between 10 and 20, and one for more than 20.
Once you’ve done that, here’s another problem you can try to solve: can you make the app refuse to accept duplicate answers? Right now the user can enter 1234 again and again, which causes SwiftUI to print its angry Xcode warning – can you write code to stop that from happening?
And finally, let’s not forget the “Maximum guesses” setting: once the user reaches that number, show a different alert telling them they lost and what the correct answer was. This means adding a second alert() modifier watching a different Boolean state, but it’s nothing you can’t handle!
Copyright © 2023 Paul Hudson, hackingwithswift.com.
You should follow me on Twitter.