![]()
Given how hard project 13 was, you might very well approach this project with some trepidation: surely this project is going to be even harder?
Well, no. In fact, this project pushes a lot of its work to an important Apple framework called SwiftData, which is responsible for storing, searching, and filtering objects that we create. Behind the scenes it’s usually backed by a database on the user’s device, but it doesn’t need to be.
In this project you’ll build an app called Bookworm, for storing the names, authors, ratings, and descriptions of books you’ve read. We’ll be using SwiftData to save all that data automatically – it's really powerful!
Anyway, let’s begin: Create a new project in Xcode named Bookworm, but please do not select anything for the storage option – it adds a whole bunch of extra cruft that you’ll just need to delete. Instead, we’ll be adding our SwiftData support by hand so you can see exactly how it all fits together.
Previously we’ve designed our data models by creating plain old Swift structs, but SwiftData takes a very different approach: it uses two powerful language features.
The first is called macros, which rewrite our Swift code to add extra functionality. SwiftData uses macros so that it can add functionality to load and save our data correctly.
The second is called observation, which allows SwiftUI to watch objects for changes. This means SwiftData can keep all our SwiftUI views updated as information changes.
To demonstrate this in action, let's start with a new class that will store a single book review – create a new Swift file called Review.swift, then give it this code:
class Review {
    var title: String
    var author: String
    var rating: Int
    var text: String
    var date: Date

    init(title: String, author: String, rating: Int, text: String, date: Date) {
        self.title = title
        self.author = author
        self.rating = rating
        self.text = text
        self.date = date
    }
}
That's just a regular Swift class, so it does nothing special. If we want to make that automatically update any SwiftUI views when one of its values change, we need to add a macro before the class definition, like this:
@Observable
class Review {
It's a one-line change, but it does a huge amount of work behind the scenes. To see what is changing, add this to the top of your Swift file:
import ObservationThat allows Xcode to look inside the @Observable macro to see exactly what it's doing – you should now be able to right-click on @Observable and select Expand Macro to see exactly what it's doing.
What you'll see is… well, a lot! That one extra line of code from us has dramatically rewritten our code, and in fact the full extent of the rewrite isn't immediately obvious because those @ObservationTracked lines are also macros – to see everything, you need right-click on each of those to expand that macro. Macros inside macros!
If you're looking at all the rewritten code and feeling a little overwhelmed, that's okay – the macro uses a wide range of advanced Swift in order to achieve its goals. Here's the abridged version of what it does:
title becomes _title, author becomes, _author, and so on.title, author, and so on. This process is sometimes called shadowing: our original values get wrapped up so we can add extra functionality to them.title reads or writes _title.Observable. This conformance doesn't add any extra functionality, but it does let Swift check how we use the objects elsewhere.All these changes combine to make working with @Observable objects in SwiftUI easier: whenever SwiftUI changes a value it automatically updates the object, and when the object changes somehow else, SwiftUI's views updated to reflect that change.
What SwiftData does is take all this and expand on it even more: as well as quietly observing all changes and keeping SwiftUI views updated, it also adds functionality for reading and writing objects from the Mac's SSD.
To see that in action, replace import Observation with import SwiftData, then change @Observable to @Model. If you expand the macro again you'll see similar work happening: each property is marked with another macro that shadows them, automatically making sure SwiftUI is able to detect changes. It also makes Review conform to the Observable protocol, but also adds the PersistentModel protocol.
Anyway, that's enough theory for now – let's put this class into action. Now that we've told SwiftData what our data looks like, the next step is to tell SwiftData to load a model container for that data. Model containers are the actual database files on your Mac, and allow your changes to be saved and reloaded when the user quits and relaunches your app.
Loading a model container takes two small changes, both in BookwormApp.swift. First, add a new import for SwiftData:
import SwiftDataThen add .modelContainer(for: Review.self) to your window group, like this:
WindowGroup {
    ContentView()
}
.modelContainer(for: Review.self)
And that's it! That's literally all it takes to define our data and prepare it for use. SwiftData is doing a lot of heavy lifting for us, and of course its building on top of Swift's whole observation system, but the result is that we don't need a lot of code to get started!
All the work we’ve done so far has just been about defining the data we want to store, but now it’s time to do the important work: creating new instances of our Review class, then displaying them somehow.
Rather than put this work into ContentView, we’re going to make a new SwiftUI view that is solely responsible for working with all our Review objects.
So, start by creating a new SwiftUI view called ListingView, then add import SwiftData to the top.
We’ll be adding three properties to this view, but only two are needed for now.
First, we need to read a model context from SwiftUI. This is different from a model container, and you need both.
As I said earlier, model containers handle the actual permanent storage of your data, so after the user quits and relaunches the app your data is still there.
Model contexts sit above model containers: they act a bit like a cache, so that you can with SwiftData objects in memory rather than always reading and writing to disk. When we used the modelContainer() modifier earlier, SwiftData silently created a model context at the same time, and handed it over to SwiftUI for us to access.
Reading that back is done in our first property, which uses a new property wrapper called @Environment. This can read various data from SwiftUI's environment, which is where it stores shared values such as whether we're in dark mode or light mode, or whether the user has various accessibility settings enabled.
In this case, we can read the SwiftData model context into a local property by writing this:
@Environment(\.modelContext) var modelContextThat will automatically look in the environment for a model context, which again was created automatically for us when we made our model container.
Second, the most important part: we need to tell SwiftUI to load all our Review objects. This is done using the @Query macro, which is responsible for fetching objects from SwiftData and also updating our UI whenever reviews are created, edited, or deleted.
Creating a query can be done in various ways, but here we need something nice and simple: we want to sort our reviews by their date. So, add this property to ListingView now:
@Query(sort: \Review.date) var reviews: [Review]One of the real power features of SwiftData is the way it’s quite sneaky about loading data – it likes to load only just enough data to satisfy our request, and will lazy load other data in the future. This is handled for us automatically, but it means a lot of the time you don’t need to be worried about loading a lot of data.
Running a query tells SwiftData to read our reviews from our model context, so now we can go ahead and show the results in our body property:
List(reviews) { review in
    Text(review.title)
        .tag(review)
}
Now we just need to show ListingView from ContentView. This will use a NavigationSplitView so we have our listing view on the left, and our detail view on the right – once we make it, that is.
Change the body in ContentView to this:
NavigationSplitView {
    ListingView()
        .frame(minWidth: 250)
} detail: {
    Text("Please select a review")
}
Now go ahead and run the app and see what you think!
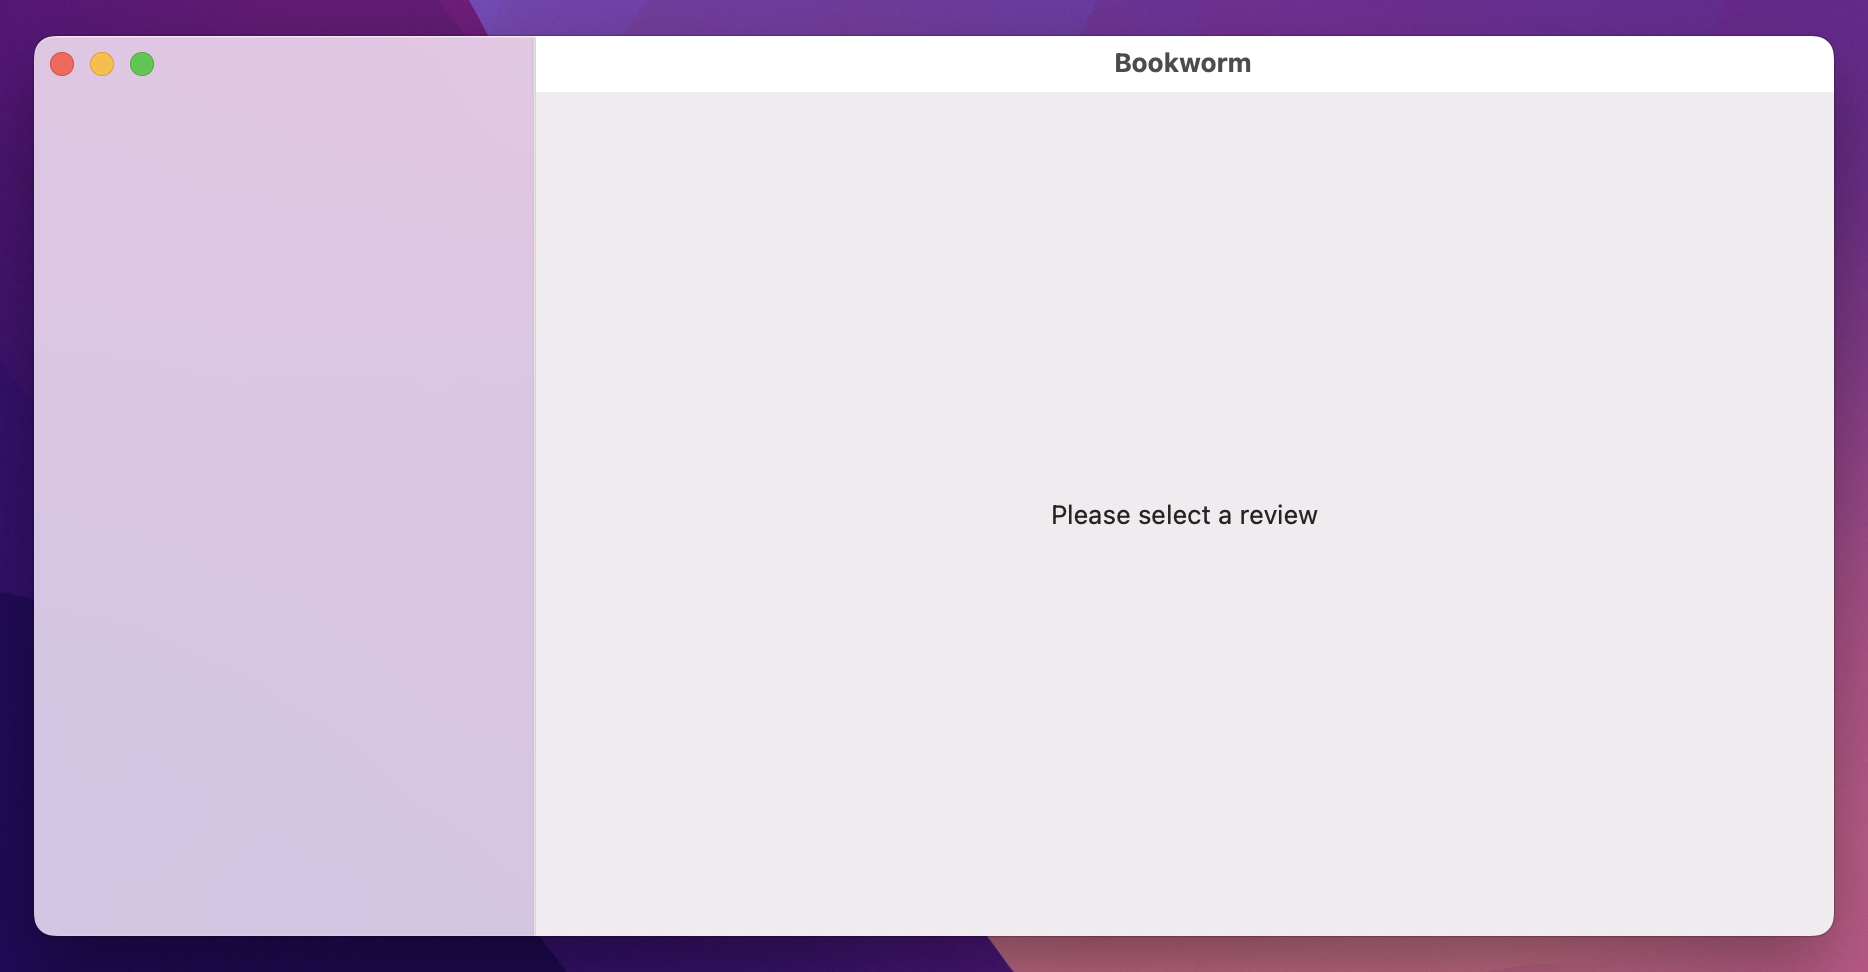
…it’s not very impressive, is it? If everything has gone to plan, you’ll see a completely empty sidebar, with “Please select a review” written next to it – that’s not a lot, given how much work it took to get this far.
Fortunately, it’s only a small hop forward to get something actually useful: we need to write some code to create a new Review when requested.
To do that, we start by writing a method that creates a new Review object, then hands it off to SwiftData's model context so it can be saved.
Go ahead and add this new method to ListingView now:
func addReview() {
    let review = Review(title: "Enter the title", author: "Enter the author", rating: 3, text: "", date: .now)
    modelContext.insert(review)
}
Just calling insert() on our model context is enough to have SwiftData take ownership of the object, and it will automatically ensure it's saved – SwiftData makes extensive use of autosave, so normally just making a change is enough for it to be saved permanently.
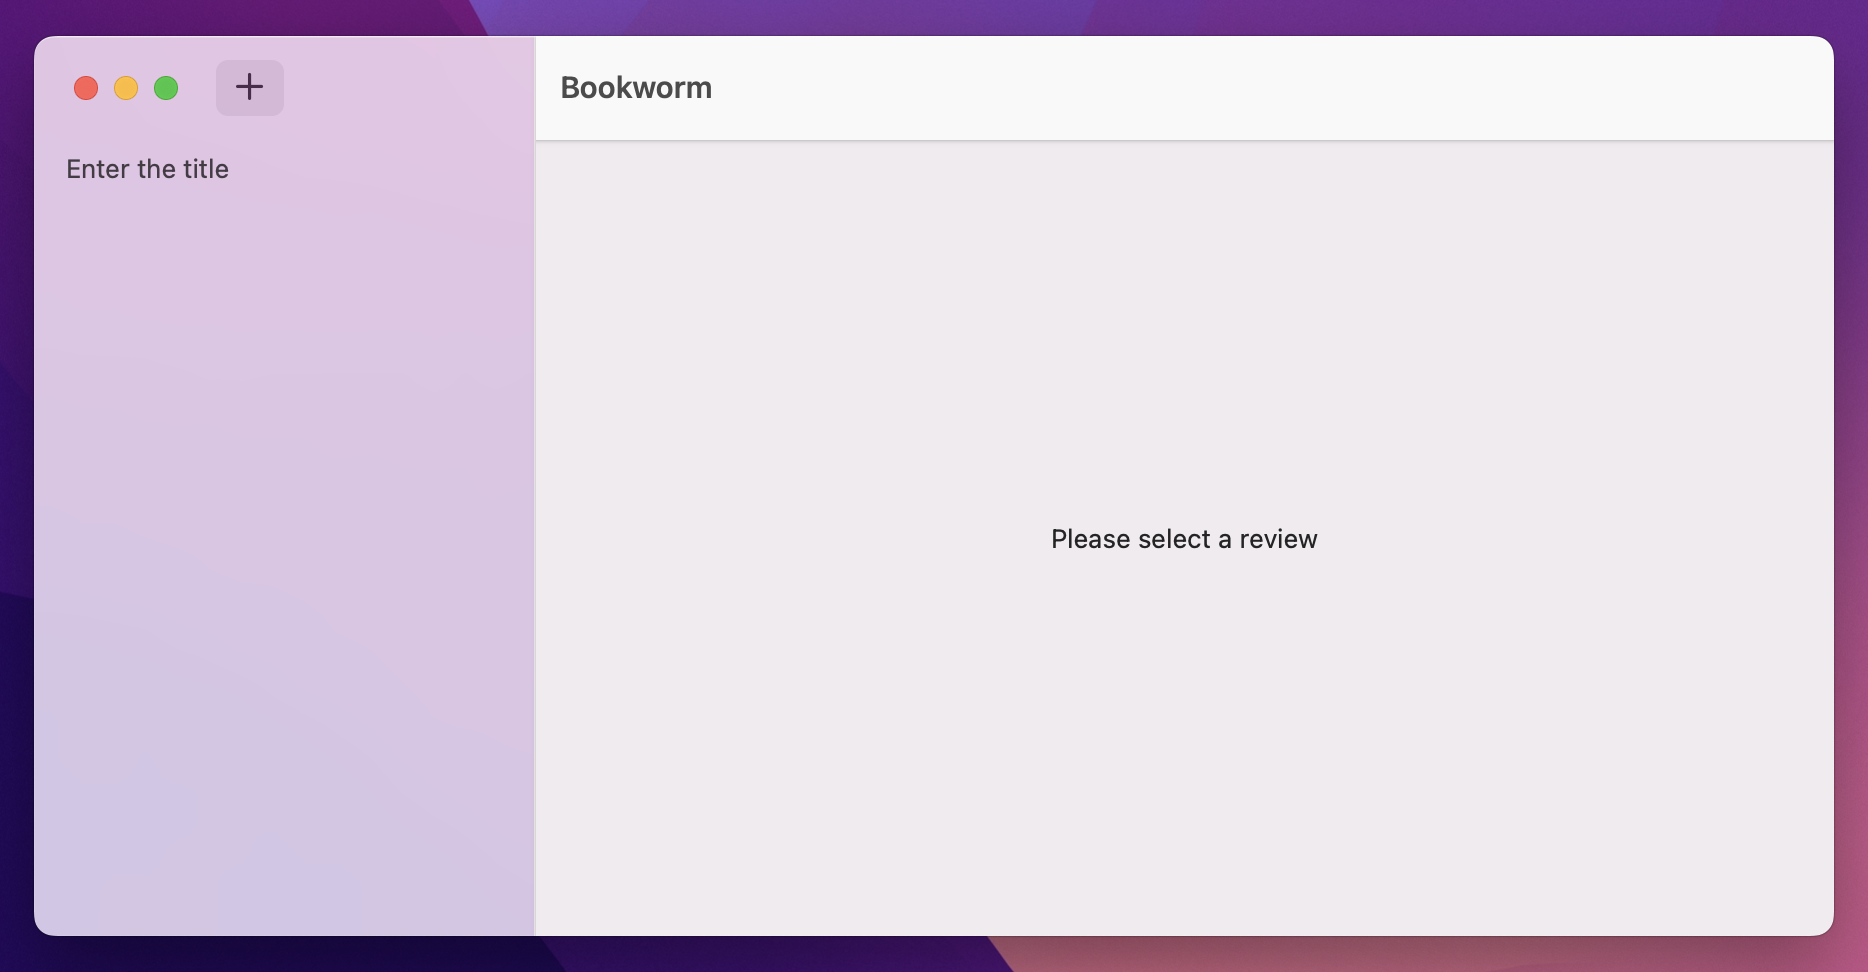
Now we can call that method from a toolbar button, by adding this modifier to the List:
.toolbar {
    Button("Add Review", systemImage: "plus", action: addReview)
}
And now try running the project again. Yes, it’s still not exactly impressive, but at least it shows things are working – as you press the + button you’ll see new rows slide into our list. This happens because SwiftData creates the Review object inside our managed object context, which our @Query property detects, and our view updates itself.
Now that we have a list of all the reviews the user has created, the next step is to let them edit those reviews – to add book names, authors, and a rating, along with free text entry of what they thought about it. Mostly this view will use things you already know, like Form, TextField, Picker, and TextEditor, but there will be a couple of important improvements that I think will really show you the power of SwiftData.
First, create a new SwiftUI view called DetailView. This has the job of receiving whatever review the user selected, so normally we’d add a property to the view like this:
let review: ReviewThis time, though, we’re going to use a different property wrapper called @Bindable – if you're starting to think that SwiftUI’s solution to any thorny problem is Yet Another Property Wrapper, I certainly wouldn’t argue with you!
In this case, @Bindable is designed to receive an external object – one that was created outside of the view, and is being shared with the view – and also watch it for changes. This is different from @State and @Query, which specifically create and manage the data in question.
So, instead of using a simple let constant property in DetailView, I’d like you to add this instead:
@Bindable var review: ReviewBecause we’ve used @Bindable for the incoming review, SwiftUI will automatically provide us with bindings directly to that object’s data – we can bind our text field to title and author, for example.
Important: I know that @Bindable looks and works very similarly to the @Binding property wrapper we used back in project 13, but it's quite different. Use @Binding when you've been given a binding that was created through @State or similar, and use @Bindable when you've been given an object that conforms to the Observable protocol – that's @Observable and @Model objects – and you want to create bindings from it.
Anyway, go ahead and change your body property to this:
Form {
    TextField("Title", text: $review.title)
    TextField("Author", text: $review.author)

    Picker("Rating", selection: $review.rating) {
        ForEach(1..<6) {
            Text(String($0))
        }
    }
    .pickerStyle(.segmented)

    TextEditor(text: $review.text)
}
.padding()
Everything there should be old news to you at this point, but it's worth pausing for a moment to consider just how much work SwiftUI and SwiftData are doing for us here: those values get loaded from disk into the view, editing them updates the model context data automatically, and also gets automatically saved with no further work from us!
Now, in order for this code to compile we need to fix the preview code, which takes a little work. Take another look at the Review initializer we made earlier:
init(title: String, author: String, rating: Int, text: String, date: Date) {
    self.title = title
    self.author = author
    self.rating = rating
    self.text = text
    self.date = date
}
That does nothing special at all – it's just plain old Swift code. So, you might be forgiven for thinking that creating a Review instance for previewing purposes takes nothing special at all.
To try this yourself, replace the #Preview code with this:
#Preview {
    let review = Review(title: "Example title", author: "Example author", rating: 4, text: "Example review goes here", date: .now)

    return DetailView(review: review)
}
On macOS, that code is perfectly fine. But on iOS – for reasons known only to Apple – that code will cause all sorts of problems, and in fact your preview might simply just fail to show, and Xcode will likely say something like "Bookworm may have crashed."
So, if you're just building for macOS, you can skip ahead to the "Okay, back to code for macOS…" section, but if you ever want to have your app on both platforms, read on!
The problem here is a thorny one, but ultimately it happens because of what's called a leaky abstraction. Abstractions are when we take rather unpleasant code and wrap them up in simpler, neater, smarter code. Ideally we use that nice, abstracted version all the time going forward, without having to think about the gnarly underbelly it's hiding.
This is what's happening with SwiftData and Core Data: Core Data is a 20-year-old framework that doesn't fit in well with modern Swift and SwiftUI code. So, SwiftData is an abstraction over Core Data that simplifies lots of its tasks.
What's happening here – what's making your code crash – is that Core Data is leaking through the SwiftData abstraction layer. What we see as nice and simple Swift code is in fact backing on to Core Data, which performs all sorts of extra work behind the scenes to make sure we can load and save data safely.
When we create a new Review instance in our preview code, SwiftData quietly checks to make sure it knows how to load and save Review objects – does it have a database in place for that information? So, it checks around to see if there's a model container in place for that type, and in our preview code we haven't made one.
This is what's causing the problem: although we can't see it in the code, SwiftData's check for an active model container fails, and it does the only safe thing: it triggers a crash.
To fix this we need to make a model container by hand, and we need to do it before we create the Review object. That means code like the below isn't good enough:
#Preview {
    let review = Review(title: "Example title", author: "Example author", rating: 4, text: "Example review goes here", date: .now)

    return DetailView(review: review)
        .modelContainer(for: Review.self)
}
That won't be much better, and it's important you understand why: it creates the Review object, then creates DetailView, then creates the model container.
For our previews to work properly we must create the model container before creating model instances, and this gives me a chance to show you an important extra SwiftData feature: when working with previews, which inherently use temporary data, we can create a custom model configuration specifying that all our data should be stored in temporary memory rather than permanent storage.
First, add import SwiftData to the top of ListingView.swift, then replace your current preview code with this:
#Preview {
    do {
        // Store preview data in RAM so it gets cleared automatically.
        let config = ModelConfiguration(isStoredInMemoryOnly: true)

        // Create our model container from the custom configuration.
        let container = try ModelContainer(for: Review.self, configurations: config)

        // Now it's safe to create our Review object.
        let review = Review(title: "Example title", author: "Example author", rating: 4, text: "Example review goes here", date: .now)

        // Pass our custom container into the view.
        return DetailView(review: review)
            .modelContainer(container)
    } catch {
        return Text("Failed to create preview: \(error.localizedDescription)")
    }
}
Notice how that uses a slightly different form of the modelContainer() modifier – we're passing in the custom container container we made, rather than creating a new one.
Okay, back to code for macOS…
And that’s our entire detail view done already – using @Bindable will automatically synchronize our changes back to whatever Review object was passed in, and SwiftData will automatically detect those changes and ensure they get saved automatically.
We need to show this new view when the user selects a review, which means going back to ListingView and adding selection controls to the list.
This time it’s a bit trickier, though: we want to control the selection from ListingView, but then control which view is showing from inside ContentView – how can we make these two very different views stay in sync?
The easiest solution is to make a new @State property in ContentView, which will track whichever review is currently selected. We can then pass that into ListingView and make it use @Binding – not @Bindable, because this is already a binding.
Start by adding this to ContentView, to track the selected review:
@State private var selectedReview: Review?That’s optional because by default no review will be selected, but of course we want to bind that to our List in ListingView. To do that we need to add a new property in ListingView using @Binding, because we'll receive the binding straight from ContentView rather than creating new bindings here:
@Binding var selectedReview: Review?We want to use that for our List, so that selecting an item in there automatically updates the binding. So, change your List code to this:
List(reviews, selection: $selectedReview) { review inThat means we’re now storing a selected review and also updating the value as the user works with our list.
You'll need to update your preview code too, but just passing an empty binding is fine there:
#Preview {
    ListingView(selectedReview: .constant(nil))
}
And now the final step, which is updating our NavigationSplitView code in two ways:
selectedReview into ListingView.DetailView with whatever they selected.Adjust your ContentView code to this:
NavigationSplitView {
    ListingView(selectedReview: $selectedReview)
        .frame(minWidth: 250)
} detail: {
    if let selectedReview {
        DetailView(review: selectedReview)
    } else {
        Text("Please select a review")
    }
}
If you run the program now you’ll see it already works well, but with one small tweak we can make it a little better: we’re going to modify addReview() so that it automatically selects the new review that was just added, so the user can start modifying it immediately. To do that, just add this line to the end of addReview():
selectedReview = review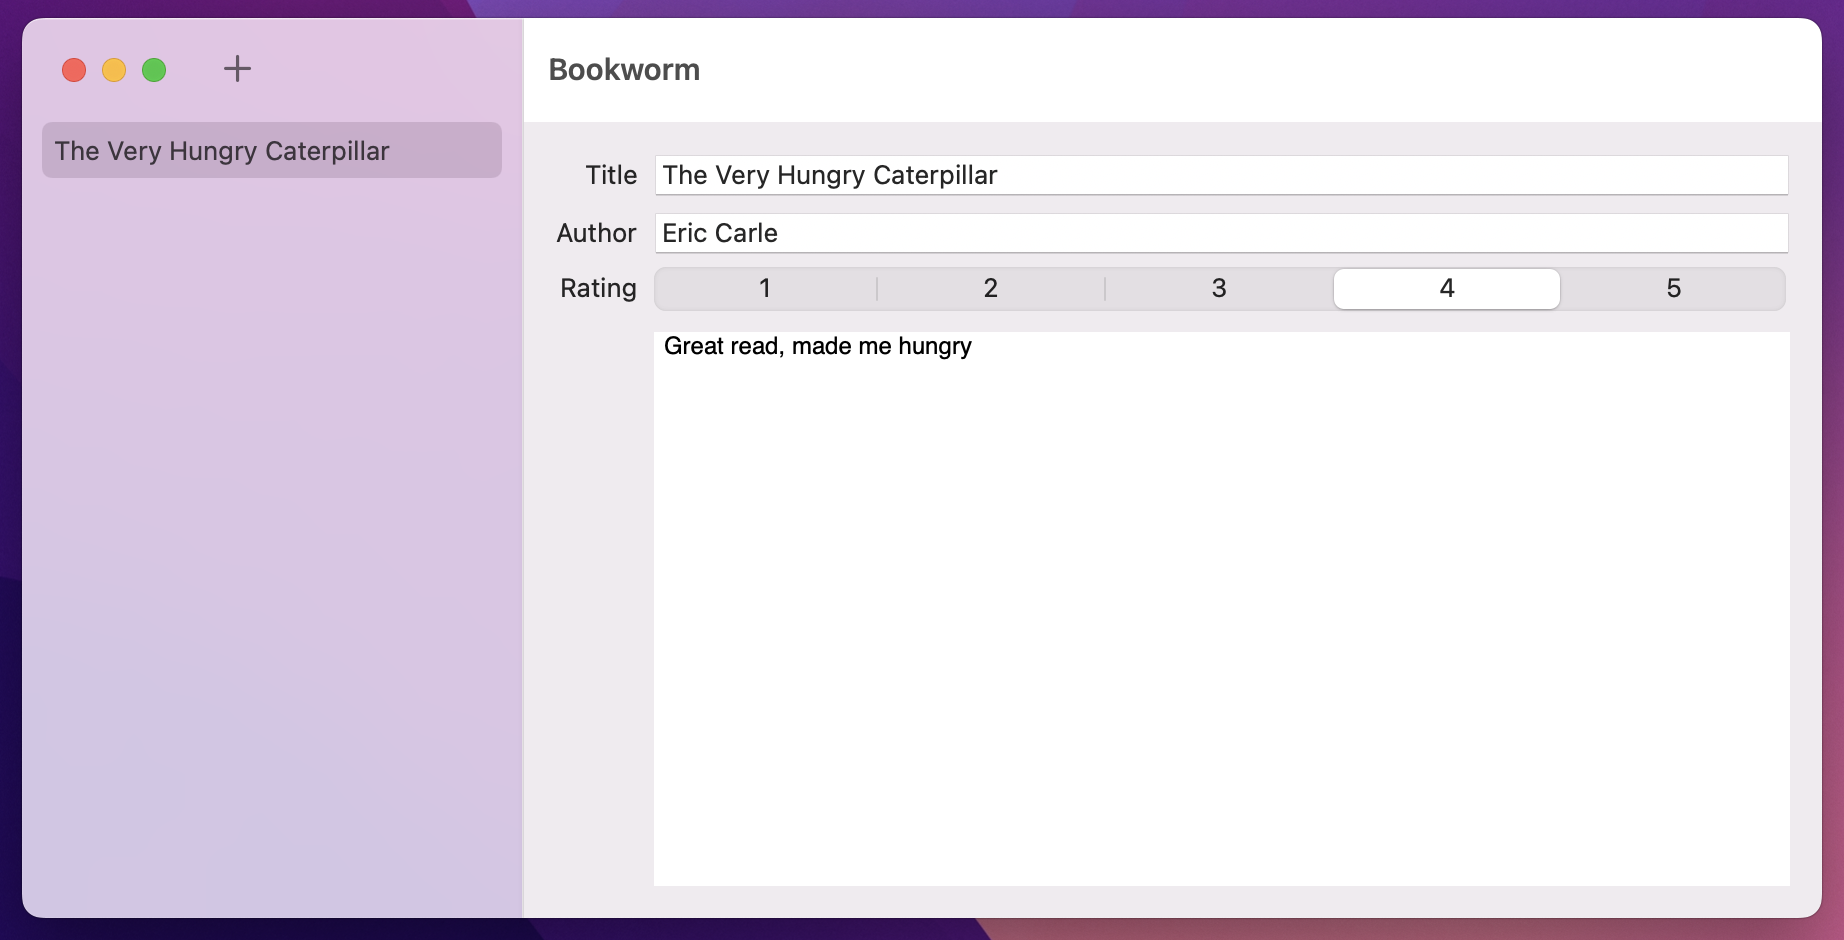
I want to add two more features before this app is done: one important, and one nice to have, but both bringing in some really useful extra skills for you.
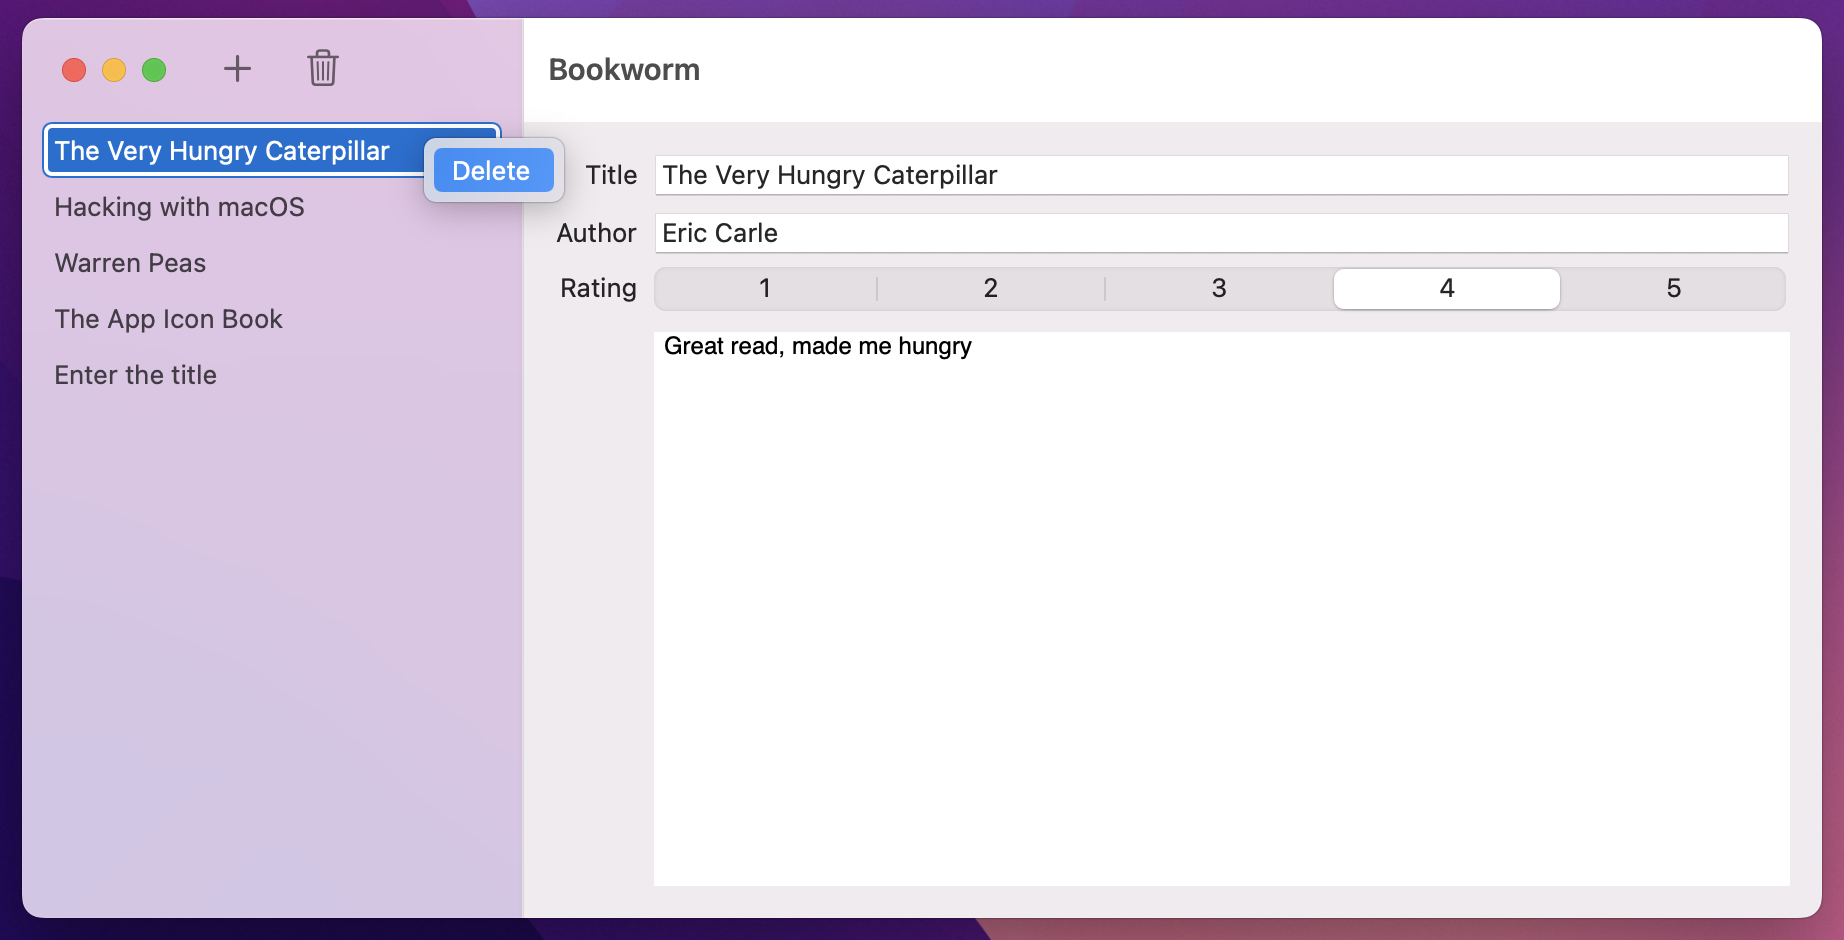
The first feature is to delete reviews we don’t want any more. This will use the same contextMenu() modifier we’ve used earlier, but this time I want to add some extra logic to automatically select a sensible next item after the deletion completes.
First, add this new method stub to ListingView, so we can fill it in step by step:
func deleteSelected() {
}
The first code inside there will be to check that we currently have a review selected, because if we don’t there’s no point continuing:
guard let selected = selectedReview else {
    return
}
After that comes an important step: we need to find where this review exists inside our query results. This matters because once the object has been deleted, we want to automatically select a different review based on its location – that will be the one after it if possible, but if we deleted the last review then we need to select the one before.
So, add this second check after the previous one:
guard let selectedIndex = reviews.firstIndex(of: selected) else {
    return
}
Next we need to write two lines of code to perform the actual deletion in SwiftData, which means deleting the selected object from our managed object context, then immediately triggering a manual save on our model context.
Now, we could let SwiftData do its usual automatic save, but that causes a complication: deleting an object from a model context doesn't actually finally delete it until a save happens, which means our results array would still contain the object we're trying to delete. Trust me, this logic is tricksy enough without having to factor in lazy deletion!
Anyway, add these two lines to your method now, one to delete the selected review and one to trigger a save:
modelContext.delete(selected)
try? modelContext.save()
And now for the bonus work: making sure we select a new review after the previous one was deleted. There are two possibilities we care about: if our selectedIndex is less than the number of reviews we have (which will be one lower, because we just deleted a review), then we can set selectedReview to whatever is the review at the same index, like this:
if selectedIndex < reviews.count {
    selectedReview = reviews[selectedIndex]
} else {
    // more code to come
}
If you’re feeling a bit uncertain about that code, here’s an example data flow:
selectedIndex.selectedIndex (1) is less than the number of items in our array (2), which it is.We also need to handle the second case, which is when selectedIndex is greater or equal to the size of our array, which will happen if we delete the last review. In this instance we need to read the previous review, but only if that doesn’t result in us trying to read index -1 because the array is empty.
So, replace the // more code to come comment with this:
let previousIndex = selectedIndex - 1

if previousIndex >= 0 {
    selectedReview = reviews[previousIndex]
}
That completes the deleteSelected() method, so now we need to call it when the user right-clicks on the review and selects Delete, or when they press a Delete toolbar button.
The first of those means adding a context menu to the text view we’re using for our rows, giving it a single button:
.contextMenu {
    Button("Delete", role: .destructive, action: deleteSelected)
}
And the second means adding another button to our toolbar, after the existing plus button:
Button("Delete", systemImage: "trash", action: deleteSelected)
    .disabled(selectedReview == nil)
Adding that disabled() modifier to the button ensures the user can’t try to delete from the list unless something is actually selected.
The second extra feature I want to add is a nice way to preview a finished review – showing all its information in a slightly more attractive way. This isn’t just about aesthetics, of course, because I’ll also be using this as a way of showing you a couple of extra techniques.
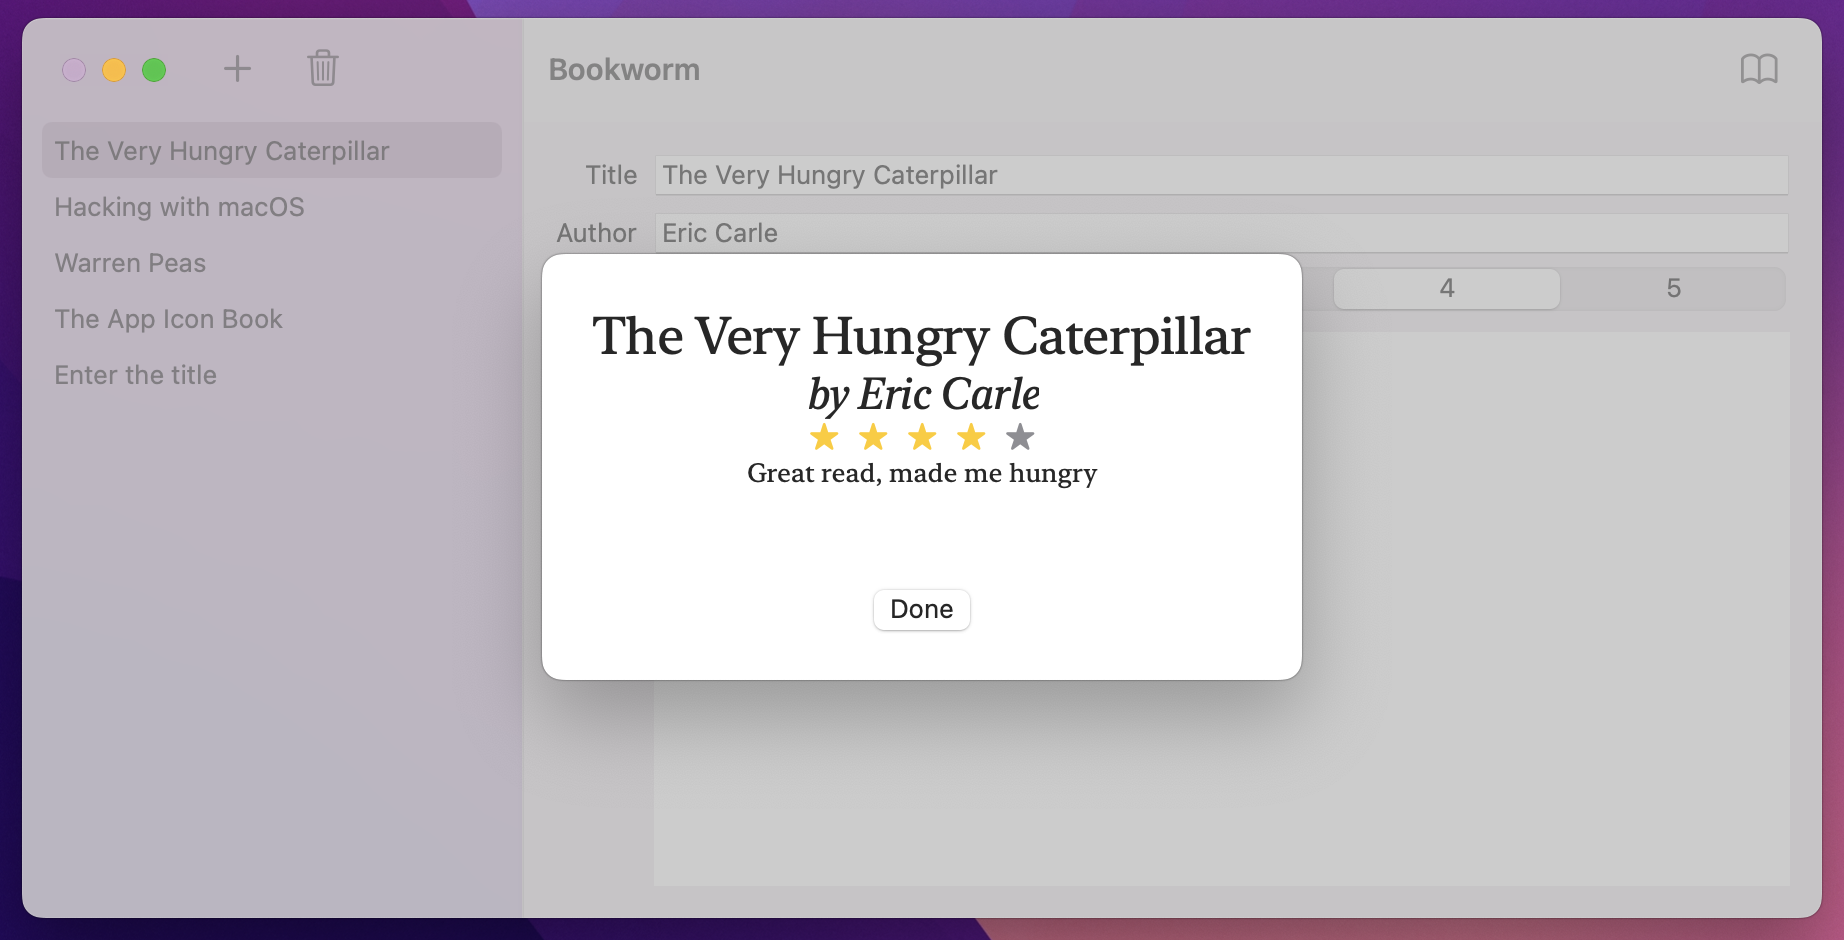
First, the easy part: make a new SwiftUI view called RenderView, then give it this code:
struct RenderView: View {
    let review: Review

    var body: some View {
        VStack(spacing: 10) {
            Text(review.title)
                .font(.system(.largeTitle, design: .serif))

            Text("by \(review.author)")
                .font(.system(.title, design: .serif))
                .italic()

            HStack {
                ForEach(0..<5) { number in
                    Image(systemName: "star.fill")
                        .foregroundStyle(number > review.rating ? .gray : .yellow)
                }
            }

            ScrollView {
                Text(review.text)
                    .fontDesign(.serif)
                    .padding(.vertical)
            }

            Spacer()
                .frame(height: 50)

            Button("Done") {
                // dismiss the view
            }
        }
        .frame(maxWidth: 800)
        .padding(25)
    }
}
There are three parts of that where you might have done a double take, but they are small:
.fontDesign(.serif) when I don’t actually need to change the underlying font size, just the design.As with DetailView, you’ll need to update your preview code to inject a test Review. That means adding import SwiftData to the top of RenderView.swift, then changing your preview code to this:
#Preview {
    do {
        let config = ModelConfiguration(isStoredInMemoryOnly: true)
        let container = try ModelContainer(for: Review.self, configurations: config)

        let review = Review(title: "Example title", author: "Example author", rating: 4, text: "Example review goes here", date: .now)

        return RenderView(review: review)
            .modelContainer(container)
    } catch {
        return Text("Failed to create preview: \(error.localizedDescription)")
    }
}
Where this view gets more interesting is in how we present and dismiss it. We’ve used NavigationSplitView a lot so far, but this view is different because it’s not something to do with hierarchical navigation – it’s just a different view of what we have already.
One option for display is to hide the form and show the rendered result when pressing a button, but I want to show you a better alternative: presenting RenderView as a sheet, which means it will be displayed over our existing window.
This takes three steps in SwiftUI, starting with a new @State Boolean in DetailView to track whether we’re currently showing the rendered version of our review or not – add this now:
@State private var showingRendered = falseNext, we need to add a toolbar to the Form in that same view, so there’s a button to toggle that Boolean when pressed:
.toolbar {
    Button("Show rendered", systemImage: "book") {
        showingRendered.toggle()
    }
}
Now for the important part: when that Boolean is true, we want SwiftUI to show a sheet containing our new RenderView, showing whatever review we were previously editing. This takes just one extra modifier, so add this below the toolbar:
.sheet(isPresented: $showingRendered) {
    RenderView(review: review)
}
So, that attaches the sheet to our new showingRendered Boolean using a two-way binding: when the Boolean is true the sheet will be shown, but when the sheet gets hidden the Boolean is set back to false automatically.
That’s half the problem solved, because now we can press the book icon to see our render sheet appear. But we still need to dismiss the sheet somehow – how can RenderView hide itself on demand?
Well, you can see I’ve added a “Done” button to the code for that view, but there’s no logic. This is where SwiftUI does something quite brilliant: rather than us trying to call some kind of closeSheet() method, we instead ask the environment to dismiss our view in whatever way is most appropriate. So, if it was presented as a sheet like we have here, then the sheet will be dismissed, but if the view was presented through a navigation link, then that will be dismissed too – the system automatically does the right thing, depending on how the view was presented.
To use this in our code, first add this property to RenderView:
@Environment(\.dismiss) var dismissThat reads the current dismiss action from the environment – we can call that whenever we want and it will hide our view, regardless of how it was shown. In the current project that means calling dismiss() from our button action, like this:
Button("Done") {
    dismiss()
}
Now the whole process works: we present a RenderView when the button is pressed, then dismiss it when Done is pressed.
And that completes our app – great job!
This isn’t a complex app in terms of the amount of code we wrote, but we did pack in a whole of new functionality: SwiftData, yes, but also @Bindable, @Environment, disabled(), sheet(), and more.
SwiftData does take a bit of getting used to, but there's a whole technique project dedicated to it in project 18 – we'll explore filtering, sorting, relationships, and more!
Here are three ways you should try extending this app to make sure you fully understand what’s going on.
RenderView.ListingView to show the book’s star rating below its title. For extra points, make the star rating view from RenderView into a standalone RatingView that can be used in both places.id right now, but allow title, author, or rating. You’ll need to save their selection as a string, then convert it to a key path when ListingView is created.Copyright © 2023 Paul Hudson, hackingwithswift.com.
You should follow me on Twitter.