![]()
In this project we’re going to build a shooting gallery game, with all the graphics and sound effects you would expect. Targets and ducks will move across the screen at increasingly fast speeds, and it’s down to the player to shoot as many as possible before the time runs out.
Along the way you’ll learn how to animate sprites around the screen, how to make actions repeat forever, how to create your own SpriteKit node subclass, how to restart the game once it’s finished, how to set a custom mouse cursor, how to run code after a delay, and more.
Create a new Game project in Xcode, name it ShootingGallery, then choose SpriteKit for the game technology. Now go ahead and clean the project so it’s in a sensible state, which means following the instructions in the “Cleaning up the Xcode template” section of project 11.
In the project files for this book, look for the folder project14-files. You’ll see a variety of images in there, plus some sounds – please drag the images into your project’s assets catalog, then place empty.wav, reload.wav, and shot.wav loose into the project navigator.
This is a game of layers: there’ll be a wood background texture, then some grass laid over it, then some background water and foreground water, then some curtains at the front. This multi-level approach lets us create targets at a variety of depths, and we’ll add to the illusion by making the further back targets a bit smaller.
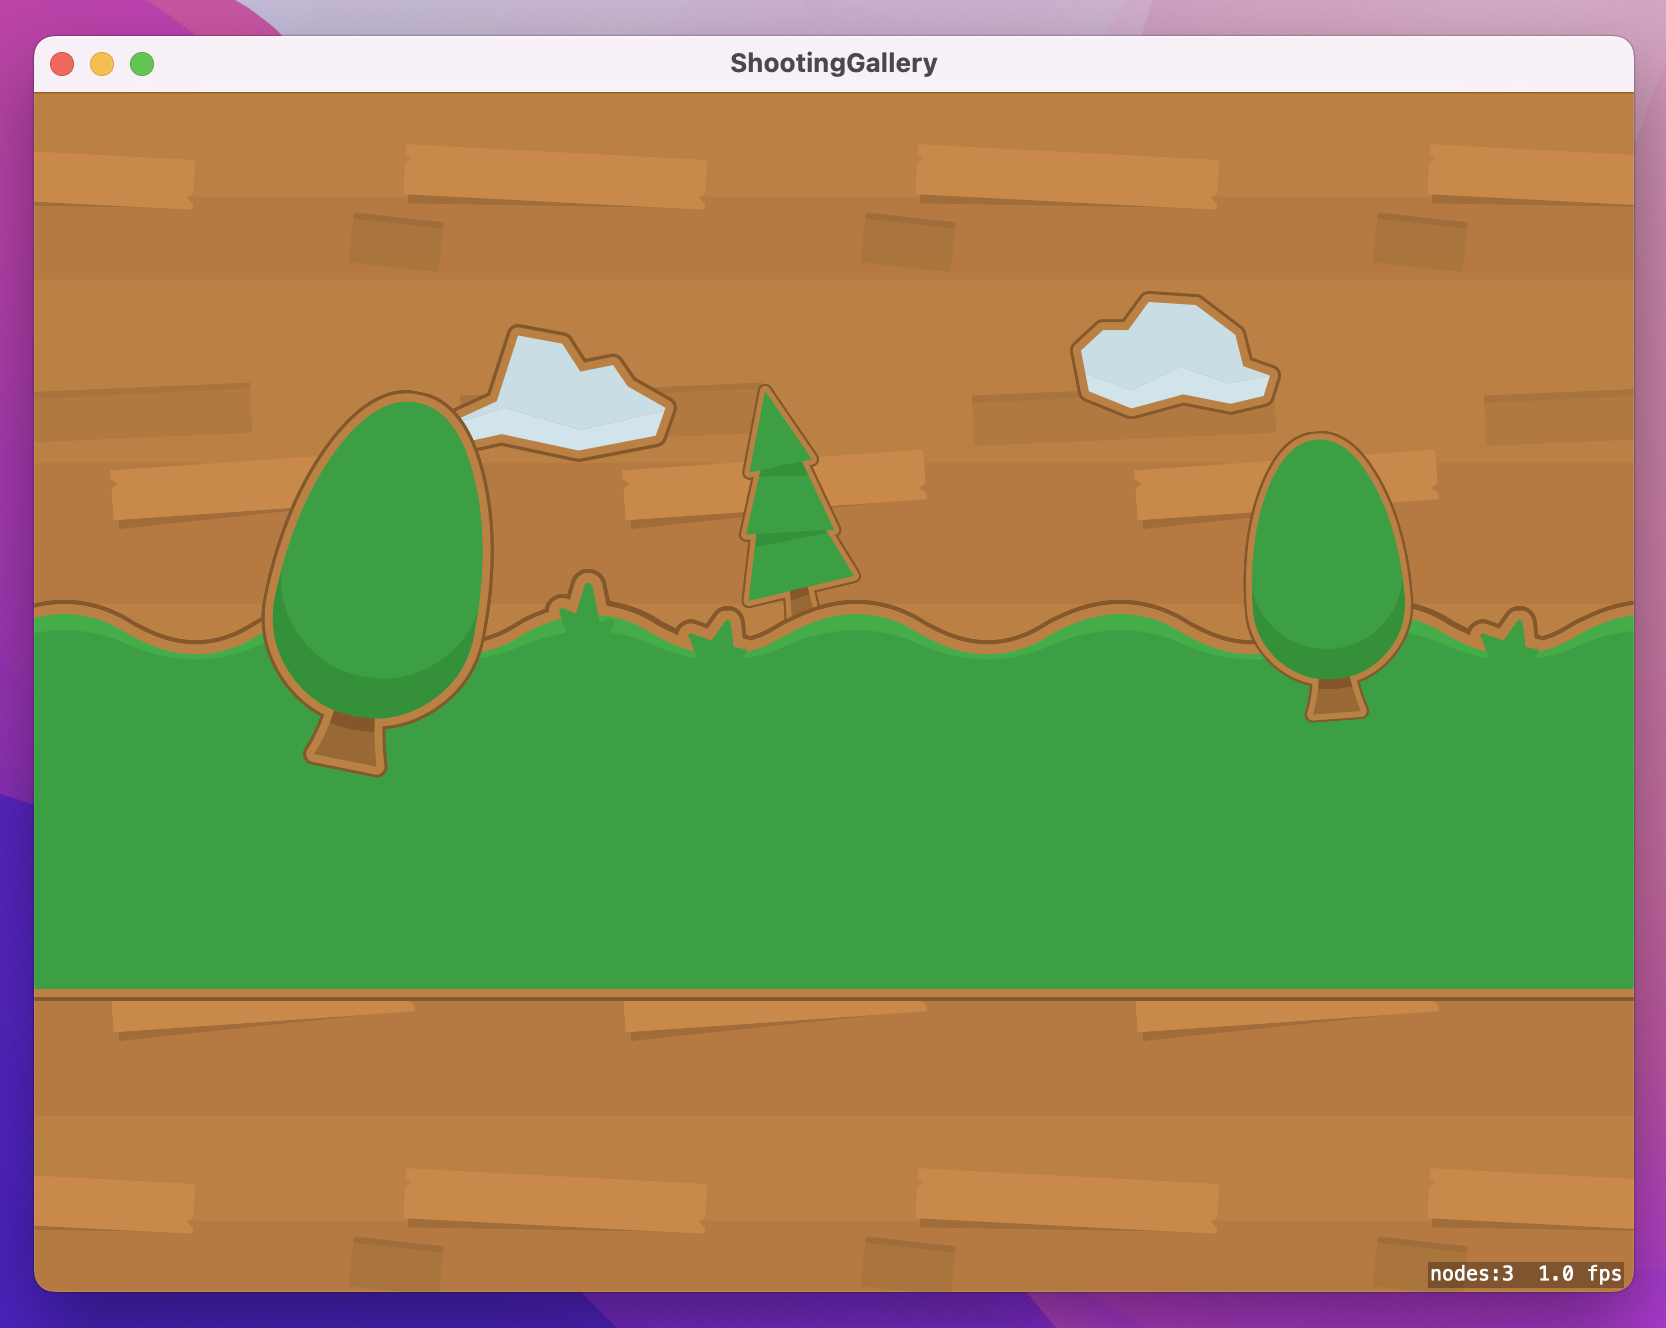
We’re going to create the game world in three different methods, to help keep things small enough to explain easily. The first method, createBackground() will load a wood image that will fill the whole screen, then overlay the grass texture on top.
The wood will be the background for everything else, so we’re going to set its blendMode property to .replace – that tells SpriteKit it can draw the texture without worrying about calculating opacity, because there’s definitely nothing behind this image. We’ll also set the zPosition property of the grass to be 100 so that it draws over the wood. You can use any number you like for this – I chose 100 because it leaves scope to place other nodes between the grass and the background if you expand the game.
Open GameScene.swift and add this method now:
func createBackground() {
    let background = SKSpriteNode(imageNamed: "wood-background")
    background.position = CGPoint(x: 400, y: 300)
    background.blendMode = .replace
    addChild(background)

    let grass = SKSpriteNode(imageNamed: "grass-trees")
    grass.position = CGPoint(x: 400, y: 300)
    addChild(grass)
    grass.zPosition = 100
}
Go ahead and add a call to createBackground() in the didMove(to:) method, and you’ll see this:
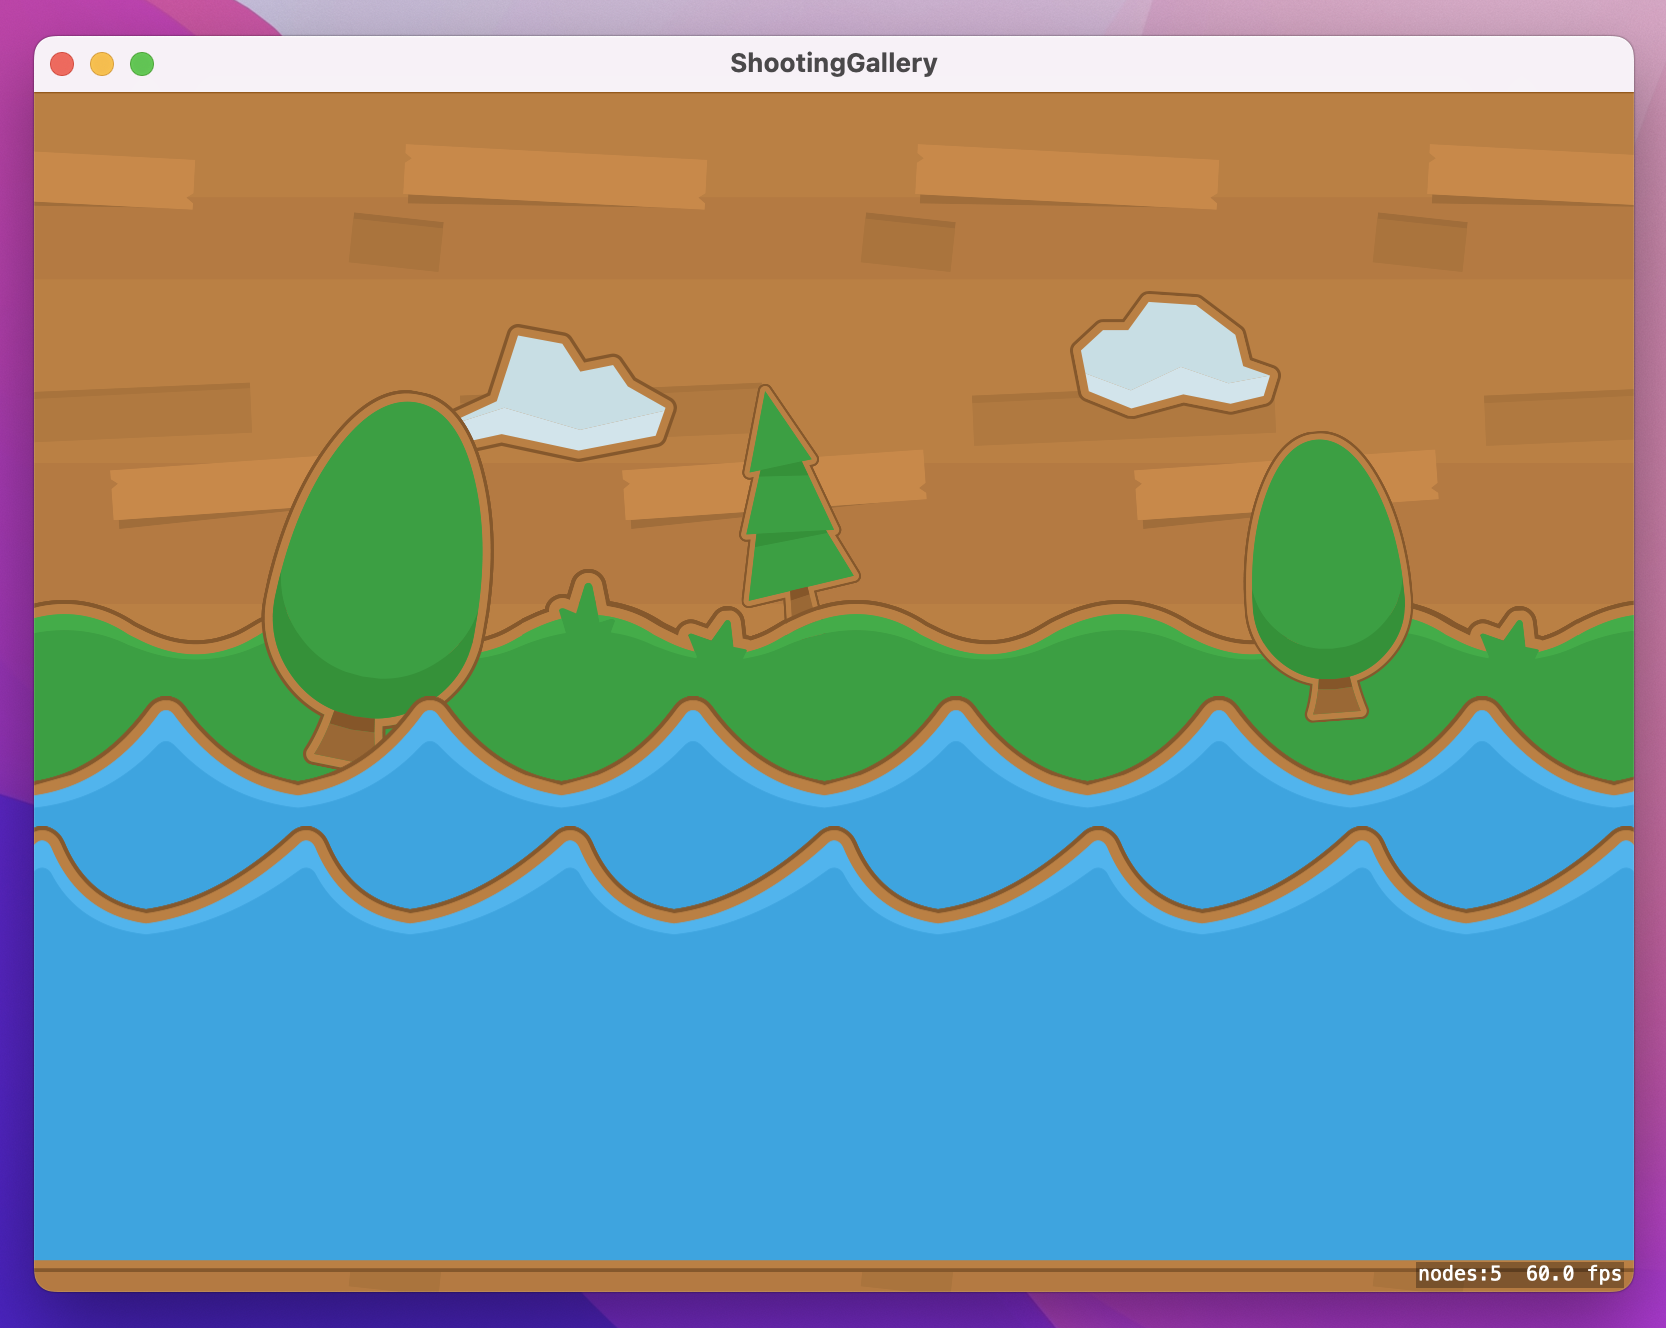
The next two layers are two slightly different water sprites, and are more interesting because we want the layers to move – and not just once, but continuously while the game runs.
This will be done using four lines of code. First, you move a node using the moveBy(x:y:duration:) action, like this:
let movementUp = SKAction.moveBy(x: 0, y: 50, duration: 1)If you want to move the item back to its starting position, you can create a second moveBy() action if you want, but a smarter move is to ask SpriteKit to reverse the first action. That’s as simple as calling its reversed() method, like this:
let movementDown = movementUp.reversed()Now that we have actions to move up and move down, we can make them run in a sequence with a third SKAction:
let sequence = SKAction.sequence([movementUp, movementDown])Finally, we’re going to create a fourth action to cause that sequence to loop forever, so that the water will move up and down for as long as the game scene is running:
let repeatForever = SKAction.repeatForever(sequence)We need to apply that whole behavior to both the background and foreground water nodes, so to avoid code duplication we’re going to make it a nested function. Nested functions are functions that are written inside another function. They look and work just like regular functions, except they are available only inside the function that contains them. When you make a function nested it’s clear to other people who read your code that it’s not designed to be used elsewhere, so they are a good idea.
So, createWater() is going to create two new water nodes, position them on the screen, give them appropriate zPosition values, then animate them using a nested animate() function. That nested function will create all the actions I just explained, making one node animate up and down while the game runs.
Here’s the createWater() method:
func createWater() {
    func animate(_ node: SKNode, distance: Double, duration: TimeInterval) {
        let movementUp = SKAction.moveBy(x: 0, y: distance, duration: duration)
        let movementDown = movementUp.reversed()
        let sequence = SKAction.sequence([movementUp, movementDown])
        let repeatForever = SKAction.repeatForever(sequence)
        node.run(repeatForever)
    }

    let waterBackground = SKSpriteNode(imageNamed: "water-bg")
    waterBackground.position = CGPoint(x: 400, y: 180)
    waterBackground.zPosition = 200
    addChild(waterBackground)

    let waterForeground = SKSpriteNode(imageNamed: "water-fg")
    waterForeground.position = CGPoint(x: 400, y: 120)
    waterForeground.zPosition = 300
    addChild(waterForeground)

    animate(waterBackground, distance: 8, duration: 1.3)
    animate(waterForeground, distance: 12, duration: 1)
}
Add a call to createWater() at the end of the didMove(to:) method, then run the game and see what you think.
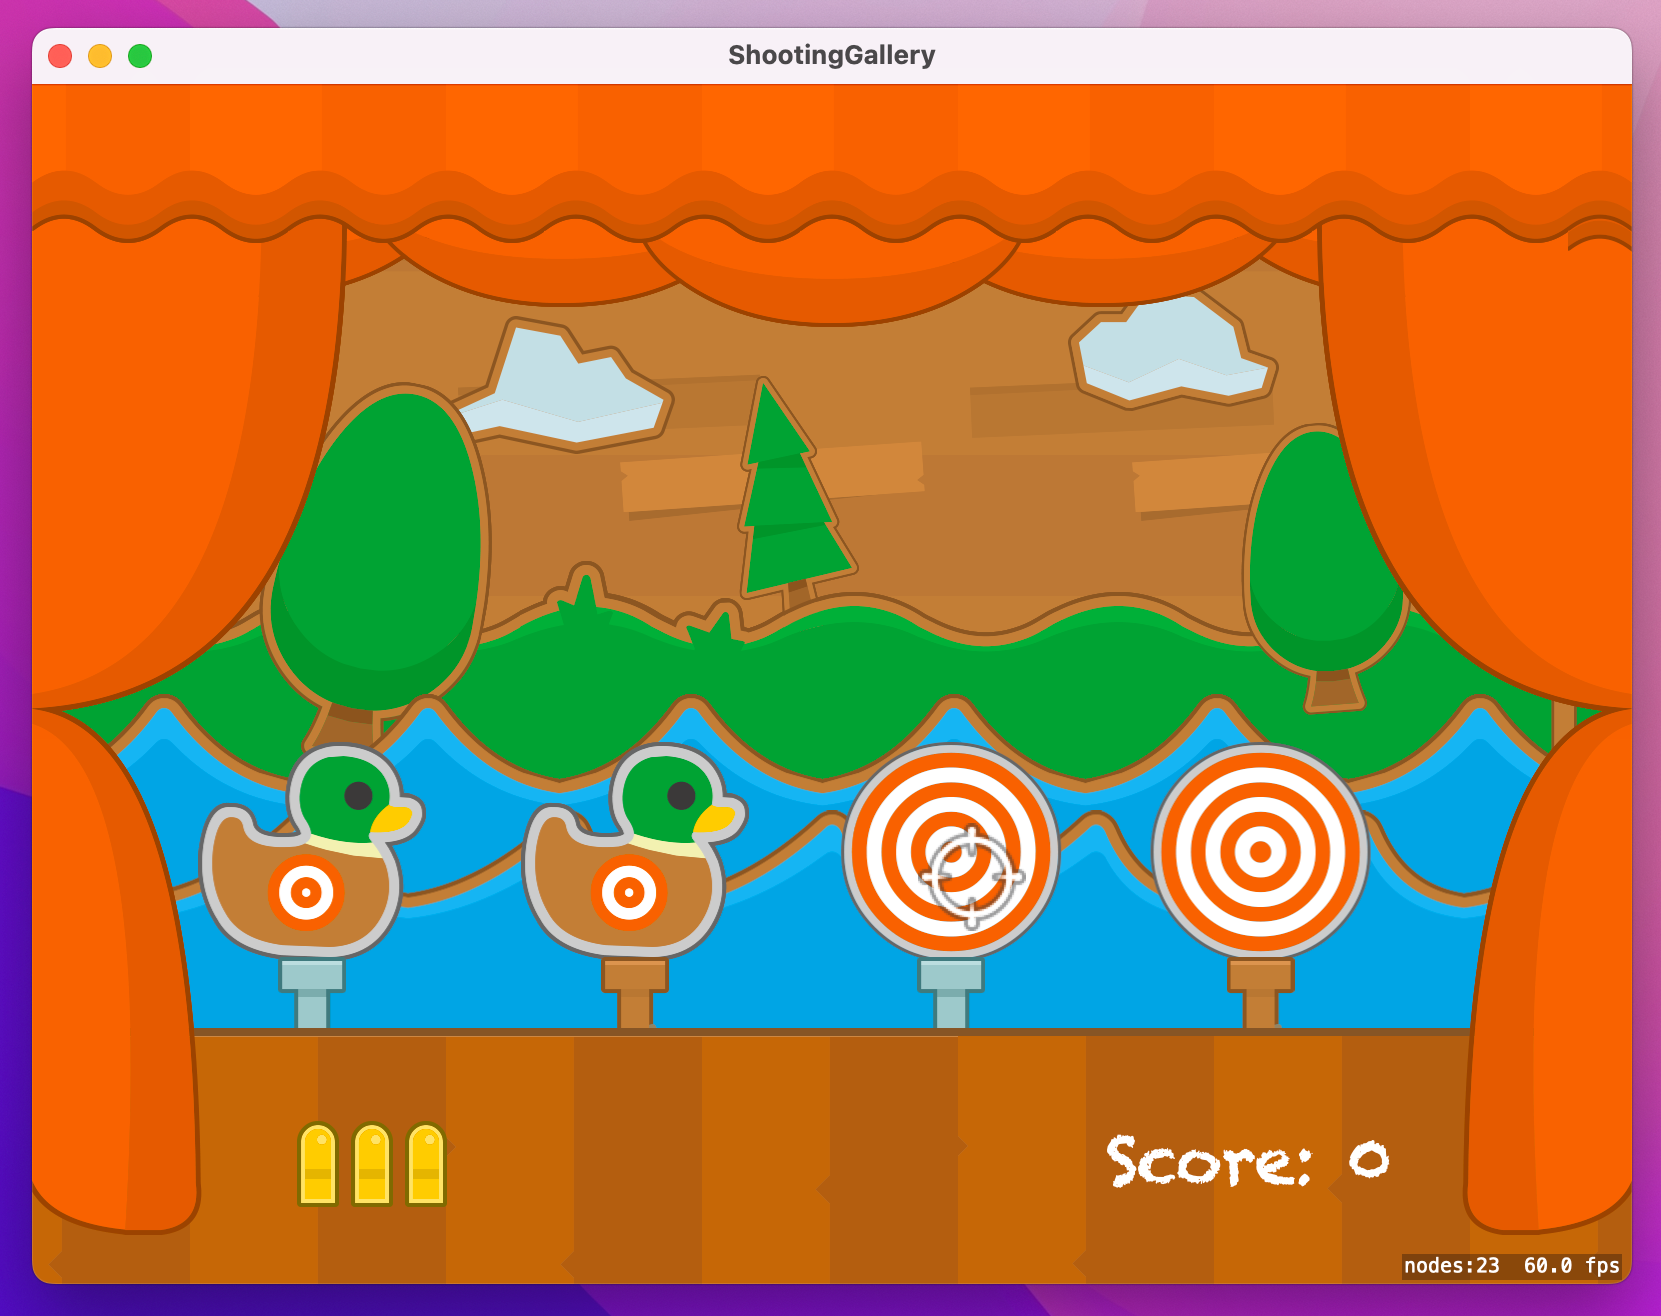
The last method we need to create our game world is createOverlay(), which creates some curtains at the front of the shooting gallery, then adds a bullet and score read out so the player can see their game status. We’re going to give them three bullets per clip, then update the bullets sprite as they fire. As for score, we’ll award three points for hitting a target, but subtract one point each time the player reloads their gun.
Because we need to adjust the bullets sprite and score during the game, we need to add some properties to store them. Add these two to the GameScene class:
var bulletsSprite: SKSpriteNode!
var scoreLabel: SKLabelNode!
With those two in place we can write the createOverlay() method. It doesn’t have anything complex, although I have made the score label align itself to the right so that it stays in position even as the score goes up.
Add this method now:
func createOverlay() {
    let curtains = SKSpriteNode(imageNamed: "curtains")
    curtains.position = CGPoint(x: 400, y: 300)
    curtains.zPosition = 400
    addChild(curtains)

    bulletsSprite = SKSpriteNode(imageNamed: "shots3")
    bulletsSprite.position = CGPoint(x: 170, y: 60)
    bulletsSprite.zPosition = 500
    addChild(bulletsSprite)

    scoreLabel = SKLabelNode(fontNamed: "Chalkduster")
    scoreLabel.horizontalAlignmentMode = .right
    scoreLabel.position = CGPoint(x: 680, y: 50)
    scoreLabel.zPosition = 500
    scoreLabel.text = "Score: 0"
    addChild(scoreLabel)
}
Finish up by adding a call to createOverlay() to the end of didMove(to:), then run the game.

That’s the full game world created, including some gentle animation to mimic wooden planks of “water” moving up and down – all we need now is something to shoot…
Simple games like Bubble Trouble from project 11 can be created using SpriteKit’s built-in node types, but there soon comes a point where it makes your code easier to read, write, and maintain if you introduce a custom class as needed.
In this game, I’ve provided you with four different target images and three different stick images to “hold up” the targets. If we mix them all up we get 12 different possible combinations, but we don’t really want GameScene to have to worry about that sort of thing. Instead, we’re going to create a custom Target node that is able to create and position its own target and stick images randomly.
Go to the File menu and choose New > File, then select Cocoa Class. Name it “Target” and make it a subclass of “SKNode” - that’s the parent class of SKSpriteNode and SKLabelNode. Open Target.swift for editing, then add this import so we can use SpriteKit:
import SpriteKitYou can create a custom initializer for your SKNode subclasses if you want, but generally I prefer not to because they come with some fairly tedious requirements. Instead, I prefer to add a setup() method or similar, which does the work that would have happened in the initializer.
To set up the Target class, we’re going to generate two random numbers: one for the stick type, and one for the target image type. We’re then going to name the target image “target” so we can detect when it was clicked on, in comparison to the player clicking on the stick. Finally, we need to offset the target image by 116 pixels so that it sits at the top of the stick.
So, add these two properties to the Target class:
var target: SKSpriteNode!
var stick: SKSpriteNode!
Now add this method:
func setup() {
    let stickType = Int.random(in: 0...2)
    let targetType = Int.random(in: 0...3)

    stick = SKSpriteNode(imageNamed: "stick\(stickType)")
    target = SKSpriteNode(imageNamed: "target\(targetType)")

    target.name = "target"
    target.position.y += 116

    addChild(stick)
    addChild(target)
}
Having a Target class isn’t enough, because we need to actually create some instances of it. This is done in two steps: creating some properties to track target creation, then writing a createTarget() method to do all the work.
Let’s start with the properties, because they are nice and easy. We need to add three properties to GameScene.swift: how fast each target should move, how long to wait between creating targets, and how many targets we’ve created in total. Add these three to the GameScene class:
var targetSpeed = 4.0
var targetDelay = 0.8
var targetsCreated = 0
Next we’re going to write the createTarget() method, but it’s more complicated than just some properties. It needs to:
Target object then call its setup() method.You’ve already written code to do most of that, but there are a three extras that I’d love to touch on briefly.
First, our layering effect means that some targets are created further back in the game scene than others. We’re going to make that look a little more realistic by setting the back-most targets to have a scale of 0.7 (i.e. 70% of its original size), and middle targets to have a scale of 0.85.
Second, targets in the middle row are going to move right to left, but all our images are facing the other direction. To correct this, we’re going to flip the sign on its xScale property, like this:
target.xScale = -0.85That will cause the image to be flipped horizontally, making the ducks face to the left.
Third, I’m going to make targets move at different speeds depending on how far back they are created in the game scene, adding further to the feeling of depth. This will be done by multiplying the targetSpeed property by 1.1 or 1.2, so the difference is just barely noticeable.
The createTarget() method is quite long, so I’ve added extra comments below to make it easier to follow. Add this method now:
func createTarget() {
    // create and initialize our custom node
    let target = Target()
    target.setup()

    // decide where we want to place it in the game scene
    let level = Int.random(in: 0...2)

    // default to targets moving left to right
    var movingRight = true

    switch level {
    case 0:
        // in front of the grass
        target.zPosition = 150
        target.position.y = 280
        target.setScale(0.7)
    case 1:
        // in front of the water background
        target.zPosition = 250
        target.position.y = 190
        target.setScale(0.85)
        movingRight = false
    default:
        // in front of the water foreground
        target.zPosition = 350
        target.position.y = 100
    }

    // now position the target at the left or right edge, moving it to the opposite edge.
    let move: SKAction

    if movingRight {
        target.position.x = 0
        move = SKAction.moveTo(x: 800, duration: targetSpeed)
    } else {
        target.position.x = 800
        // flip the target horizontally so it faces the direction of travel
        target.xScale = -target.xScale
        move = SKAction.moveTo(x: 0, duration: targetSpeed)
    }

    // create a sequence that moves the target across the screen then removes it from the screen afterwards
    let sequence = SKAction.sequence([move, SKAction.removeFromParent()])

    // start the target moving, then add it to our game scene
    target.run(sequence)
    addChild(target)
}
We’re almost done with this part of the game, and the last remaining task is to call createTarget() at regular intervals. Each time a target is created we’re going to call a new method called levelUp(), which will do several things:
targetSpeed by 0.99, making the next target move fractionally faster than its predecessor.targetDelay by 0.99, making the next target be created slightly sooner than its predecessor.targetsCreated, so we can track how many targets have been created in total.targetDelay after some time has elapsed.Only that last part is new, and relies on a piece of functionality that used to have extensive use in AppKit but now gets used a great deal less: Grand Central Dispatch, or GCD. This is Apple’s older method of creating asynchronous functionality, but these days it’s main use is running code after a delay. To do that, call DispatchQueue.main.asyncAfter() and pass in a deadline, usually expressed as the value .now() plus some amount – that would be .now() + targetDelay in this project.
Alongside a deadline, the asyncAfter() method also accepts a function to run as soon as the deadline is reached, which is where we’ll be calling createTarget() to keep the game going.
Here’s the code for levelUp():
func levelUp() {
    // make the game slightly harder
    targetSpeed *= 0.99
    targetDelay *= 0.99

    // update our target counter
    targetsCreated += 1

    if targetsCreated < 100 {
        // schedule another target to be created after `targetDelay` seconds have passed
        DispatchQueue.main.asyncAfter(deadline: .now() + targetDelay) {
            self.createTarget()
        }
    } else {
        // game over!
    }
}
We’ll be filling in the “game over!” section later on, but for now add calls to levelUp() at the end of createTarget() and also at the end of didMove(to:) so that our game starts creating targets when it launches.
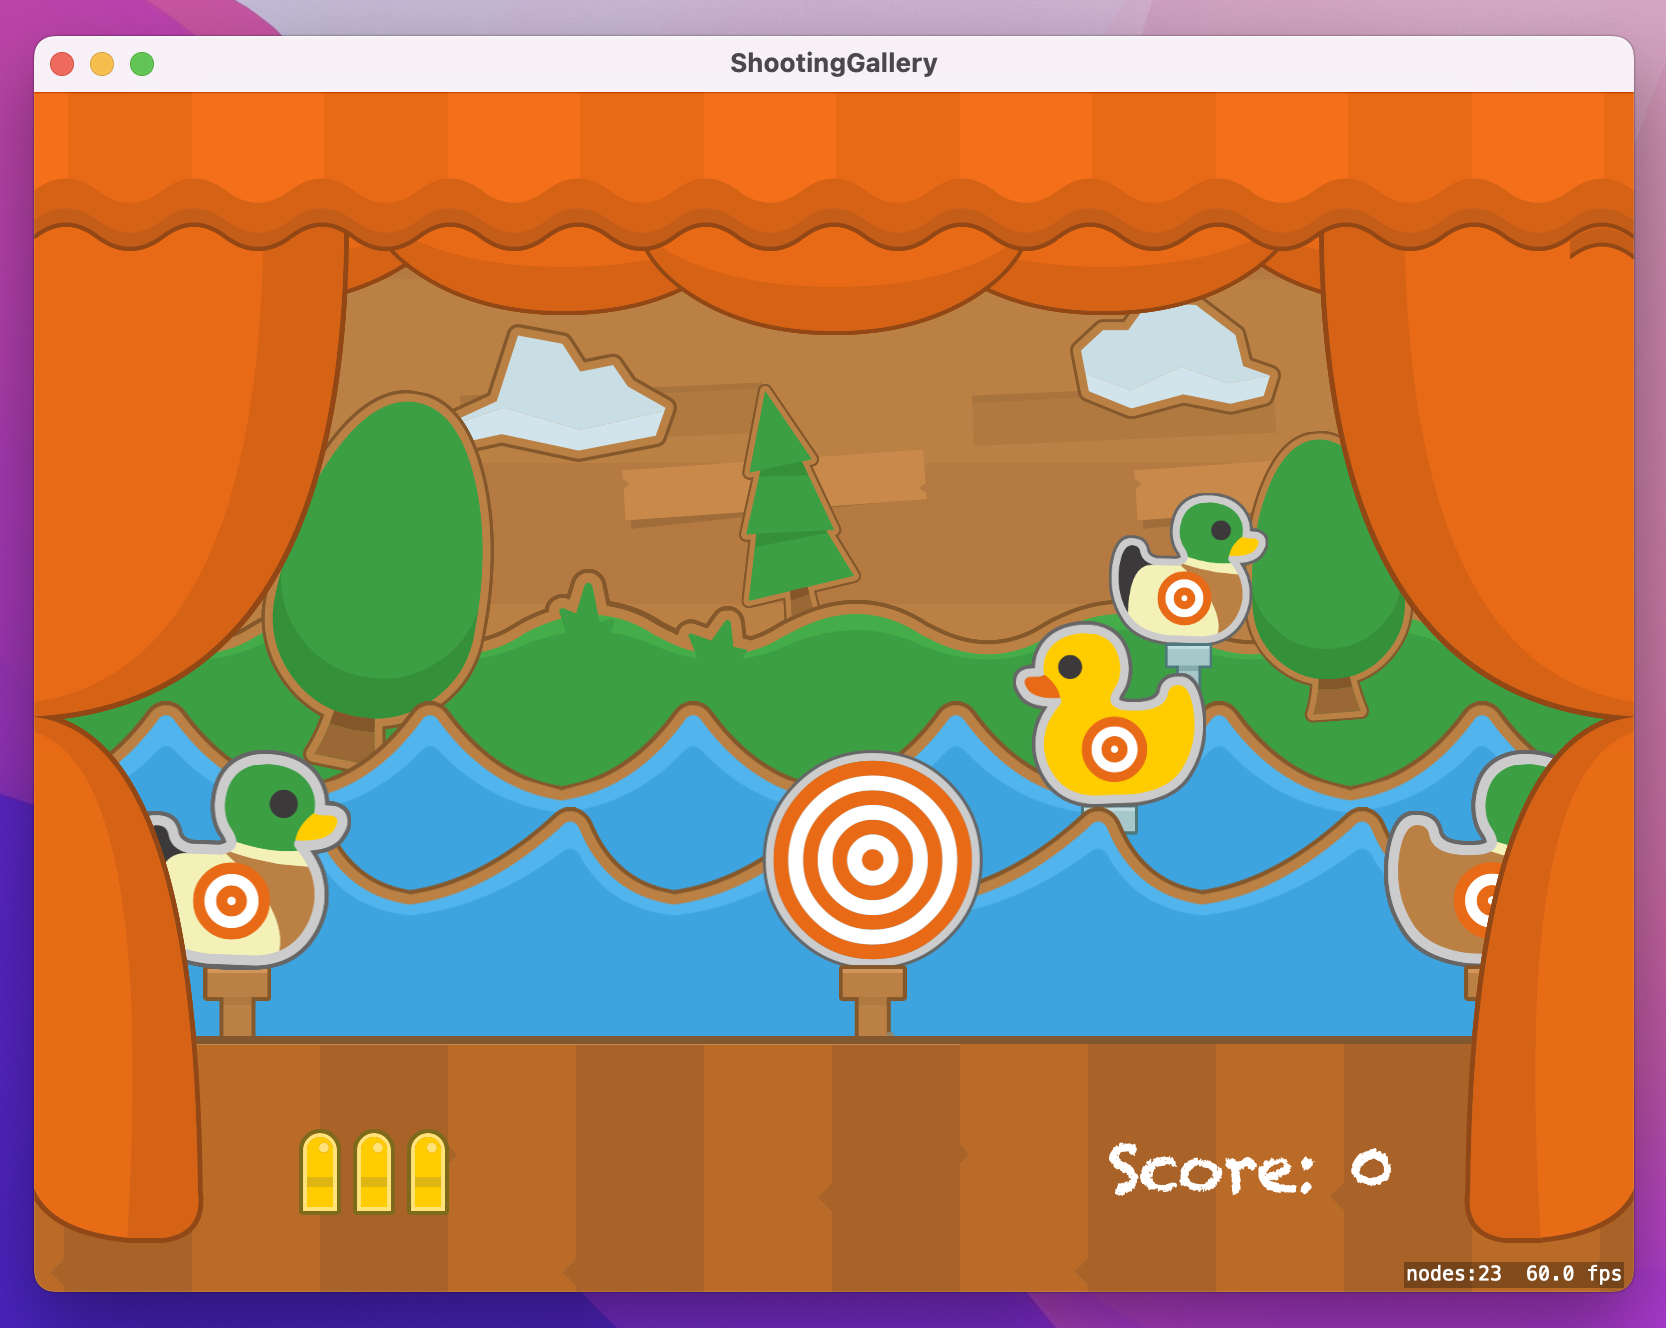
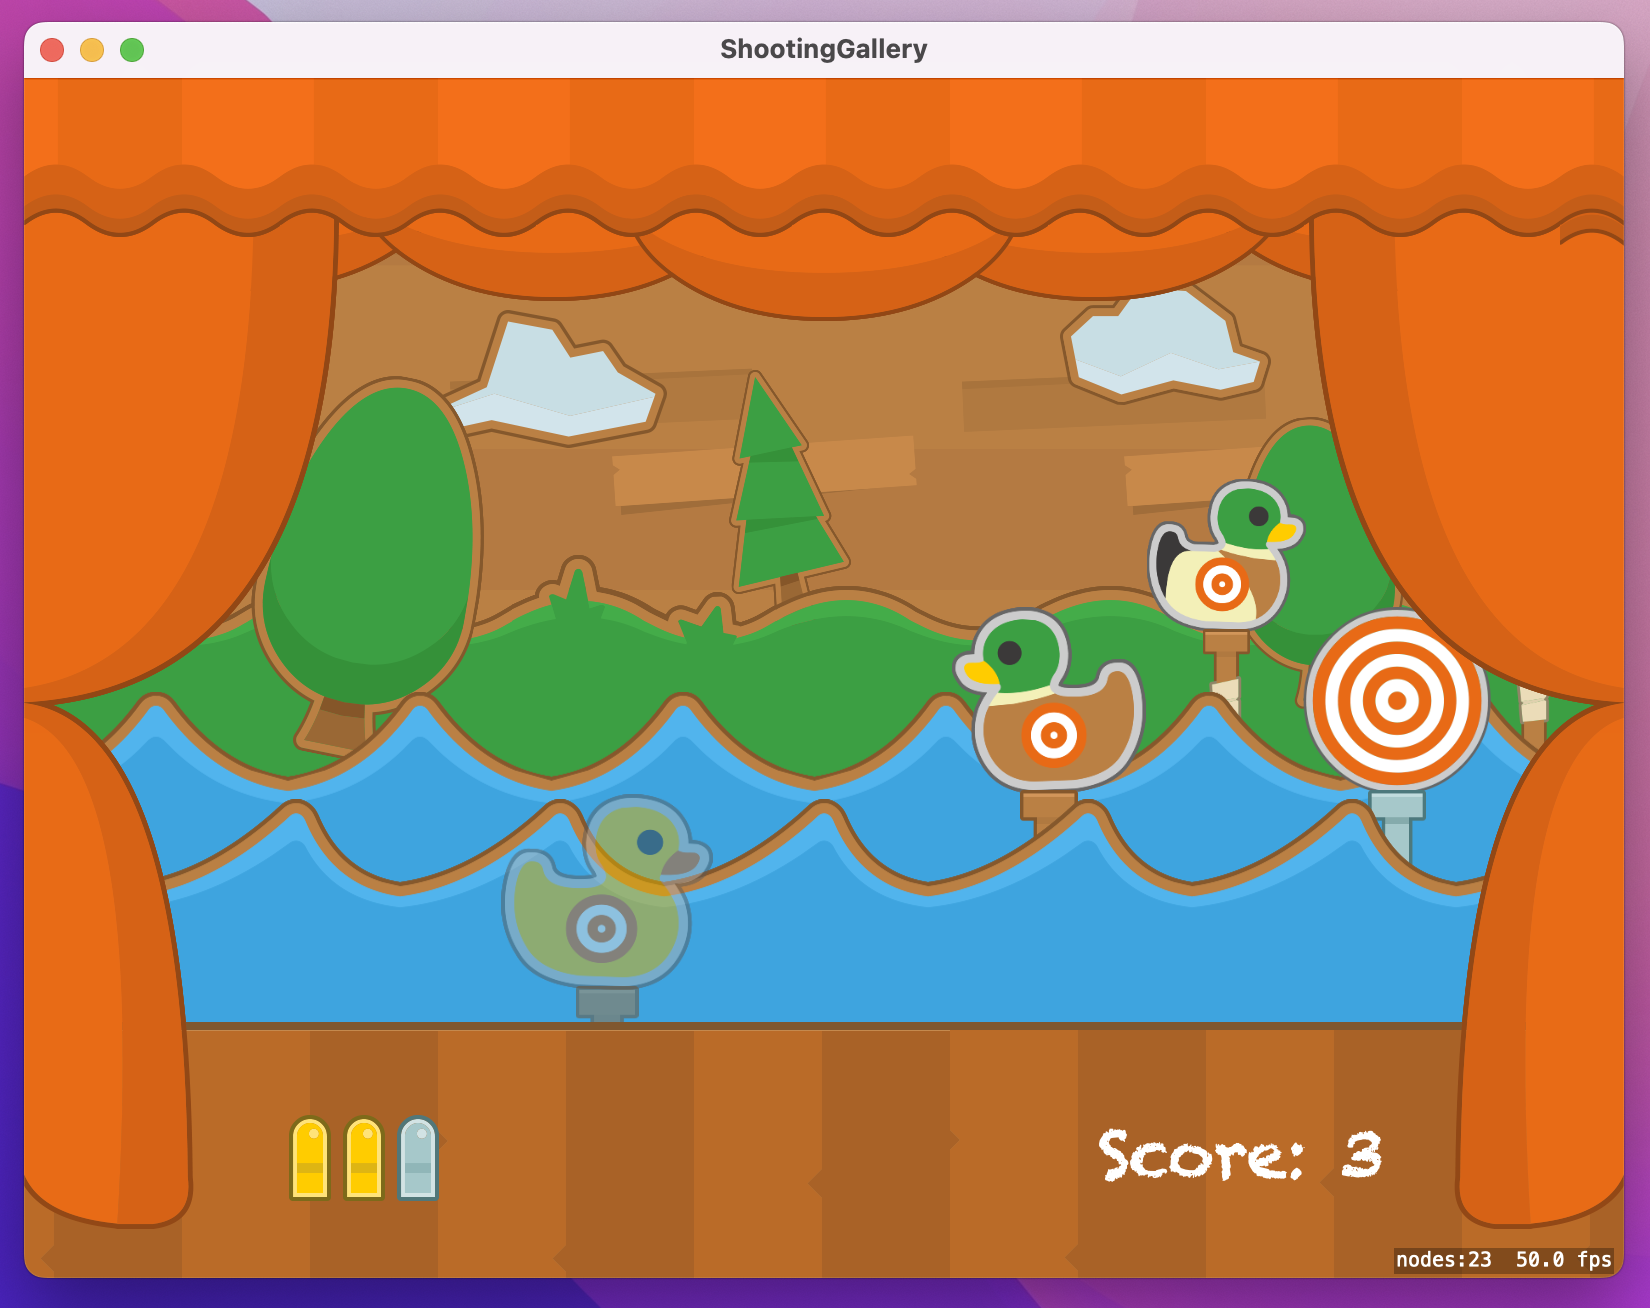
Run the game now and admire your work so far – you should see targets sliding smoothly across the screen in different directions, slowly getting faster and more frequent over time. Admit it: you’re itching to start shooting them. Well, you’re in luck…
There are two controls for our game: clicking the mouse button to fire a bullet wherever the mouse pointer is, and pressing the spacebar to reload the weapon. As the player fires and reloads, we’re going to update the bullet sprite so they can always see how many shots are left in their clip, and we’ll also update their score when they hit a target.
To make this work we need to add some more properties:
bulletsInClip. This will have a property observer so that it updates the bulletsSprite texture when bullets are fired.bulletTextures array.score, which will have a property observer to update scoreLabel as needed.isGameOver, because we don’t want the player firing once the game finishes.So, four new properties. The isGameOver property is nice and easy, so add that first:
var isGameOver = falseThe score property will start at 0, but like I said we’re going to attach a property observer so that it updates the scoreLabel text as the player’s score changes. Add this next to scoreLabel:
var score = 0 {
    didSet {
        scoreLabel.text = "Score: \(score)"
    }
}
The bulletTextures property will be an array of four textures representing the player’s current ammunition clip. We’re going to load them as textures, then place them at the same position in the array as they represent for the bullet count – i.e., the empty clip picture will be at position 0, the 1 bullet picture will be at position 1, and so on.
Add this property next to bulletsSprite:
var bulletTextures = [
    SKTexture(imageNamed: "shots0"),
    SKTexture(imageNamed: "shots1"),
    SKTexture(imageNamed: "shots2"),
    SKTexture(imageNamed: "shots3"),
]
Finally, the bulletsInClip property will track how many bullets the player has left to fire because they must reload. This will start at 3, and we’ll attach a property observer to update the bulletsSprite texture whenever it changes. Because we ordered bulletTextures sensibly, the code is easy – add this now:
var bulletsInClip = 3 {
    didSet {
        bulletsSprite.texture = bulletTextures[bulletsInClip]
    }
}
With those four new properties in place, we can write the methods required to handle shooting and reloading.
First, mouseDown(). This will be triggered when the user clicks to fire will do the following:
isGameOver is true, we’re going to do nothing – for now.bulletsInClip, then call a shot(at:) method to figure out what got hit.Add this method now:
override func mouseDown(with event: NSEvent) {
    if isGameOver {
        // ignore the click for now
    } else {
        if bulletsInClip > 0 {
            run(SKAction.playSoundFileNamed("shot.wav", waitForCompletion: false))
            bulletsInClip -= 1

            let location = event.location(in: self)
            shot(at: location)
        } else {
            run(SKAction.playSoundFileNamed("empty.wav", waitForCompletion: false))
        }
    }
}
You’ll get an error because shot(at:) doesn’t exist yet, so let’s write that now. This gets called when the player has fired a bullet, and it will be passed the location in the game where the bullet was fired.
Figuring out what was hit takes three steps. First, we’ll use nodes(at:) to get the list of SpriteKit nodes at the clicked location, filtering that so it contains only nodes with the name “target”. Second, we’ll pull out the first item in the result array if it exists, otherwise exit because no targets were shot. Finally, we’ll attempt to read the parent node of the target, and exit if that failed.
That last step is new, but important. Remember, our Target class is made of two smaller elements, the duck image and a stick image. Of all three nodes, only the duck has the name “target”, so that’s what will appear in the list of nodes that got clicked. We want to remove the whole target – stick included – when something gets shot, which means finding the parent of the thing that got shot.
In code, we can find the parent node, optionally typecast it to a Target, and exit if there either was no parent or it wasn’t a Target, all in one line of code:
guard let parentNode = hitNode.parent as? Target else { return }Once we know what was hit, we’re going to call removeFromParent() on it to destroy both the duck and the stick, then add three to the player’s score. Remember, we have a property observer on score, meaning that scoreLabel will update to stay in sync.
Add this method now:
func shot(at location: CGPoint) {
    let hitNodes = nodes(at: location).filter { $0.name == "target" }

    guard let hitNode = hitNodes.first else { return }
    guard let parentNode = hitNode.parent as? Target else { return }

    parentNode.removeFromParent()

    score += 3
}
Before you run the game, we’re going to add one last method so that players can reload their gun by pressing the spacebar. If the game is over this method won’t do anything, but otherwise we’ll play “reload.wav”, reset bulletsInClip to 3, then take one away from the player’s score to discourage them from constantly reloading.
Here’s the method:
override func keyDown(with event: NSEvent) {
    guard isGameOver == false else { return }

    if event.charactersIgnoringModifiers == " " {
        run(SKAction.playSoundFileNamed("reload.wav", waitForCompletion: false))
        bulletsInClip = 3
        score -= 1
    }
}
As you can see, checking for a space is much easier than the code we wrote to check for delete being pressed in project 7! All we need to do is compare charactersIgnoringModifiers against “ ”, i.e. a string containing a single space.

That’s this step complete, so run the game – I think you’ll find it quite playable now! Remember, the first time you play a sound there’s a short delay while SpriteKit spins up its audio engine, but after that you should be able to fire and reload at will.
This game works, and we could quite easily stop here and move onto the next project feeling satisfied that we’ve made something useful. However, there are four more things I’d like to add that really help make this whole game better:
removeFromParent() when a target gets hit, which is a bit dull.Of the four, only the first one is difficult, and only then because macOS does it in a strange way. So, let’s start there and get it out of the way!
Custom cursors in macOS are set by calling the addCursorRect() method on your view. You tell it what cursor you want to use with a NSCursor object, as well as the rectangle where that cursor should be valid. That’s a bit strange already, but what’s really weird is that you shouldn’t call addCursorRect() directly – instead you need to subclass SKView, override its default resetCursorRects() method, then call addCursorRect() from there.
I could complain about this further, particularly because the custom cursor doesn’t always work, but really there’s no point – this kind of quirky behavior is just par for the course with AppKit.
Go to the File menu and choose New > File. Create a new Cocoa class named “GameView”, and make it a subclass of “SKView”. When the new file is created, open it for editing. You might seen an error from Xcode because GameView inherits from SKView without importing SpriteKit, so add this import:
import SpriteKitThe new GameView class only needs one method, which is the resetCursorRects() method I just mentioned to you. This will create an NSImage from the asset named “cursor”, then create an NSCursor object out of it. When you create an NSCursor you need to set a hotspot, which is the point where it should be centered – that’s the top-left corner for the default mouse pointer, but for our target reticule we’ll place the hotspot in the center.
Finally, we’ll call addCursorRect() to tell macOS to associate our window’s frame with the new NSCursor we just created. Add this method to GameView.swift:
override func resetCursorRects() {
if let targetImage = NSImage(named: "cursor") {
let cursor = NSCursor(image: targetImage, hotSpot: CGPoint(x: targetImage.size.width / 2, y: targetImage.size.height / 2))
addCursorRect(frame, cursor: cursor)
}
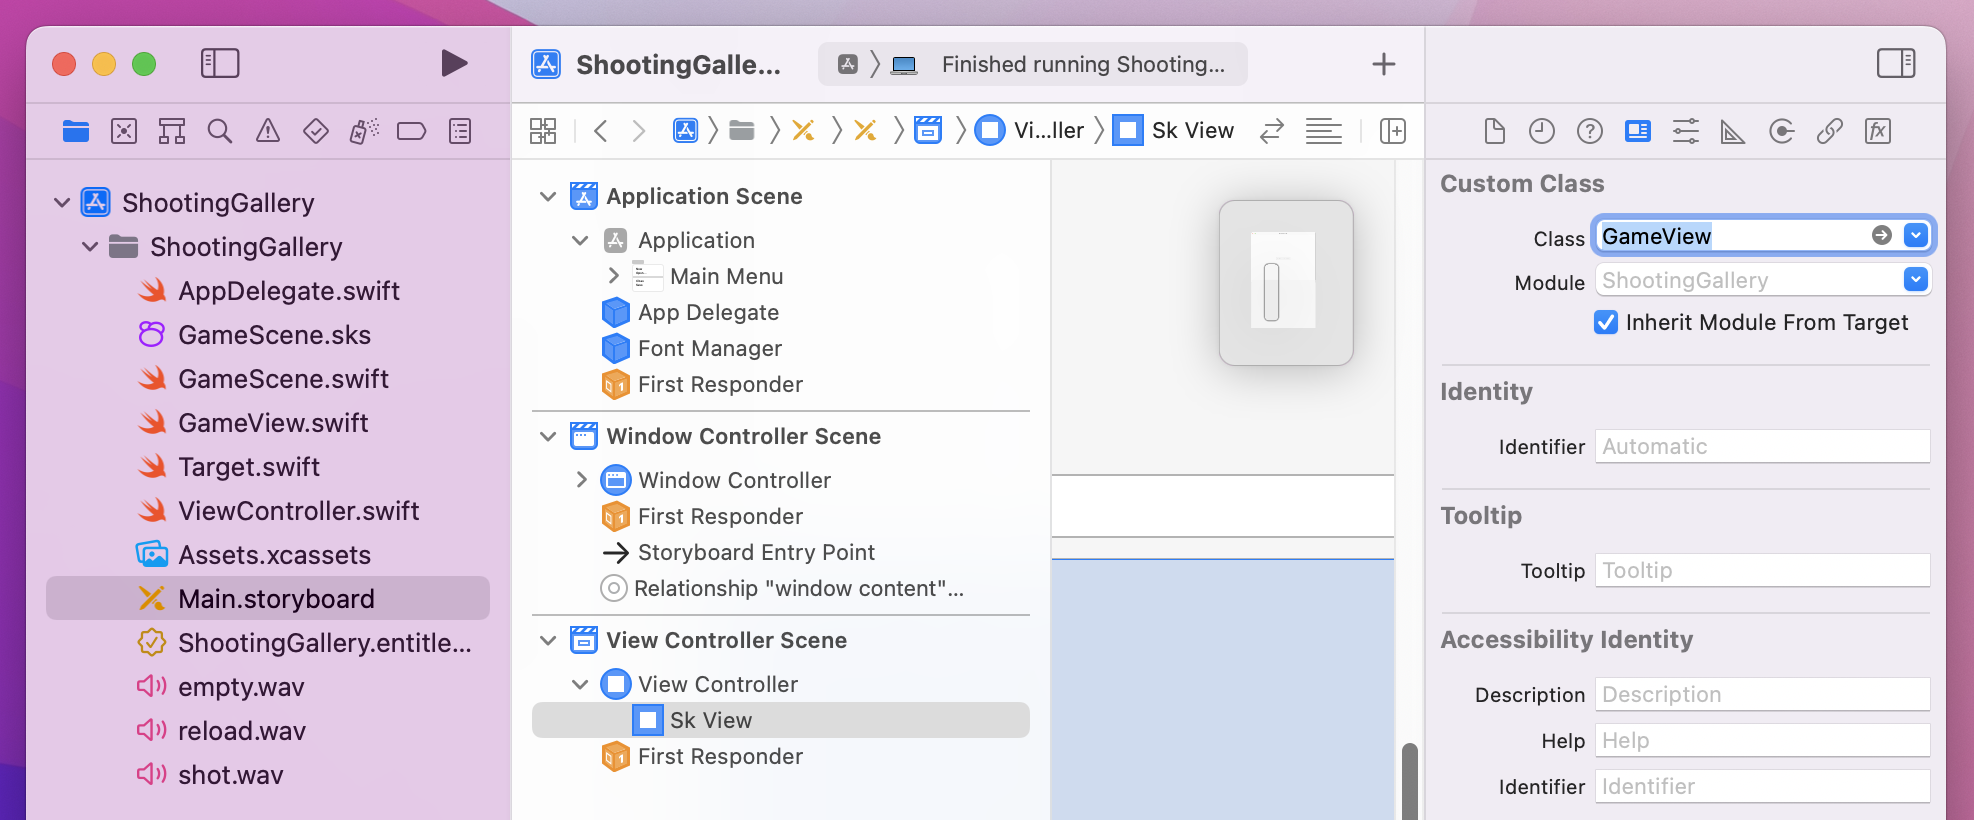
}That’s all the GameView code written, but we do need to associate it to our window in the storyboard. To do that, open Main.storyboard, then open “View Controller Scene” to find “View Controller” then “Sk View”. Select “Sk View” from the document outline, then go to the identity inspector and change Class from “SKView” to “GameView”.
The second thing we’re going to do is add a hit effect for our target, because just using removeFromParent() isn’t fun at all. SpriteKit works with 2D graphics so we’re limited in what we can do, but we can actually produce a pretty realistic disappearing effect by combining four different actions. Three of these actions you’ve seen before (fade, move, and scale), but there’s one new one, colorize(), which lets you adjust the color used to draw the sprite. A sprite’s color is white by default, which makes the sprite’s texture shine through brightly, but you can also make it red or blue to tint the texture appropriately. We’ll be animating it to be black while the other actions are happening, which will cause the sprite get darker as if it were falling into the shadows.
We made a custom Target class earlier, which means we can add this combination effect as a single method there. This will run a colorize action on the target and stick to make both textures get dimmer, then make the whole node fade out to 0, move down a little, and also scale down to 80% of its original size. The whole effect is quite convincing, I think!
We’re going to add two more lines of code before those actions are run. The first is a call to removeAllActions(), which clears any actions currently attached to the Target node. Remember, each one of those is running a sequence causing it to move across the screen then be removed from the game, so calling removeAllActions() will cause it to stop dead when shot. Second, we’ll be setting target.name to nil, so the player won’t be able to shoot a target multiple times to score easy points.
Add this method to the Target class:
func hit() {
    removeAllActions()
    target.name = nil

    let animationTime = 0.2
    target.run(SKAction.colorize(with: .black, colorBlendFactor: 1, duration: animationTime))
    stick.run(SKAction.colorize(with: .black, colorBlendFactor: 1, duration: animationTime))
    run(SKAction.fadeOut(withDuration: animationTime))
    run(SKAction.moveBy(x: 0, y: -30, duration: animationTime))
    run(SKAction.scaleX(by: 0.8, y: 0.7, duration: animationTime))
}
With that method written, you can go back to the shot(at:) method in GameScene.swift and replace the parentNode.removeFromParent() line with parentNode.hit() to trigger the new effect. Give it a try – I think it works well!
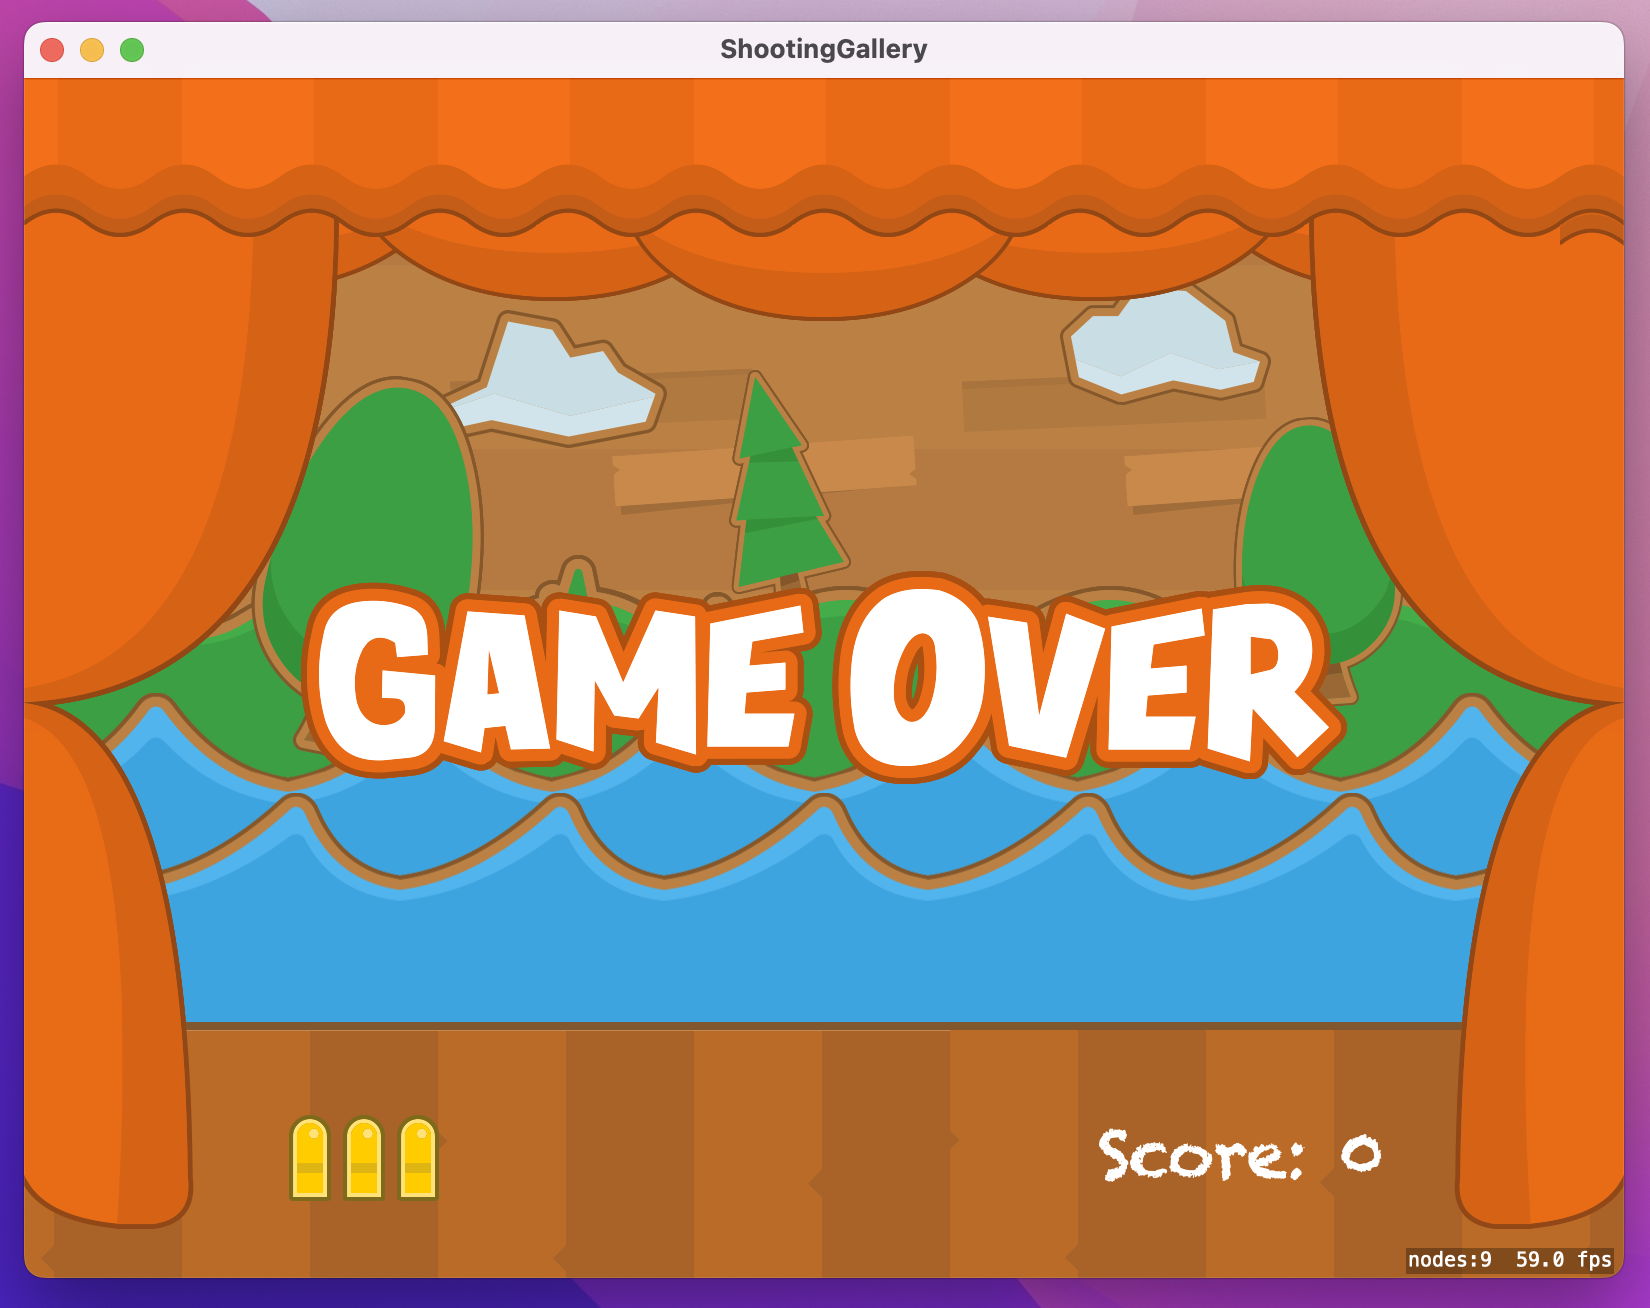
That’s two tasks down, so let’s look at the third: handling the end of the game. This will be done with a new gameOver() method in GameScene that needs to set isGameOver to true, then add a big “Game over” title to the scene and animate it in.
There’s nothing new here, but we can at least take this chance to try a different animation. To make the title animate in dramatically, we’re going to set its alpha to 0 and its scale to 2 so it’s big and invisible. We’ll then animate its alpha up to 1 and its scale down to 1, so you get a sort of “drop” effect, like “Scale Big” if you’re a Keynote user.
Add this method now:
func gameOver() {
    isGameOver = true

    let gameOverTitle = SKSpriteNode(imageNamed: "game-over")
    gameOverTitle.position = CGPoint(x: 400, y: 300)
    gameOverTitle.setScale(2)
    gameOverTitle.alpha = 0

    let fadeIn = SKAction.fadeIn(withDuration: 0.3)
    let scaleDown = SKAction.scale(to: 1, duration: 0.3)
    let group = SKAction.group([fadeIn, scaleDown])

    gameOverTitle.run(group)
    gameOverTitle.zPosition = 900
    addChild(gameOverTitle)
}
Note: I’ve given it a zPosition of 900 so that it appears on top of everything else.
We need to call that method when we know the game is over, and we already have the perfect spot for it inside levelUp(). That method calls createTarget() if we’ve created fewer than 100 targets, but as soon as it hits 100 it will go into the else block – where we have the comment // game over!.
Find that comment and replace it with this:
DispatchQueue.main.asyncAfter(deadline: .now() + 2) {
    self.gameOver()
}
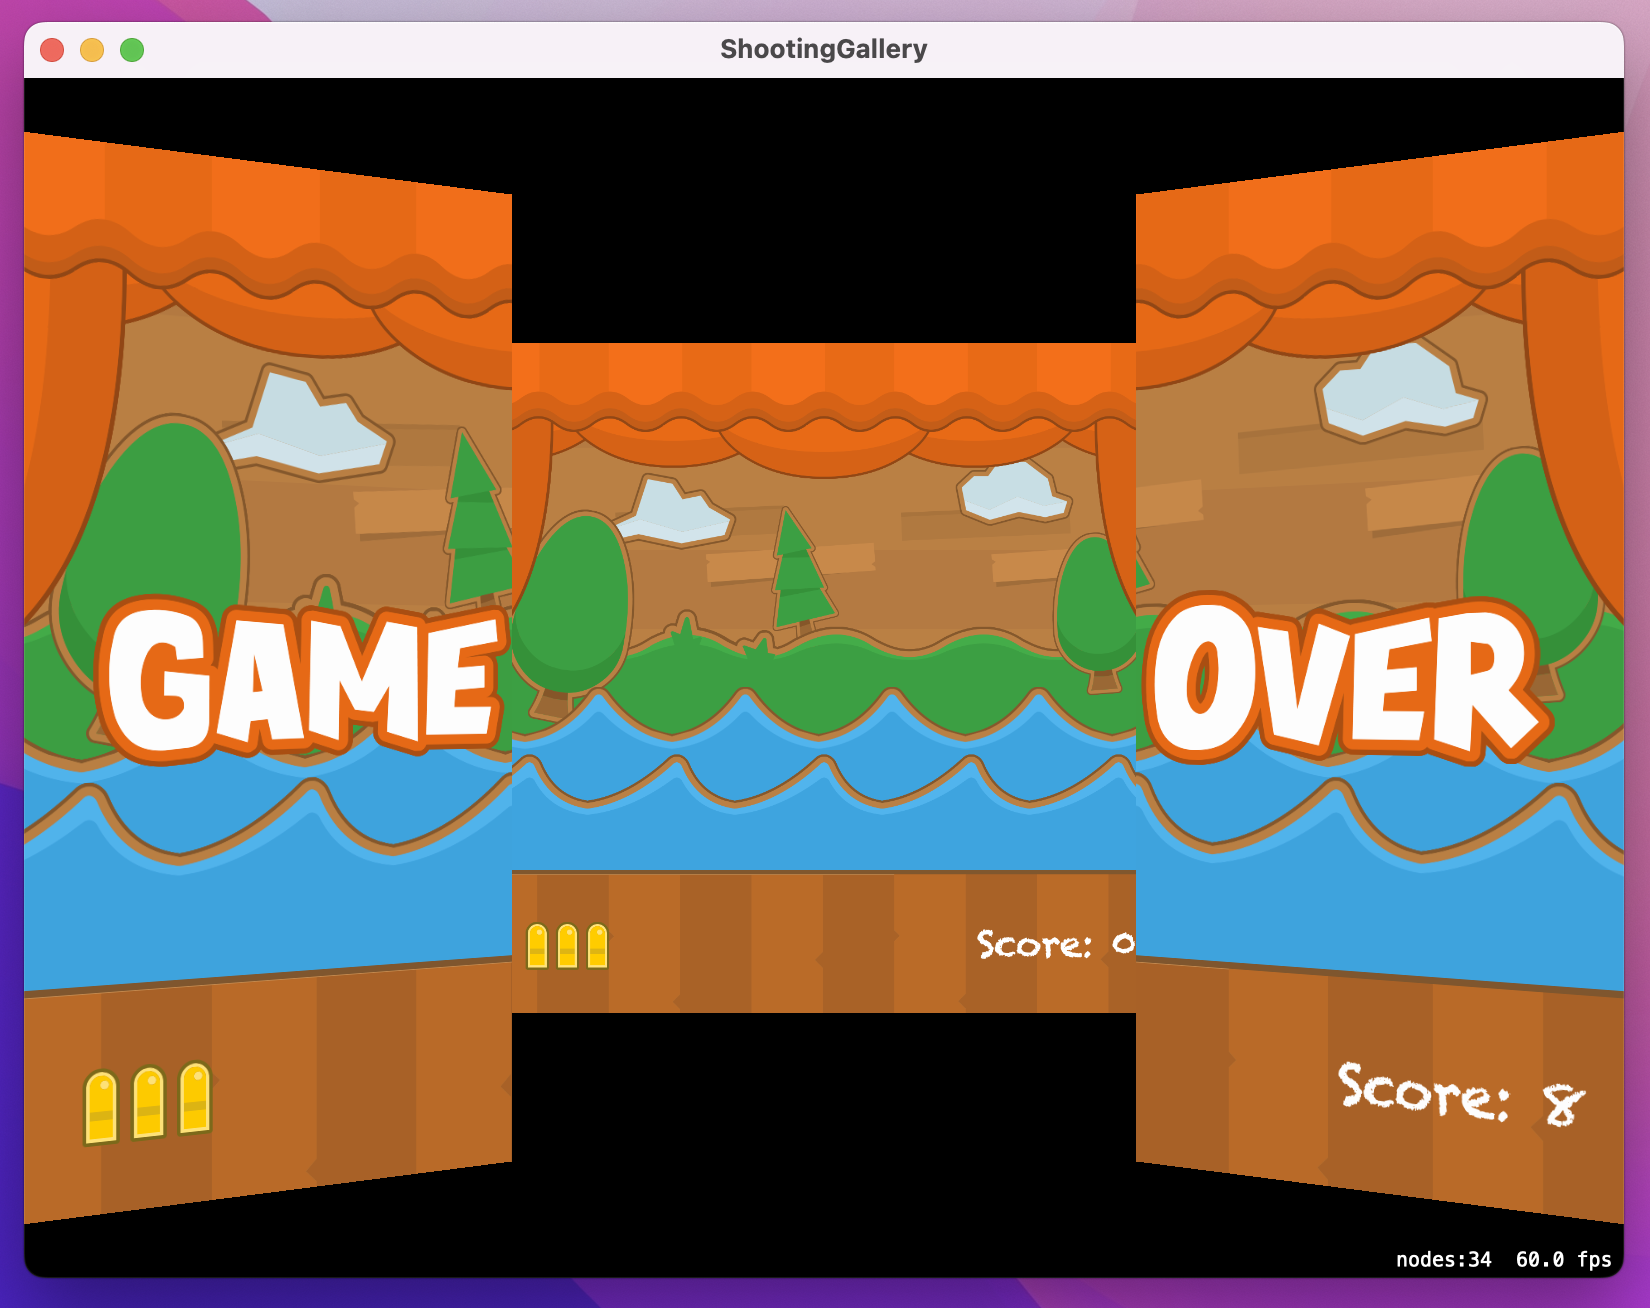
The last thing we’re going to do is let the player start a new game when their previous one finished. This needs to reset the score, the bullets, the targets, and so on – everything, really.
It turns out that we can do all that in just a few lines of code, because we can create a new instance of our game scene and present it. SpriteKit even gives us easy to use transition effects, so we can move from scene to scene in beautiful ways. For example, if you want your current scene to split in two then open up like a door while the new scene animates in, that’s a grand total of two lines of code.
Don’t believe me? Here’s how you create the transition:
let transition = SKTransition.doorway(withDuration: 1)And here’s how you activate it:
view?.presentScene(newGame, transition: transition)There are lots of these to choose from, such as crossFade(), push(), reveal(), and more – use code completion to explore!
In the meantime, add these final lines of code to the mouseDown() method, inside the isGameOver block where the click is currently ignored:
if let newGame = SKScene(fileNamed: "GameScene") {
    let transition = SKTransition.doorway(withDuration: 1)
    view?.presentScene(newGame, transition: transition)
}
That allows the player to start a new game by clicking their mouse when they see the game over message. That’s it – we’re done!
This game took a fair amount of work, but I think it’s pretty clear why – there are lots of graphics and effects to make the whole thing fit together cohesively, but the finished product looks and works like a real game.
At the same time, this project gave you the chance to learn some new things, not least the quite beautiful colorizing effect that’s built into SpriteKit, but also blend modes, repeating and reversing actions, SKNode subclasses, and more. All being well you’re starting to become a bit of a SpriteKit power user, which isn’t bad after just two projects!
To finish this game off, try adding a logo screen. Don’t worry about using “programmer art” – i.e., sketchy, half-baked Photoshop graphics – because it’s the code that matters.
You could also adjust the player’s score by different amounts depending on the level of the target. Things at the back are smaller, so you could award 5 points for them, 4 points for middle targets, and 3 points for targets at the front.
Finally, how about making some of the targets move up and down as well as across the screen. Perhaps make one in every five have a gentle up and down motion, making it extra-hard to shoot.
Copyright © 2023 Paul Hudson, hackingwithswift.com.
You should follow me on Twitter.