![]()
In this project we’re going to build a menu bar app - an app that spends its entire life in the top-right corner of the macOS screen. Lots of apps are designed like this, such as Dropbox, Tweetbot, and Evernote, so it’s another key skill to have under your belt, particularly when you realize that you can combine your menu bar app work with a regular app so that you can have both at the same time.
Along the way there are some important new SwiftUI skills to learn, such as how to create pulldown menus and how to handle moving list rows, copying to the clipboard, and even touching more on UserDefaults for things that @AppStorage can’t handle.
And what will the app do? Well, we’re going to tackle another problem that is common ever since COVID-19 allowed many more people to work from home: figuring out what time it is for your colleagues around the world. We’ll let users create a list of all the time zones they care about, then present them right in their macOS menu bar along with the current time there.
Let’s get started: go ahead and create a new macOS project in Xcode named TimeBuddy!
Before we start creating our menu bar application, the first step is to hide both our main window and dock icon. In fact, the only thing that will actually run when our program starts will be a small item in the menu bar, giving users the ability to bring up our time data on demand.
SwiftUI has a special scene type to handle these menu bar items, called MenuBarExtra. This needs to be given a title either as a plain string or as a button, but then it takes care of presenting it up there for us. So, open TimeBuddyApp.swift and change the default WindowGroup code to this:
MenuBarExtra("Time Buddy", systemImage: "person.badge.clock.fill") {
    ContentView()
}
That tells SwiftUI we want ContentView to be placed into the menu bar, using that label as the button to show it. Using both title and icon here will automatically show the icon, but the title is still used for VoiceOver so it’s always worth adding.
Go ahead and run the app now – without a WindowGroup in place no initial window will be shown, but you should see our little icon get added to your menu bar. Even better, if you click it you’ll see a menu appear showing the default views from the ContentView template – SwiftUI has transformed our layout into a menu!
Sometimes a menu will be exactly what you want, but here we want our content presented in a window. So, add this modifier to MenuBarExtra to get that:
.menuBarExtraStyle(.window)Now you’ll see “Hello, world!” appear in a small window when the button is clicked – it will automatically be sized to match the views inside ContentView.
This is good, but we still get an icon in the dock like other apps, despite no actual window appearing. Really we don’t want the dock icon to be visible, so that our program exists only in the menu bar.
To get that behavior we need to edit our target’s settings again:
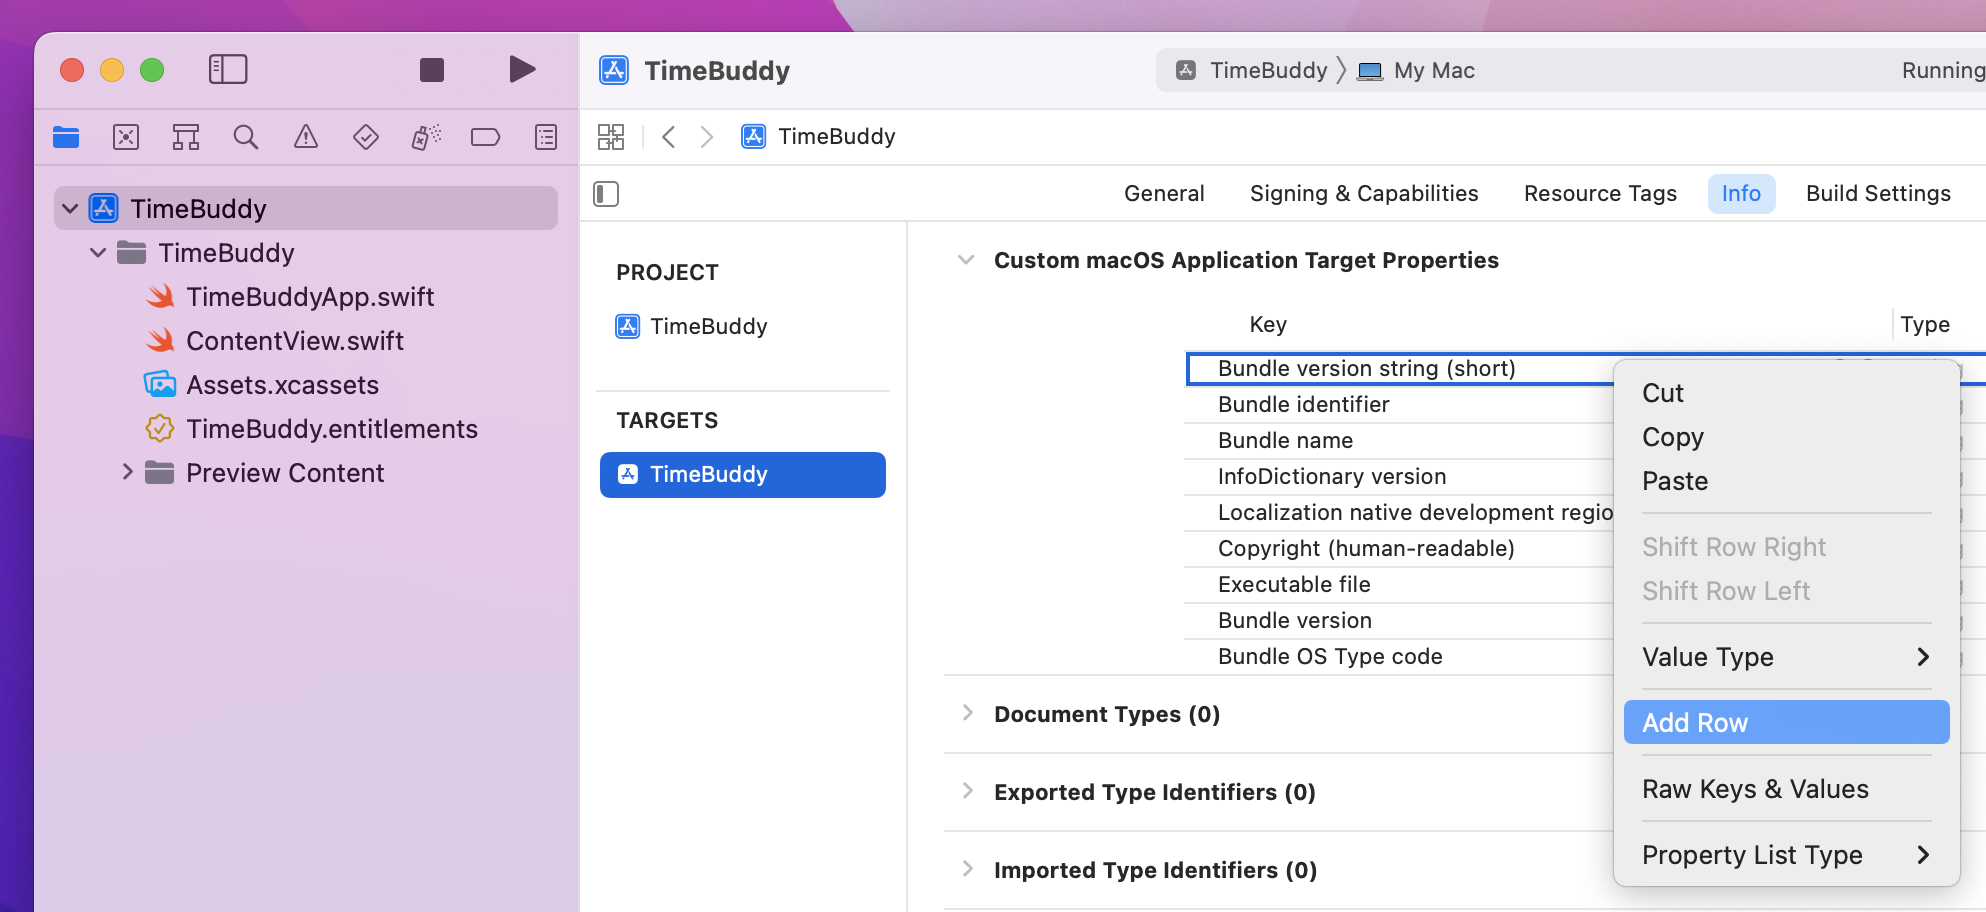
Once you’re there, right-click on any one of the existing rows, such as “Bundle name”, then select Add Row from the menu that appears. You’ll see a whole bunch of possible key names, but I need you to select one in particular: “Application is agent (UIElement)” – that’s the one that controls whether our app should exist only in the menu bar. When you add it, you should see the default value of “NO” appear to the right, but I’d like you to change that to “YES” because we do want a menu bar-only app.
And now when you run the app you’ll see nothing outside of the menu bar. No window, and no dock icon either. Our program is running, it’s just almost completely invisible.
Now that we have the menu item all configured, we can move over to ContentView to build the main part of the app. This will show a list of all possible time zones around the world, and as the user adds them we’ll show their selected zones in a list above. Once that’s done we’ll add some extra functionality so they can move and delete time zones, and most importantly also add buttons so they can copy a time zone to their clipboard.
First, we need a place where we can store all the time zones the user wants to track. Apple actually provides us with a dedicated TimeZone type, but it’s not the kind of thing you’d want to store. Instead, it’s better to store the unique identifier for each time zone, which is a string like this: Europe/London. This doesn’t mention anything about daylight savings time or similar, and doesn’t need to – if you know that identifier and the current date, macOS can figure out the rest for you.
So, instead we’re going to store our data as an array of time zone identifiers. Add this property to ContentView now:
@State private var timeZones = [String]()So, internally we store an array of strings, but in order to display times on the screen we need to convert one time zone string into an actual TimeZone instance and ask macOS what the time is there. This is best wrapped up in a single method so our SwiftUI layouts stay nice and clean, so add this method to ContentView:
func timeData(for zoneName: String) -> String {
    let dateFormatter = DateFormatter()
    dateFormatter.timeStyle = .short
    dateFormatter.timeZone = TimeZone(identifier: zoneName) ?? .current
    return "\(zoneName): \(dateFormatter.string(from: .now))"
}
With that in place we can already assemble the first part of our user interface: if the array is empty we’ll show a prompt for the user to add their first time zone, otherwise we’ll show a list of the time zones they already added. These time zones are always unique because there’s no point having exactly the same time zone twice, so we can use \.self for the identifier.
Replace the default “Hello, world!” code with this:
VStack {
    if timeZones.isEmpty {
        Text("Please add your first time zone below.")
            .frame(maxHeight: .infinity)
    } else {
        List {
            ForEach(timeZones, id: \.self) { timeZone in
                let time = timeData(for: timeZone)
                Text(time)
            }
        }
    }
}
.padding()
Before we move on, I want to pick out three pieces of that code:
VStack because we need to add some more UI below – a way for the user to select and add a new time zone from the list of all time zones.ForEach inside the List rather than sending the array directly into the List – more on that later!time constant is helpful, because later on we’ll need to copy that to the clipboard so we need it a second time.Our next task is to let the user select and add new time zones, which means adding a new property to store the item that is currently selected (the one the user is about to add), plus a new SwiftUI view called Picker. Pickers come in a range of styles based on the effect you want – you might have a segmented control, a bunch of radio buttons, and more – but they always function in the same way: there’s a long list of options, and the user may choose only one.
We can start by adding a new property to store the new time zone they are trying to add. I’ll make this GMT to begin with, which is a sensible middle ground for the default selection. Add this to ContentView:
@State private var newTimeZone = "GMT"And now we’re going to add a Picker view to let the user add a new time zone to their list. This will have its selection bound to $newTimeZone so it updates the property automatically, and we can fill it full of time zones using the standard ForEach we’ve used elsewhere.
In terms of which values we’re going to add, this is another thing macOS does for us: we can read TimeZone.knownTimeZoneIdentifiers to get all time zone identifiers in one lump.
Add this into your VStack, below the previous code:
HStack {
    Picker("Add Time Zone", selection: $newTimeZone) {
        ForEach(TimeZone.knownTimeZoneIdentifiers, id: \.self) { timeZone in
            Text(timeZone)
        }
    }

    Button("Add") {
        if timeZones.contains(newTimeZone) == false {
            timeZones.append(newTimeZone)
        }
    }
}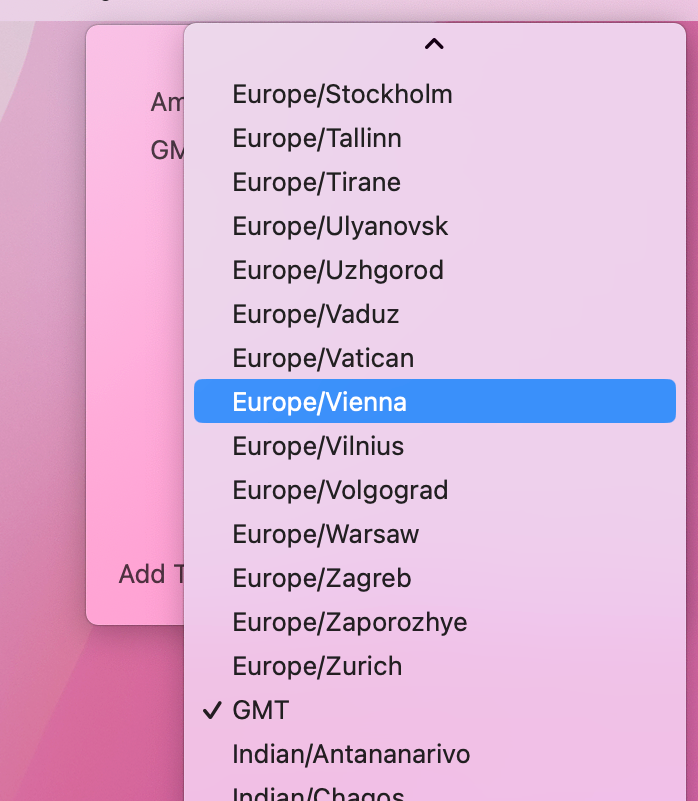
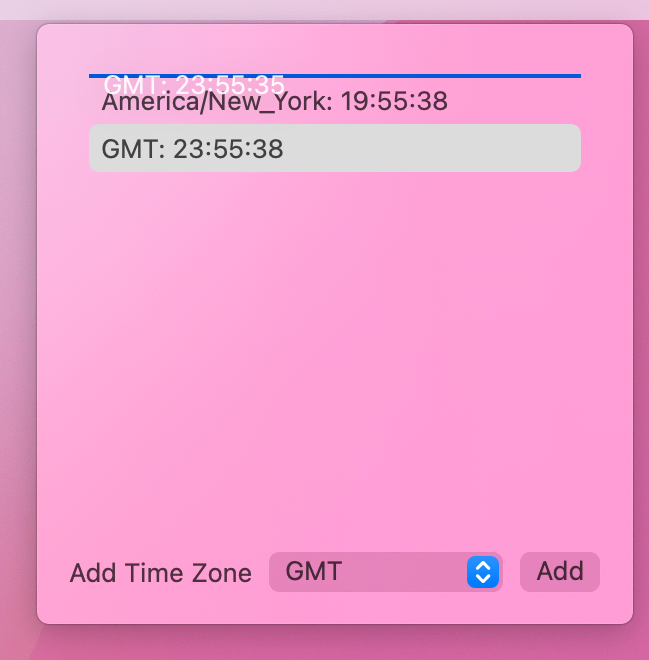
That’s already enough code to make this user interface start working – you can browse through the full set of time zones, then add any you want to the list above.
The next step is to have our user’s selections saved and loaded correctly, so they can start to build a custom list of time zones they care about.
Previously we used @AppStorage to store user data, and that’s a great choice when you want to store important user settings like this that should be available as soon as your app launches. Here, though, it won’t actually work, because @AppStorage isn’t capable of working with string arrays. That’s okay, though – if we dig into the UserDefaults system that powers @AppStorage we can make it work in no time!
When working with UserDefaults, there are three things you need to know:
UserDefaults, but every app has a standard set called UserDefaults.standard. The other options are for times when you have more complex set ups, e.g. an app that has an extension and both need to share data.@AppStorage when we wrote code like @AppStorage("searchText"), but this means you need to be careful that your names are always the same.UserDefaults it might be saved instantly, but it might be saved after a short delay. This means if you save some data then immediately use Xcode to terminate and relaunch your app, you might find the data wasn’t actually saved. In practice this is almost never a problem, because most apps don’t suddenly die!With all that in mind, we’re going to add two methods to ContentView, one to load our data and one to save it. Both will use UserDefaults.standard, which is the shared pool of user settings for our app, and both will write to the key named “TimeZones”.
Add these two methods now:
func load() {
    timeZones = UserDefaults.standard.stringArray(forKey: "TimeZones") ?? []
}

func save() {
    UserDefaults.standard.set(timeZones, forKey: "TimeZones")
}
Notice the use of nil coalescing in load() – when the user first runs the app there will be no string array to load, so we need to provide a default empty array.
Although we’re using a string array here, you’ll find UserDefaults can write regular strings, integers, Booleans, and more; it’s what @AppStorage uses behind the scenes, and it’s common to drop down a level here when you hit something @AppStorage can’t do.
Loading our data happens only once, which is when ContentView is shown. This is as simple as adding an onAppear() modifier to our VStack, like this:
.onAppear(perform: load)Saving will happen in several places, but for now it’s only one: when the user presses the “Add” button. Modify the button to this:
Button("Add") {
    if timeZones.contains(newTimeZone) == false {
        timeZones.append(newTimeZone)
        save()
    }
}
At this point the app isn’t great, but it does at least work – we’re now able to add a bunch of time zones, see the times there, and have the whole thing loaded and saved. There’s still a lot we can do to make it great, though…
So far this has been straightforward enough, but to make this view much more useful I’d like to add the ability to move and delete time zones. Remember, ultimately this list will be shown in our status menu, so the order really matters here.
This starts with the need to track which list items the user has selected. This is exactly how we did it in project 5, using a set containing the same type as our list’s contents – add this to ContentView now:
@State private var selectedTimeZones = Set<String>()With that done, we can add support for deleting, which requires a few steps.
First, Swift’s array have a removeAll(where:) method that accepts a predicate function – a function that accepts one item from the array, and returns true if that item should be deleted. Deleting items in bulk like this is more efficient than removing them one at a time, and being able to pass our own function here lets us delete using any criteria we want.
For example, we could make deleteItems() remove all time zones that start with “Europe” like this:
func deleteItems() {
    withAnimation {
        timeZones.removeAll {
            $0.hasPrefix("Europe")
        }
    }

    save()
}
There you can see removeAll() being given a function that accepts a single piece of input from the array, $0, and returns true to remove all items that start with the string “Europe”.
There’s a second method I want to talk about, which is the contains() method of sets. You can give this one element and it will return true if the set contains it. For example, we could update our removeAll() call so that it removes any items that are contained in the selectedItemZones set:
func deleteItems() {
    withAnimation {
        timeZones.removeAll {
            selectedTimeZones.contains($0)
        }
    }

    save()
}
That’s neat, right? Well, we can actually take this a step further. Previously I showed you how we can pass view initializers directly into ForEach as long as the initializer is able to take one item from the ForEach array. This is what allows us to write short code like this:
ForEach(TimeZone.knownTimeZoneIdentifiers, id: \.self, content: Text.init)We can actually do something very similar here: removeAll() expects to be given a function that accepts a single string and returns true if the item should be deleted, and the contains() method of selectedTimeZones accepts a single string and returns true if the user wanted to delete it.
So, we can put these two together – we can literally pass selectedTimeZones.contains directly into removeAll(where:) to get exactly the same result in less code:
func deleteItems() {
    withAnimation {
        timeZones.removeAll(where: selectedTimeZones.contains)
    }

    save()
}
This technique is part of a wider approach called functional programming, and it comes really naturally in Swift. What we just built has a special name called a higher-order function – it’s any function that accepts another function as its parameter, or sends back a function as its return value.
That completes our deletion code, but I also want to tackle moving items. This uses a fairly uncommon data type called IndexSet, which is a bit like a specialized Set:
Anyway, when SwiftUI wants to move list rows it will hand us an IndexSet of item indices, along with a destination row where they should be moved to, and it’s our job to handle that moving. Well, I say it’s “our job”, but actually Swift’s arrays have a built-in method that does all the work for us, so we just need to pass those values on then call save()!
Add this method to ContentView now:
func moveItems(from source: IndexSet, to destination: Int) {
    timeZones.move(fromOffsets: source, toOffset: destination)
    save()
}
That completes all the logic, so now we need to attach our new functionality to SwiftUI in three places.
First, we need to bind our list’s selection to $selectedTimeZones like this:
List(selection: $selectedTimeZones) {Second, we need to call deleteItems() when Delete or Backspace is pressed for our list, which can be done by attaching SwiftUI's onDeleteCommand() modifier to the List view:
.onDeleteCommand(perform: deleteItems)And third we need to call moveItems() when the user drags some rows around. I mentioned earlier that we had separated the List and ForEach intentionally, and now you’ll see why: because lists can contain both static and dynamic data, the modifier to attach row moving can be applied only to ForEach, because by its nature it involves dynamic content.
So, attach this new onMove() modifier to the ForEach for our list rows:
.onMove(perform: moveItems)And now the main part of our SwiftUI code is done – you can now add all the time zones you want, delete any when you change your mind, and reorder them to your heart’s content.
It’s still not finished, though: the window changes size as we add our first time zone, we still have no way of getting an added time zone back out of the app, our times don’t actually update unless you change the view state somehow, and most pressingly of all there’s no way to quit!
To get this app finished we need to fix those final four little annoyances, starting with an important one: there’s no way to quit the app! Normally this is provided through the File menu, but as we’re a menu bar app that option is no longer available.
We can terminate our app in just one of code, but I think it’s best wrapped up in a method call in case you choose to add more functionality later on. Add this to ContentView now:
func quit() {
    NSApp.terminate(nil)
}
We need to add a button to trigger that somewhere in our UI, but it shouldn’t be too prominent. Having lots of push buttons in one screen looks unpleasant, so instead we’ll give this a borderless style and a secondary foreground color – that makes it the same color as the default text (black in light mode or white in dark mode), but adds a small amount of transparency so that it inherits a little of the background color.
If we place this at the top of our list, it will keep it nicely separate from the picker and button we’re using to add new time zones. So, add this to the top of the VStack, directly before the if timeZones.isEmpty { condition:
HStack {
    Spacer()
    Button("Quit", systemImage: "xmark.circle.fill", action: quit)
        .foregroundStyle(.secondary)
}
.buttonStyle(.plain)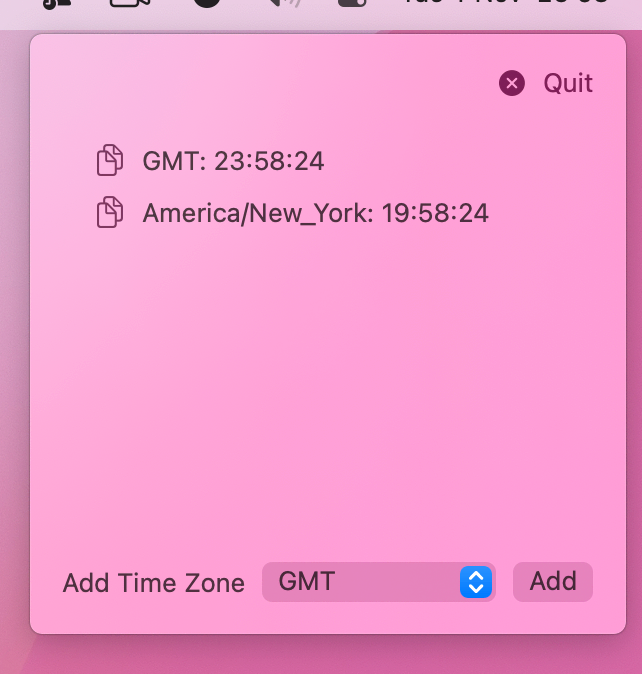
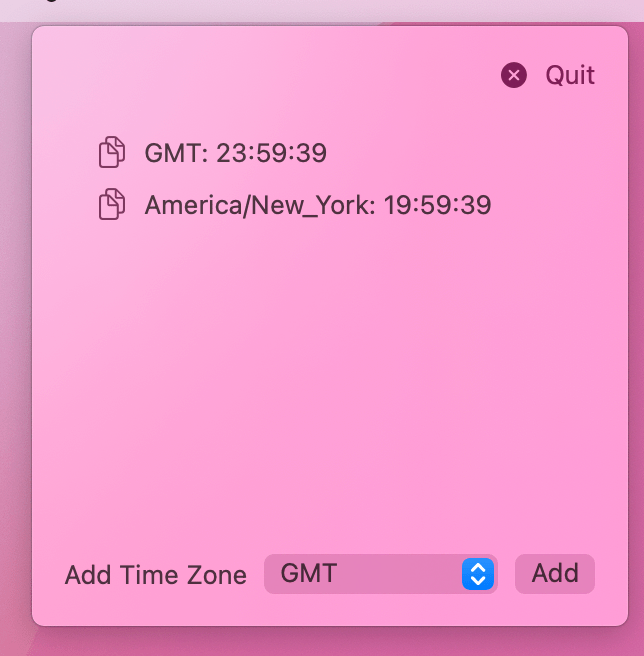
That’s one problem solved already, but here’s another one: the window keeps changing size as we add time zones, when really it ought to stay fixed to some value that works well.
This is a one-liner – just add this modifier to the VStack, below onAppear():
.frame(height: 300)On to problem number three: we need a way for the user to copy a time zone out of our app. The easiest thing to do here is to add a borderless button next to each of our times, which when clicked writes the selected time to the clipboard. This is done in a slightly odd way because the clipboard is actually really powerful in macOS – you can copy any kind of data from anywhere and to anywhere, including files from one place to another, images from Photoshop to Illustrator, and more.
So, when we write a string to the clipboard, we also get to tell the clipboard what kind of data it is – is it some image data, is it a sound, is it a file? In this case we’re writing a string, and it’s actually just a plain old string that someone might want to paste into an email, so we’ll use the .string type.
Working with the clipboard is done with a specific class called NSPasteboard, and like UserDefaults it provides a pre-made instance that is preconfigured ready to use. In this instance it means the clipboard will automatically sync using the Universal Clipboard, meaning that the string we add will also appear on the user’s iOS devices.
So, replace the current Text(time) with this:
HStack {
    Button("Copy", systemImage: "doc.on.doc") {
        NSPasteboard.general.clearContents()
        NSPasteboard.general.setString(time, forType: .string)
    }
    .buttonStyle(.borderless)
    .labelStyle(.iconOnly)

    Text(time)
}
Tip: We need to call clearContents() before writing our own data. This is important, and without it the call to setString() will fail.
That works, and I like that it’s nice and clear to users. However, macOS provides an alternative that you might want to consider: we can attach a double-click action to our list, so that users can click once to select rows, or double-click to do something else – in our case, copy the time to the clipboard.
This is done by attaching a context menu to the list, which sounds counterintuitive but it works because alongside the context menu we can also provide a primary action – code to run when the double-click happens, which works even if we don’t provide a context menu.
The primary action we’re going to use will copy text to the clipboard, but we need to do it in a precise way: we’ll be handled the set of selected time zone strings from our List, so we need to convert each one to a formatted time string by passing it through the timeData() method, then sorted the results into an array, and finally join the array into a string with each time zone on its own line.
Add this modifier to the List now:
.contextMenu(forSelectionType: String.self, menu: { _ in }) { timeZones in
    NSPasteboard.general.clearContents()

    let timeData = timeZones.map(timeData).sorted().joined(separator: "\n")
    NSPasteboard.general.setString(timeData, forType: .string)
}
The last problem is a tricksy one: the times we show for each time zone only change when something in our UI changes, for example if you select a list row or adjust the picker to add a new time zone.
This happens because SwiftUI won’t keep reinvading the body property of our view when the time changes. It has no idea that time actually matters to us, so instead it only reinvokes body when one of our @State properties change.
To fix this we’re going to tell SwiftUI that our app state has changed even when really it hasn’t. This will trigger a body reload, but it’s important we do it carefully: we don’t want SwiftUI to think that our list has changed when it hasn’t, because that would cause any selection data to be lost.
First, add a new property that will identify our current app state uniquely:
@State private var id = UUID()Second, we need to use that property somewhere in our view, so SwiftUI knows it needs to reload the view every time id changes. Where we use it matters, because again if we use it in the wrong place we’ll lose our list selection because SwiftUI will think the list changed.
So, we’re going to use it in an innocuous place – add this modifier to the “Add” button:
.id(id)That’s enough to tell SwiftUI the button has changed, which in turn means it will reload our entire view, but it doesn’t have any effect on the rest of our project.
Third, we’re going to ask macOS to trigger a timer that fires every second, which we’ll use to adjust the id property so SwiftUI reloads our body property. There are a few ways of making timers, but here’ll take the easiest approach: we’ll tell the timer to fire to on the main run loop (where our UI work takes place) in all the common modes, which means it will work alongside the rest of our app.
Add this property to ContentView now:
var timer = Timer.publish(every: 1, on: .main, in: .common).autoconnect()Using autoconnect() there means we want the timer to start firing immediately.
To make SwiftUI watch for the timer firing we need to add a new modifier called onReceive(). This needs to be told what it should watching, which in our case is the timer we just created, and it also needs to provided with a function to run when the timer fires. This function will be given the new time from the timer, but we can ignore that because all we need to do is give id a new random value – that’s enough to trigger our body being reloaded.
So, add this to the VStack now:
.onReceive(timer) { _ in
    id = UUID()
}
That’s enough to solve our problem, and if you run the app again you’ll see the times in our list are now staying in sync with the actual time. However, we can do slightly better: if the main window for our app (that’s ContentView) isn’t currently visible, we can ignore the timer firing. If you think about it, most of the time our app is sitting quietly in the background because the user is working with the rest of the programs on their Mac, so why should we be updating our UI when it isn’t actually visible?
The answer is: we shouldn’t! So, change your onReceive() code this:
.onReceive(timer) { _ in
    if NSApp.keyWindow?.isVisible == true {
        id = UUID()
    }
}
And now we’re telling SwiftUI to adjust id (and thus reload body) only if the timer fires when our view is actually onscreen – it’s a tiny change, but it stops our app from constantly using up small amounts of CPU time while it runs in the background.
In this project you learned how to build another completely different form of macOS project, the menu bar app. We stripped the whole thing back here so that our app only ran in the menu bar, but it’s also common to have a window and a status bar so the user has quick access to both.
Of course, along the way you learned a bunch of new skills, including Picker, onMove(), UserDefaults, DateFormatter, TimeZone, quitting the app, higher-order functions, and more.
Whether you want to spend some time tackling the challenges below or perhaps tackle your own menu bar apps, I hope you found this project useful!
If you’d like to try to taking this project further, here are some suggestions:
List, allowing users to delete specific time zones using their mouse.Copyright © 2023 Paul Hudson, hackingwithswift.com.
You should follow me on Twitter.